Please put your pickup/wiring discussions in the Electronics section; and put discussions about repair issues, including fixing errors in new instruments, in the Repairs section.
I've had a couple of things done on my first archtop build for a few months. Finally getting around to making a build thread to document it all. Top is Engleman and back and sides will be black walnut. Three piece maple neck with walnut headstock overlay planned.
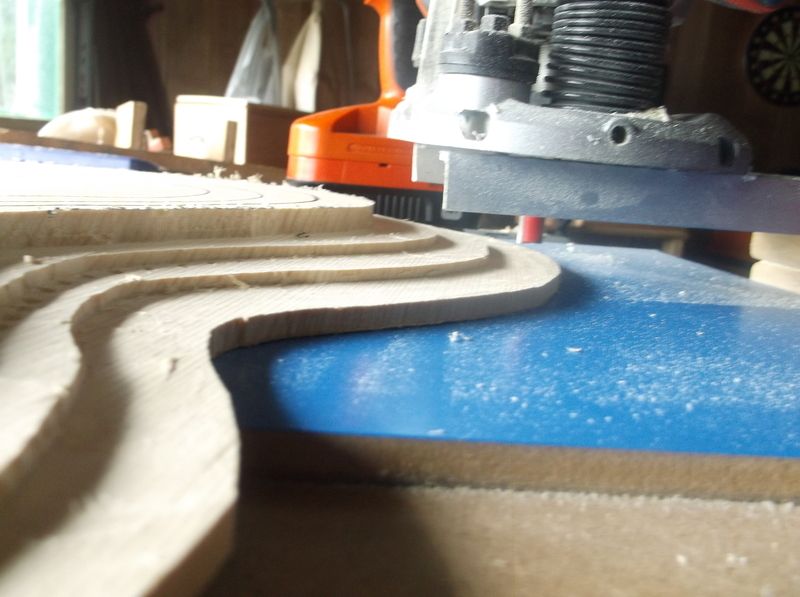
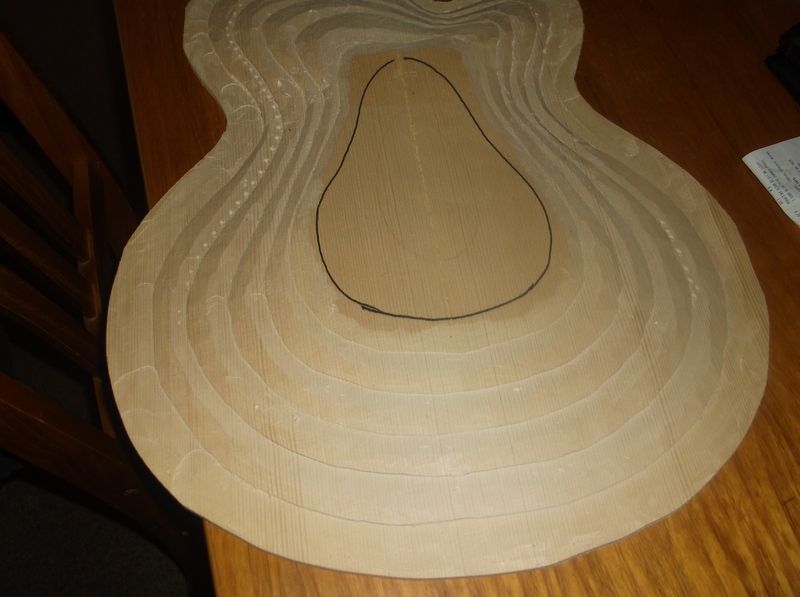
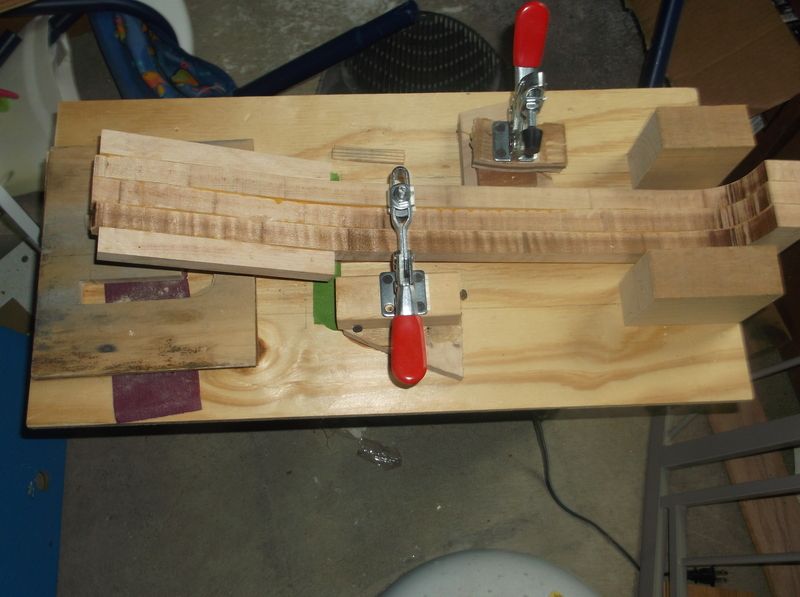
Here is the shortcut setup for the top and back carves. So far I only have the top started.
Getting there.
And after a little time with a sharp chisel cutting down the ledges.
Here is the back. Should get around to stepping it in a day or two.
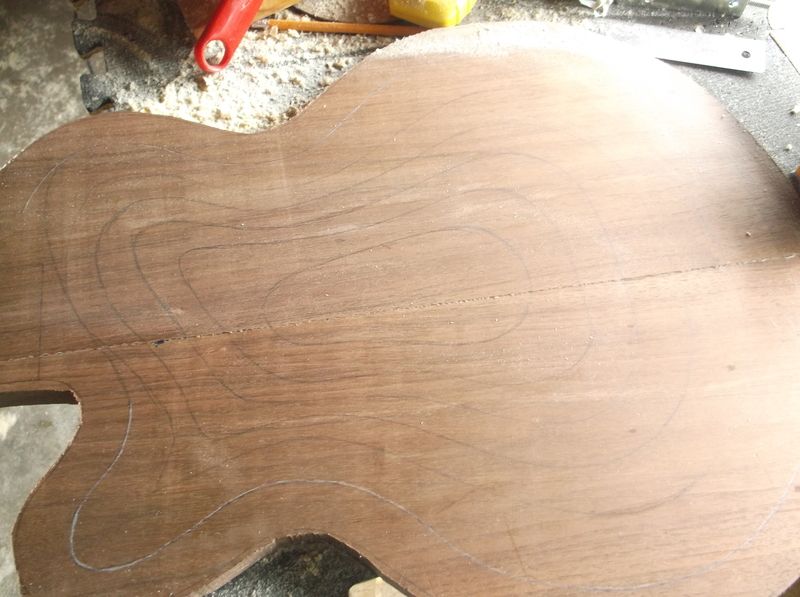
The center line on the walnut is not at the joining of the two halves unfortunately. Just didn't work out with the wood I had.
To be honest I can't remember whether I bought black or white binding, it's been so long since I looked in the "goodie box" of guitar parts and supplies. I think I intended to do the opposite of what I saw in Benedetto's book, using black where he used white and vice versa. The main reason for that is that I thought I would just have a natural or honey blonde top finish and the black would be a nice contrasting color. I really wanted to use tortoise binding but couldn't find any that looked like I wanted.
Greg, I really liked the contrast between the plain or curly maple and the dark walnut, especially the curly maple. So far I have only used wood bindings I made myself - no problem bending them and I could use regular Titebond glue.
The second walnut build I did (my Number 4) I used an ebony grain filler mixed using Elmers ProBond wood filler and distilled water. To avoid discoloring the front plate and binding I taped off the walnut, applied a light honey amber toner, then sealed with 3 coats of EnduroVar, then did the filler. It was a messy job to sand out, but it worked really well.
I guess the point is to consider whether you want the walnut grain filled or not. I like the look either way, though filling the grain with a dark filler enhanced the grain pattern and gave a flatter finished surface. I do not want to intrude into your design or intentions, just wanted to share some thoughts. I really like walnut for archtops even though the typical jazz guitar aficiaondo would expect to see maple.
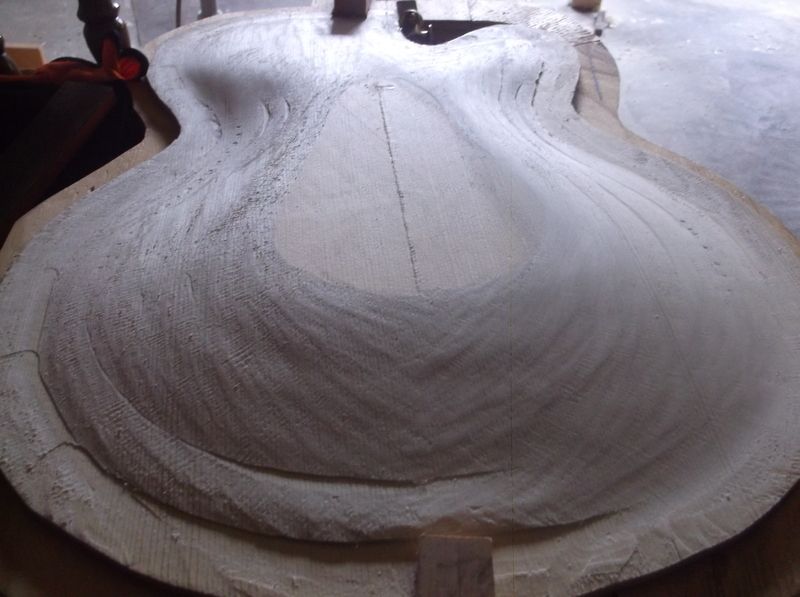
Did a little more carving the past couple of days and it's starting to look like a guitar-shaped object. I may be further along if I could find my smaller finger plane . Or if I had a nice sharp gouge to get into some of the curvy parts.
The neck is ready to cut the tenon on but I will have to have a practice run on something cheap first.
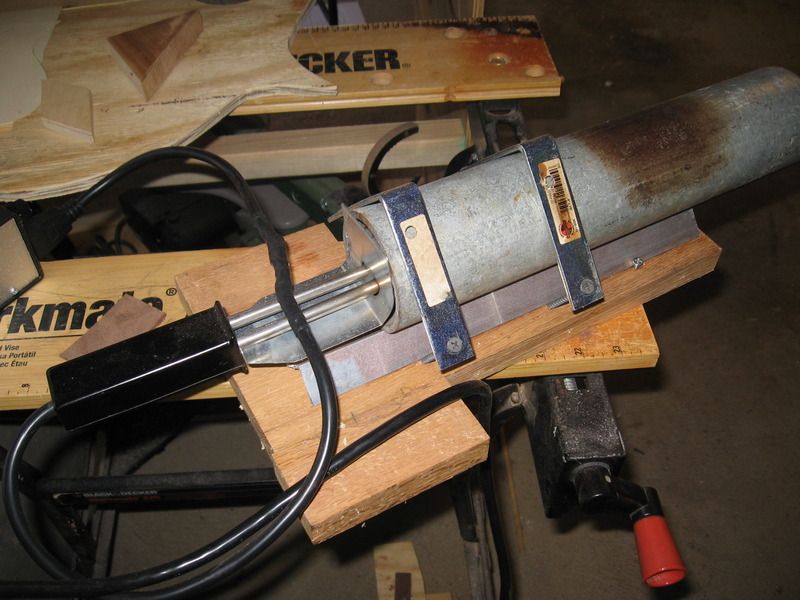
Here are the sides. Still a bit too thick at this point, I'll have to glue or double stick tape them to a board and send it through the planer to thin them down. The end of one is starting to split but I have longer pieces than I need so it should be okay.
Greg,
Rug tape from Walmart works great - I just use a piece at each end and live with the slight "snipe". Slip a knife between the rug tape and side and it will release cleanly.
Superglue the split now, before doing any more planing or sanding, to keep the split from running down the grain. Superglue is your friend when planing or bending!
Thanks for the tips Mike. I've got some of that rug/carpet tape, and boy howdy does it hold well . I'll glue the side split tomorrow.
I have to say, the carving process on the spruce is a nice, therapeutic thing to do. I'm learning about the sharpening process too, but very slowly. That just seems to be one of those things you'll probably only "get" with experience.
BTW, what is your recommendation for side thickness? I think they stand at 3/32" now; the thinnest the planer would take them.
Yep, carving the spruce is great meditation. I really like the sound of the plane "ringing" from the plate.
OTOH, carving walnut or maple back plates is anger management therapy.
You are pretty close on your sides! I never trusted my Dewalt planer to go that low without a backing board.
3/32" is" about 0.094". I target 0.077" off the planer and that leaves a little bit for sanding or scraping.
You can be thinner at the cutaway bend, maybe 0.065" or so.
BTW, planing this way (sticking the thin side blanks to a carrier board) is the same way I prepare wood bindings. Essentially, my wood bindings are a side blank ripped down to 1/4" wide strips at the bandsaw. I gang the binding strips together on edge and clean up both edges to ensure they all end up the same width, then scrape them down to about 0.065" (for a 0.060" channel).
Mike Conner wrote:Yep, carving the spruce is great meditation. I really like the sound of the plane "ringing" from the plate.
OTOH, carving walnut or maple back plates is anger management therapy.
After a session of practice side bending, I dove right in this morning. The top ended up fine but of course the side with the cutaway didn't make it without a split. My plan is to let the side dry out and then sand it thinner in those spots it will need to bend more sharply in. Will it be okay to glue the split before I do that, and what glue should I use?
I would love to show a pic of the completed top carve but my camera went toes up so that ain't happening. I'll borrow one soon to keep the thread going.
Greg,
Is the split along the grain, or is it like a delamination where part of the thickness popped or pealed up?
Either way, the couple of times that has happened (walnut, cherry) after letting the wood dry out some I used some medium thick "maximum bond" superglue in the split, then clamped it back down with wax paper to prevent adhering the scrap wood caul. I make sure to buy some fresh superglue at Walmart and/or use a new unopened tube since superglue has a shelf life.
Since moisture helps set superglue I didn't worry too much about having the wood bone dry.
Worked for me, and when back to bending the superglue held up fine.
Sanding thinner would probably help a bit too. When bending walnut, I found it reduced the chance for splitting by doing the cutaway bend in two or three sessions and sneaking up on it rather than doing it all in one bend.
It split along the grain. This section, unlike the one I used for the top, has a little "figure" in it rather than straight grain. I'll used some CA glue and sand a little thinner and try again tomorrow.
I hate to beat a thing to death but hot hide glue will hold up better than most other glues if you can get the surfaces to mate well while drying, and hide glue shows less under finish than any other glue.
No matter what glue you make the repair with you are more likely to have a bit of difficulty with the separation than if it hadn't separated. In short, it is more difficult to bend a repaired section than to bend an undamaged section.
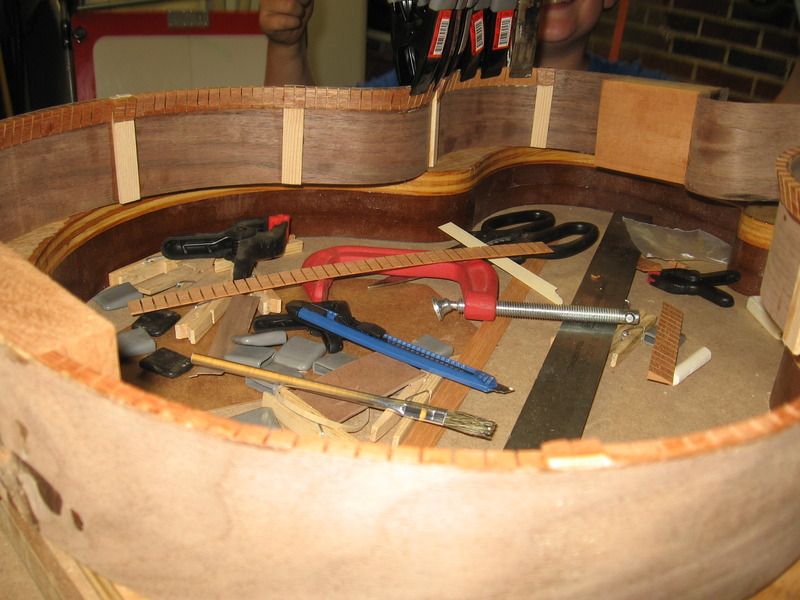
Fortunately, I cut the sides longer than needed, so I was able to flip it around and start from the other end. This morning I got a pot of water boiling on a hot plate nearby and kept dipping the cutaway section in there. Eventually it got pretty limber and I was able to clamp it in. Phew!
Now that I've done it, I know what would be ideal: a cutaway-shaped insert to clamp in the mold on top of it. Similar to the insert for the professional benders I've seen but just a little block. Oh well, live and learn. It's starting to come together.
Keep us posted, Greg. I loved the experience of making my walnut-backed archtop and I love the guitar. Honestly, I didn't mind planing the back to shape. I did it all with the plane and some templates--no pre-stepping. I did pre-drill the inside contour, however. Just try going diagonally across the grain in various directions until you find out how that particular section of board wants to be shaved. Do thin shavings and don't be in a hurry. I think you'll love it. Best of luck as you work forward!
Patrick