Pictures, test

If it's not a guitar or a bass guitar discussion, and it's got strings, put it here.
Arnt Rian
Posts: 216
Joined: Fri Jan 06, 2012 11:41 am
Location: Trondheim, Norway
Contact:

Pictures, test

Post by Arnt Rian »

I guess this means we will no longer upload pictures, but like them in, like so

Image

Well it works, anyways...
Arnt Rian
Posts: 216
Joined: Fri Jan 06, 2012 11:41 am
Location: Trondheim, Norway
Contact:

Re: Pictures, test

Post by Arnt Rian »

Ah, found the "upload" function, lets see how it works...
071.jpg
071.jpg (128.89 KiB) Viewed 32300 times
User avatar
Neal Carey
Posts: 98
Joined: Fri Jan 06, 2012 8:19 pm
Location: Woburn, Massachusetts
Contact:

Re: Pictures, test

Post by Neal Carey »

Always such beautiful pictures Arnt.
"Time you enjoy wasting, was not wasted." - John Lennon
User avatar
Jim McConkey
Posts: 1081
Joined: Thu Jan 05, 2012 4:00 pm
Location: Way north of Baltimore, MD

Re: Pictures, test

Post by Jim McConkey »

And I believe you post up to three images per messages now.
MIMForum Staff - Way North of Baltimore
Arnt Rian
Posts: 216
Joined: Fri Jan 06, 2012 11:41 am
Location: Trondheim, Norway
Contact:

Re: Pictures, test

Post by Arnt Rian »

Jim McConkey wrote:And I believe you post up to three images per messages now.

Lets check...

So, I bit the bullet and broke out the sister back...

Image


After going through the same procedure as with the first back, I got this

Image


The new and the old together. In the picture, the figure in the first one looks nicer, but they are actually quite similar

Image


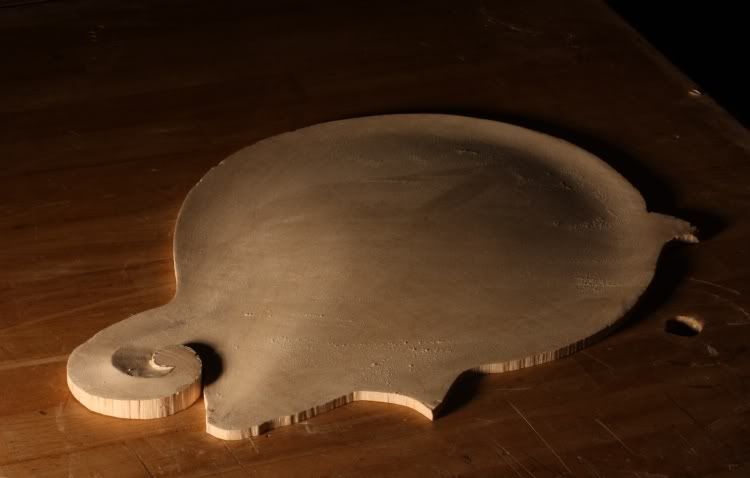
Scraped and sanded smooth

Image


Marking the limit of the inside curvature by tracing the edge of the linings onto the back plate

Image


Drilling out much of the waste with forstner bit in the drill press. There is a smooth headed bolt directly under the spindle, and the depth stop is set at a fixed distance from it. This leaves the remaining wood at a uniform thickness, and a good starting point for graduating

Image


Result

Image


After hogging most of the rest of the waste out with a gouge, a carving spoon is used for some coarse carving

Image


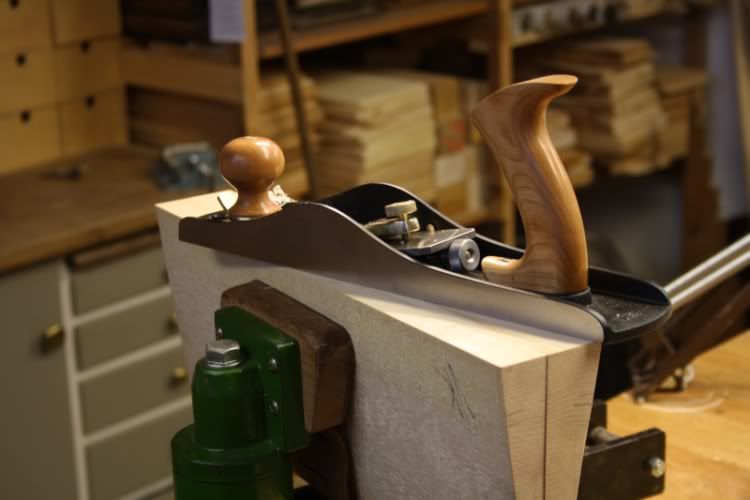
Next step is planing with small finger planes. My favourite ones are shop made

Image


When I get close to final dimensions, I use this simple thickness gauge to monitor my progress.

Image


Finally, everything is scraped and sanded smooth

Image


After repeating the procedure for the inside of the top plate, it is time to cut the f-holes. I use a template to trace the onto the outside of the top. A small hole is drilled in its largest eye, and a fine coping saw blade is inserted, before sawing just inside the lines. I try to keep the walls in the holes vertical, by sawing straight through a hole in a little workboard clamped to my regular bench.

Image


I find I get the cleanest results by paring the rest of the way with a violin maker’s knife. You have to pay attention to the grain direction, and the knife must be quite sharp, of course.

Image


This is one of the most enjoyable tasks in the whole building process for me, so here’s one more

Image


To shape the eyes, some sand paper wrapped around a pencil works fine

Image


Finished f-hole

Image


Recording the finished graduations, weight etc for future reference.

Image


Tracing the inside curvature onto the side of a quartered, split piece of red spruce.

Image


Planing and scraping most of the waste away, before final “chalk fitting”. When there is even transfer of chalk between the mating surfaces, it is ready to be glued in place. The chalk is sanded off with 220 grit sand paper

Image


Gluing the brace with hot hide glue, and multiple clamps for even pressure.

Image


Paring the braces down, before rounding them over and sanding everything smooth.

Image


Gluing the top to the rim in the go-bar deck

Image


Result

Image


The neck blank, squared up. Checking the optimal cut with the neck template...

Image


Cutting out the neck blank on the small band saw

Image


Cutting the truss rod slot on the table saw. I small shim is temporarily glued to the nut end, so the bottom of the slot will be at an equal distance from the back of the finished neck, which tapers in thickness.

Image


Gluing on peghead “ears” from the cut-offs

Image


I didn’t have any more 5 mm bar stock left, but rummaging my drawers I found I could make an ordinary tension rod by canibalizing this Stewmac “hot rod”. Luckily, one end has the correct threads for the Gibson style brass nuts that I use. I plan to cut it to the correct length and bend the other end at an angle, to anchor it to the heel end of the neck

Image
Arnt Rian
Posts: 216
Joined: Fri Jan 06, 2012 11:41 am
Location: Trondheim, Norway
Contact:

Re: Pictures, test

Post by Arnt Rian »

It seems there is no limit to how many you can link in, though (as usual, with these phpBB sites, I guess...?)
User avatar
Charlie Schultz
Site Admin
Posts: 1436
Joined: Fri Dec 23, 2011 6:53 pm
Location: St. Louis, MO

Re: Pictures, test

Post by Charlie Schultz »

I could not find any limits on the number you can link in. The number of attachments per post is currently 3. And thanks for the great photo sequence!
Simon Magennis
Posts: 471
Joined: Sat Jan 07, 2012 7:51 am
Location: Menorca. Spain.

Re: Pictures, test

Post by Simon Magennis »

Superb.
Markus Schmid
Posts: 31
Joined: Sat Jan 07, 2012 5:57 pm

Re: Pictures, test

Post by Markus Schmid »

That looks really good for just supposed to be a picture test...
I'm sure this would even be a very nice mandolin build thread about building a very nice mandolin! :lol:

As an off-topic (well, not really off topic... :roll: ) : Congrats to the team who made/makes it possible to continue with this beautiful project called MIMF. I am sure that in its new format it will be more popular than ever! 8-)
User avatar
Charlie Schultz
Site Admin
Posts: 1436
Joined: Fri Dec 23, 2011 6:53 pm
Location: St. Louis, MO

Re: Pictures, test

Post by Charlie Schultz »

Hi Markus and welcome!
Brian Dyskin
Posts: 17
Joined: Sat Jan 07, 2012 7:21 pm
Location: Melbourne, Australia
Contact:

Re: Pictures, test

Post by Brian Dyskin »

Beautiful work as usual Arnt. Although this was a thread to test photos, it shows the benefits of having "in progress" threads - now that the photos can be stored on another site like photobucket instead of taking up MIMF storage and bandwidth, I reckon it's worth considering an "In Progress" section.
User avatar
Charlie Schultz
Site Admin
Posts: 1436
Joined: Fri Dec 23, 2011 6:53 pm
Location: St. Louis, MO

Re: Pictures, test

Post by Charlie Schultz »

Hi Brian and welcome! Thanks for the input.
Markus Schmid
Posts: 31
Joined: Sat Jan 07, 2012 5:57 pm

Re: Pictures, test

Post by Markus Schmid »

Hi Charlie, thanks for welcoming me!
Charlie Schultz wrote:I could not find any limits on the number you can link in
As far as I know such a limit is not provided by phpBB.
User avatar
Charlie Schultz
Site Admin
Posts: 1436
Joined: Fri Dec 23, 2011 6:53 pm
Location: St. Louis, MO

Re: Pictures, test

Post by Charlie Schultz »

Thanks for the confirmation- I'm still coming up to speed with phpBB.
Kif Wood
Posts: 5
Joined: Sat Jan 07, 2012 7:39 pm

Re: Pictures, test

Post by Kif Wood »

Hi Charlie, and Arnt.

Beautiful pics, as usual, Arnt! This worries me as the bigger format will no doubt show up my lazy craftsmanship !!!!!

A suggestion Charlie; personally I find the 'post heading repeat' at the beginning of each 'reply' a bit confusing. What I really like about this forum is the lack of unneccessary visual distraction that seems endemic on 99% of other Fora. Maybe bring back the name of the 'postee' as before rather than in small letters under the 'repeat post header' ??

Also, maybe up the font size a wee bit. Good work!
Kif Wood
Posts: 5
Joined: Sat Jan 07, 2012 7:39 pm

Re: Pictures, test

Post by Kif Wood »

.......and when message is posted , go automatically to the post being viewed!
User avatar
Greg Robinson
Posts: 686
Joined: Fri Jan 06, 2012 1:54 pm
Location: Coburg North, Victoria, Australia

Re: Pictures, test

Post by Greg Robinson »

Kif, see Navigating the new forum software posted in the Frequently Asked Questions section, it details how to navigate to the most recent post.
MIMForum staff member - Melbourne, Australia
Veronica Merryfield
Posts: 33
Joined: Sat Jan 07, 2012 11:24 pm
Location: Grand Mira North, Cape Breton, Nova Scotia

Re: Pictures, test

Post by Veronica Merryfield »

Really nice picture sequence - repost when the real forum goes live.
Mark Lurvey
Posts: 21
Joined: Sun Jan 08, 2012 10:02 am

Re: Pictures, test

Post by Mark Lurvey »

Nice to finally see the new MIMF, good job.
The photos are working but some of them, number 2 in this discussion for instance, need to be scrolled up and down and left and right to see the whole photo. Is that true for everyone or just my old computer?
Mark ô¿ô
User avatar
Charlie Schultz
Site Admin
Posts: 1436
Joined: Fri Dec 23, 2011 6:53 pm
Location: St. Louis, MO

Re: Pictures, test

Post by Charlie Schultz »

Hi Mark and welcome! No, it's not you- we currently are using the generous default values for attached images (<= 256k, no dimension limits). That'll change before we go live.

Charlie
Post Reply

Return to “Other Stringed Instruments”