Page 1 of 2
new member, 2nd build
Posted: Thu Dec 27, 2012 11:57 pm
by Eric Baack
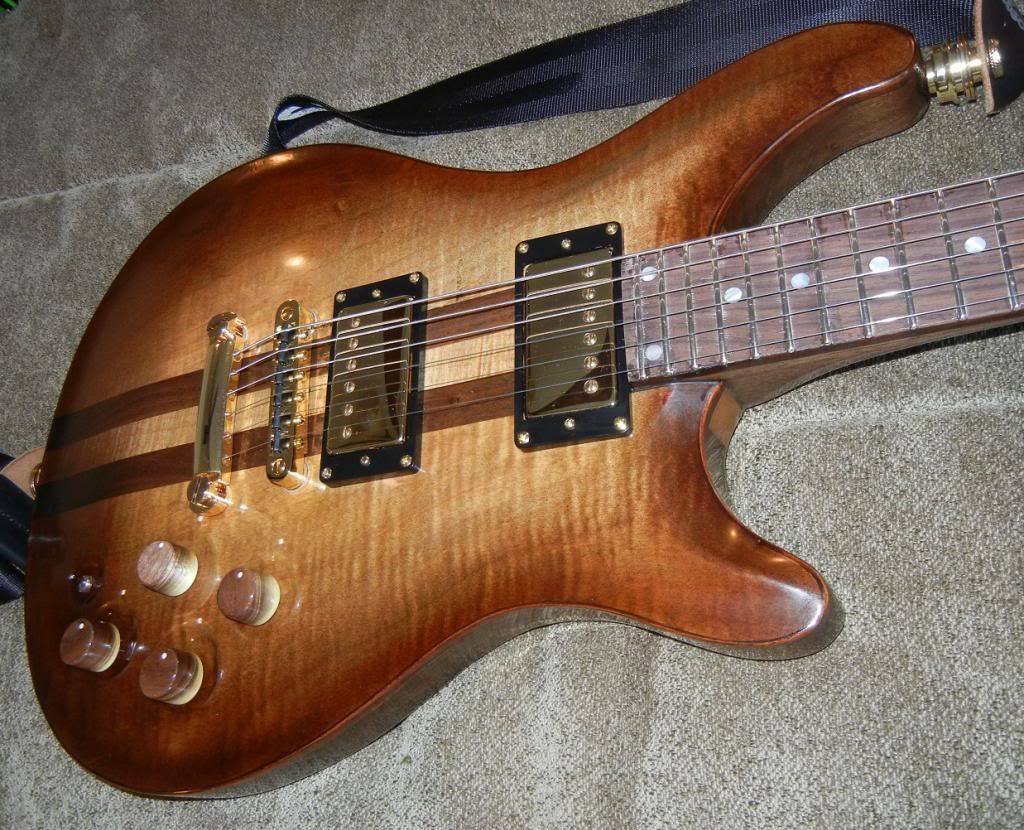
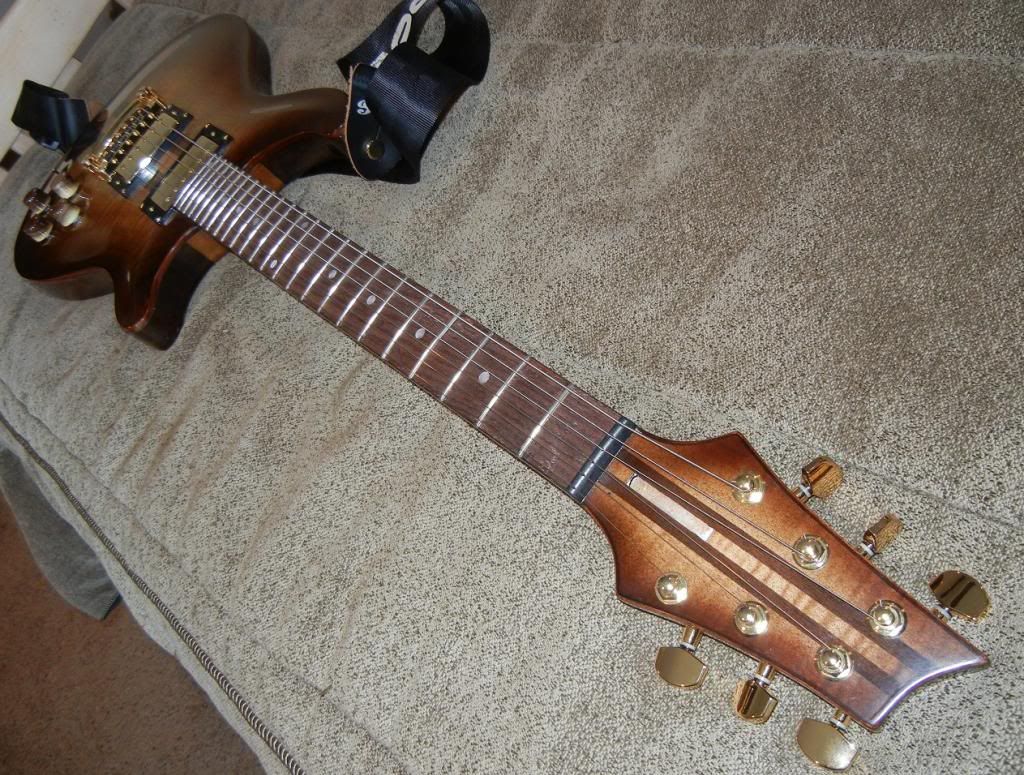
I'm just wrapping up my 2nd build. My first was a bolt in neck les paul style guitar that turned out alright, plays nice and sounds good, just not quite as good of a quality looking instrument as I'd have hoped. My 2nd build is turning out much better. there are a couple of small finish mistakes and a bit of patch work in areas but overall I think it turned out really nice. It sounds great, is very versitile with parallel/series switching on both pickups and a graphtech piezo bridge. Here are a couple of pictures and links to vids. Pickups are GFS crunchy pats, 3 push pull pots, 1 blend pot, 1 quick switch for mixing piezo and mags. I'm finishing up the truss rod cover and battery compartment cover now
A few pictures:
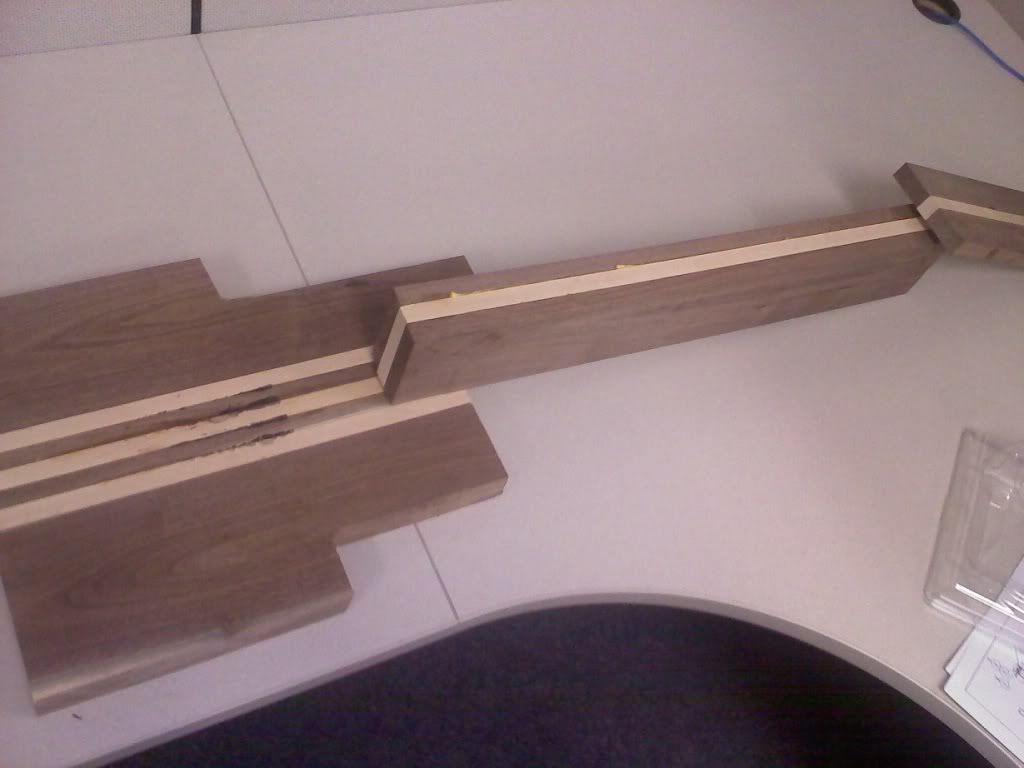
Lumber chunks:
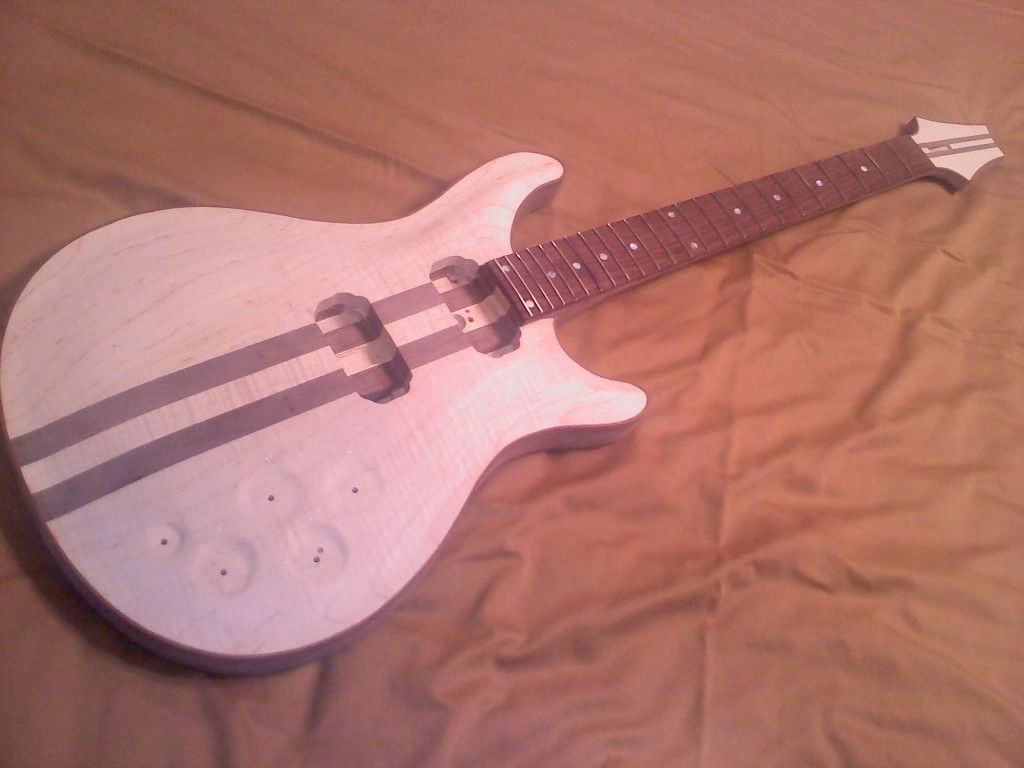
Assembled:
Finished!
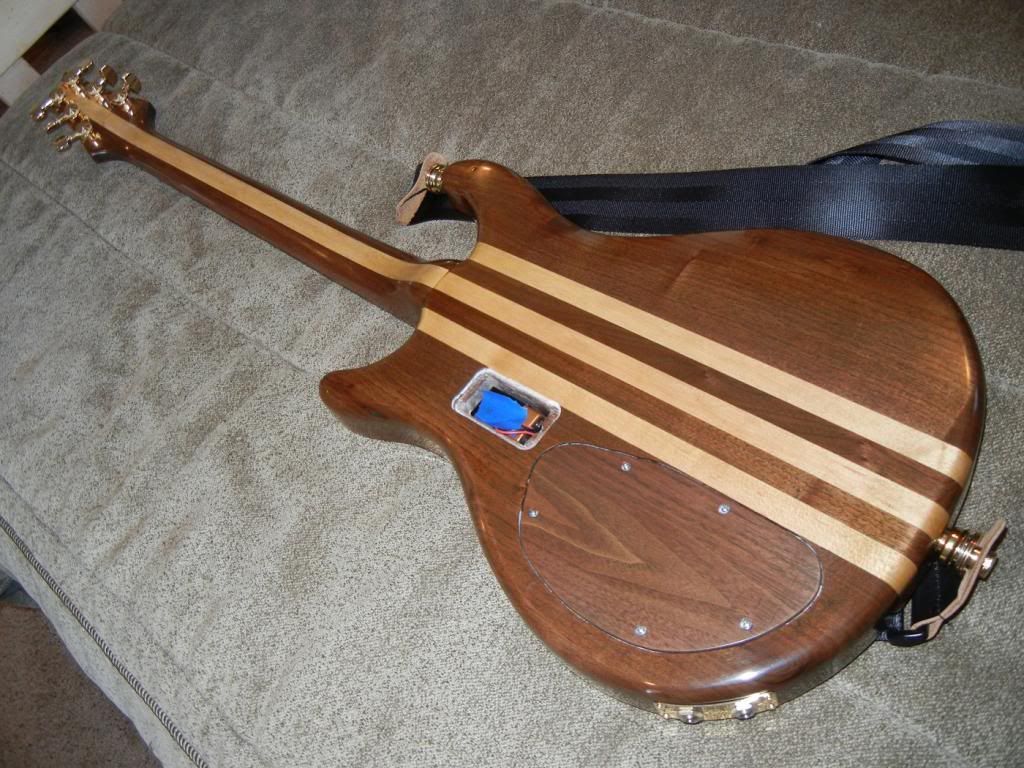
Build summary video:
http://youtu.be/qF8X9O7Nbek
Some sound clips:
http://youtu.be/gdc2vqmO-TU
http://youtu.be/CGT4-wDa3Fs
http://youtu.be/E16Z1u0Flg8
Re: new member, 2nd build
Posted: Thu Dec 27, 2012 11:58 pm
by Eric Baack
I'm looking forward to input from members here, I have in mind a baritone explorer neck through with a 27 or 28" scale and have someone possibly interested in having me build a guitar for them
Re: new member, 2nd build
Posted: Fri Dec 28, 2012 9:35 am
by Warren May
Nice work. The laminations for the neck, body and top line up very nicely, which can be hard to get right. Looks and sounds really good. I see in the video you swapped the aspen for maple cap. Good choice and you did a really great job on making that transition to the carved top. Did you have to alter the neck angle to make it work?
Re: new member, 2nd build
Posted: Fri Dec 28, 2012 9:51 am
by Eric Baack
Yeah, I went ahead and changed the neck angle a bit when I went to the maple cap. I glued in a shim and routered in a bit more angle. The aspen was going to get carved too but it was only 1/2" thick and the maple ended up at 5/8" thick at the bridge. I have the bridge about bottomed out with just a bit of relief in the neck and the action is about right. I have a couple of frets that will need some attention at the next string change as I have a few buzzing frets but it doesn't fret out in the wrong place anywhere. I think my neck angle is about 3 degrees. It balances nicely and doesn't feel too heavy as I play it for a little while.
Re: new member, 2nd build
Posted: Fri Dec 28, 2012 2:09 pm
by Rob Carty
How's this for feedback: Very nice!
Re: new member, 2nd build
Posted: Fri Dec 28, 2012 10:26 pm
by Charlie Schultz
Hi Muttstang,
Welcome to the forum. Please note that we require the use of real (first & last) names on this forum. Please PM me or one of the mods with your name and we'll fix up your registration, thanks.
Re: new member, 2nd build
Posted: Fri Dec 28, 2012 10:30 pm
by Eric Baack
pm sent
Re: new member, 2nd build
Posted: Fri Dec 28, 2012 10:38 pm
by steve flicker
hey i think you're guitar is great. real classy looking, i like the burst really brought out the maple. what did you use as finish?
Re: new member, 2nd build
Posted: Fri Dec 28, 2012 11:52 pm
by Eric Baack
I used transtint black walnut dye for the initial color, then sanded that back to pop the figure, then a mix of yellow and dark walnut to get an amber dye. Next I filled the pores with varathane dark walnut wood filler thinned down and layed down several coats of minwax clear polyurethane to get a nice level base. I sprayed on the burst with more of the dark walnut dye mixed with the minwax clear using my hvlp gun. I put a couple more coats of minwax clear so that I could sand it back to get a mechanical bond between the minwax poly and the spraymax 2k clear.
For those who haven't used spraymax before, it is an automotive grade 2 part clear in a can. there's an internal canister that you break to mix the 2 parts using a button on the bottom of the can. You have about 24 hours to use it after it is mixed before it gets too thick and hardens in the can.
Re: new member, 2nd build
Posted: Mon Dec 31, 2012 4:06 pm
by Eric Baack
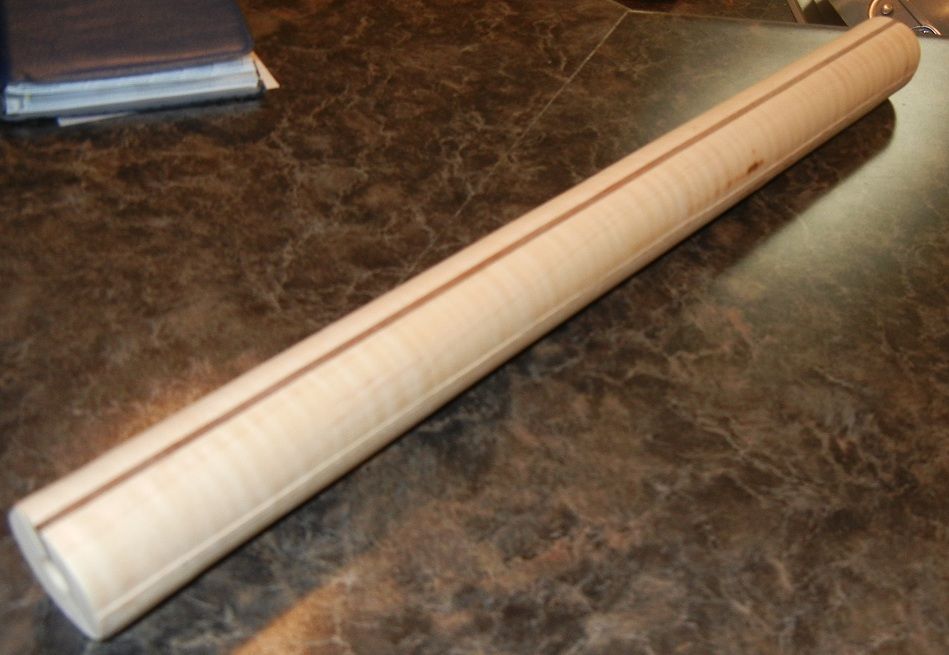
I think I'm going to redo the knobs though. they are a bit sloppy and have some wobble as they are turned. Plus I didn't put enough relief on them to cover the nuts on the pots when down. It looks tacky to me. The new ones will be using the maple instead with a bit of a fade "burst" down to the bottom and a walnut strip for the indicator. I have the blanks milled already waiting to be glued up and then I have to turn that into a dowel then shape the individual knobs.
Re: new member, 2nd build
Posted: Tue Jan 01, 2013 6:20 pm
by Eric Baack
Here's the wood glued up and rounded with a router for the new knobs. tiger maple with a walnut strip. needs to be rough turned in the lathe then shaped to individual knobs.
Re: new member, 2nd build
Posted: Thu Jan 03, 2013 3:16 pm
by Gordon Bellerose
Nice job! I think you made a good decision to replace the ash with the maple, and did a nice job on the laminations.
The burst really added to the look of the guitar.
Re: new member, 2nd build
Posted: Thu Jan 03, 2013 4:48 pm
by Bob Francis
Looks great Eric
Re: new member, 2nd build
Posted: Mon Jan 07, 2013 11:45 pm
by Eric Baack
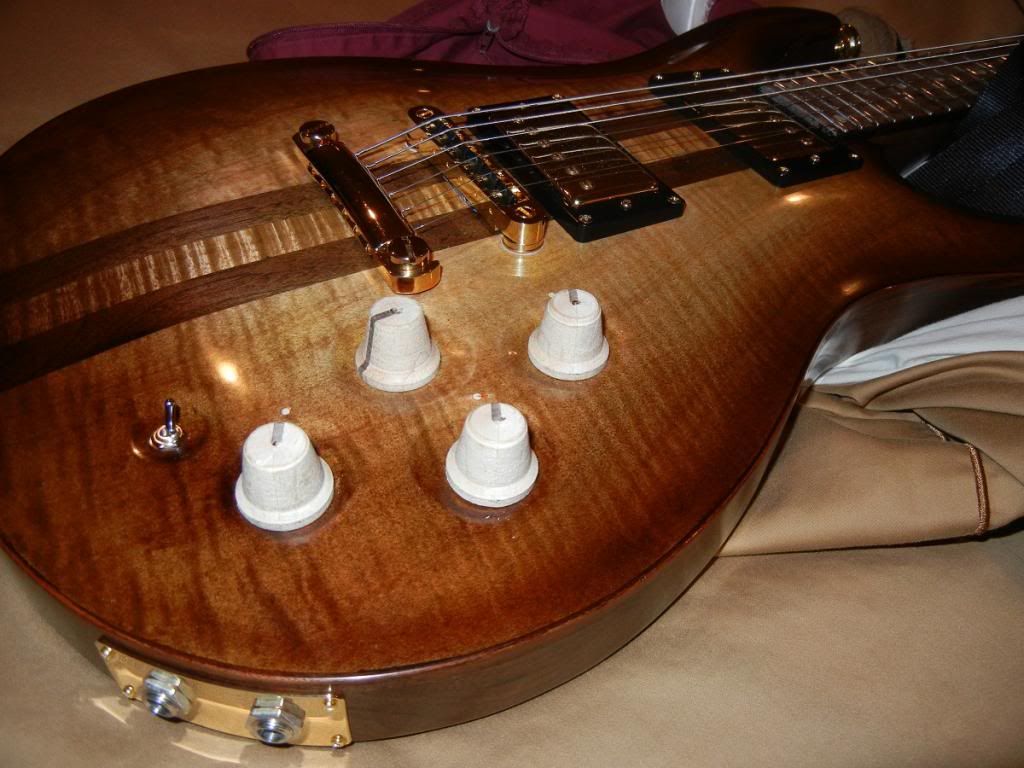
new knobs are shaped. going to make the inserts for them still and then it is to sanding and finishing
Re: new member, 2nd build
Posted: Tue Jan 08, 2013 12:16 pm
by Jason Rodgers
Nice work! Please explain how your electronics work: the switch turns on the piezo and then the blend pot mixes the piezo with the mags?
Re: new member, 2nd build
Posted: Tue Jan 08, 2013 12:45 pm
by Eric Baack
The switch mixes the piezo and mags, either piezo/both/mag. The blend pot mixes the mags turn it all the way one way and it will allow one mag pickup through. the center detent is both mags equal parts.
Push pull on the piezo volume routes the mags to the bypass circuit in case the battery on the piezo electronics dies.
Push pull on the mag volume and tone switches between serial and parallel on the buckers.
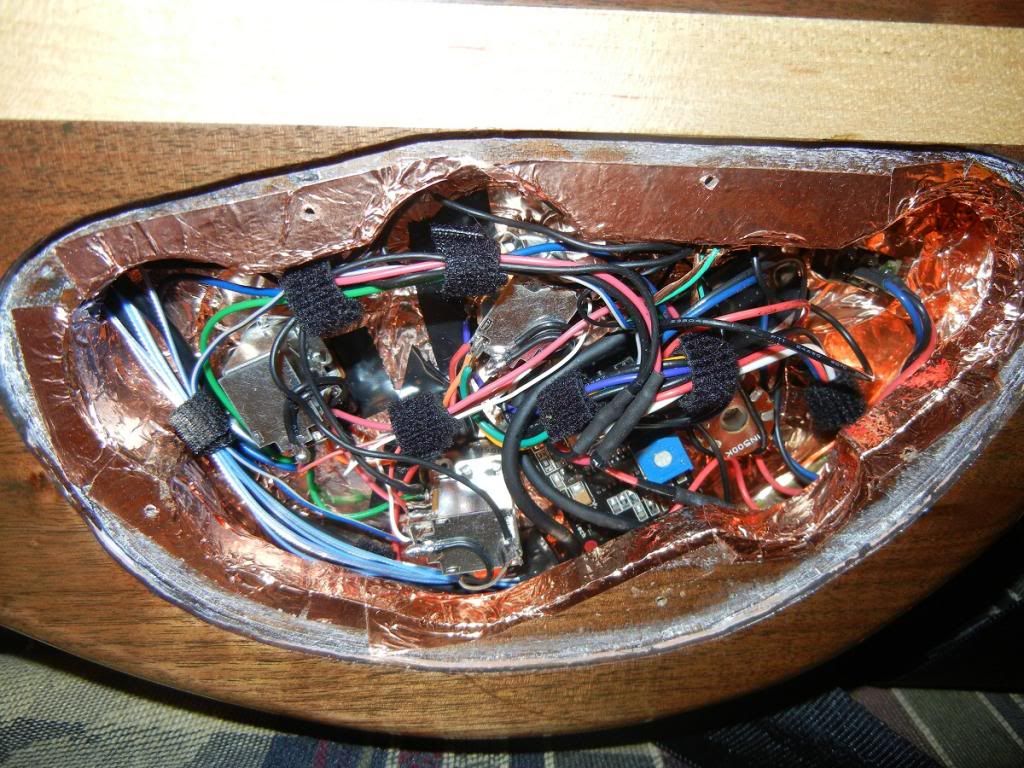
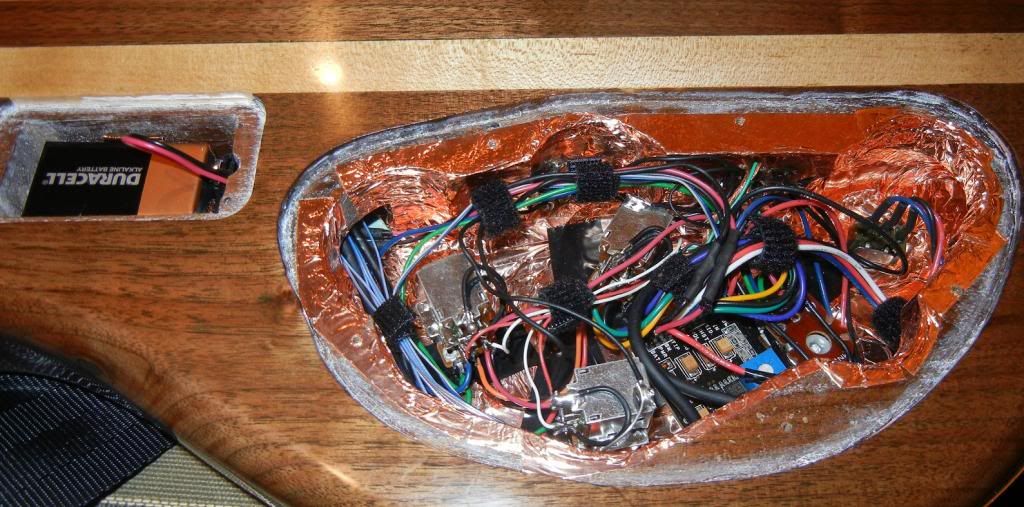
It's a bit of a spaghetti bowl of wiring though I cleaned it up a bit with some velcro wire wraps.
Re: new member, 2nd build
Posted: Tue Jan 08, 2013 7:58 pm
by Jason Rodgers
Wow, that's a bunch of options!
Ok, so tell me if I'm getting this right... There are 4 pots: one of them is a blend for the mag pickups (sort of like an infinite selector switch); a second is magnetic volume, but pulls out to put one humbucker in single coil; a third is magnetic tone that pulls out to put the other humbucker in single coil; and a fourth is volume on the piezo... ? And then there is the 3-position switch that selects piezo only / everything / magnetics only.
Is this a schematic you worked out yourself, or did you find it online somewhere? Could you please provide a diagram or point us toward a source?
Re: new member, 2nd build
Posted: Tue Jan 08, 2013 11:51 pm
by Eric Baack
close, the push pull on the buckers switches between series and parallel wiring. Parallel wiring is similar in sound to a single coil but a bit more beefy and no hum (you still have humbuckers but it acts like two single coils wired in parallel instead of in series)
It's a combination of several schematics really. I dug up a picture of a blend pot wiring online as well as series parallel switching here:
http://www.guitarelectronics.com/produc ... ne003.html
Except where the 3 way switch was I replaced with the blend pot and where the output was I replaced with the graphtech acoustifonic preamp board but with a bypass on the piezo volume push/pull to re-route the humbuckers to the 2nd jack in case the battery for the piezo pre-amp died. The pre-amp has it's own wiring diagram and some post connectors to hook everything up. I'll have to get a picture of the control cavity when I change the screws on the plate to the brass ones I'm getting
I'll have to see if I can put together a wiring diagram for it but it isn't to difficult to piece together with the link above. The trickiest thing for me was to figure out how to do the mag bypass without creating a ground loop.
Here's an example of the blend pot wiring
http://www.sgd-lutherie.com/docs/blend-pot_wiring.png
Re: new member, 2nd build
Posted: Sat Jan 12, 2013 11:17 am
by Eric Baack
I replaced the screws on the control cavity so I took a couple shapshots of the wiring. I bit cluttered in there but there are a lot of wires!
Re: new member, 2nd build
Posted: Sat Jan 12, 2013 1:17 pm
by Jason Rodgers
That is a big plate of spaghetti! Cool results, though. I wouldn't need all the push-pull fanciness, but I really like the idea of having the piezo and magnetics sort of wired as parallel units, but with a switch in the middle that ties them together.
I've never used a preamp before: can you preset the volume (and EQ) under the hood so that the piezo and magnetics are balanced? In other words, you wouldn't want a big jump or drop in volume when switching from one to the other, or have to fiddle with the volume to balance them when they are mixed.
I've been pondering a simple solution to the piezo/humbucker combo, and this gives me some good ideas. Thanks!
[Edit: If Eric is ok with it, maybe the staff could change the title of this thread to better describe the contents for search later. Perhaps: "Eric's Electric" or "Eric's PRS-style 6-string."


