Page 3 of 8
Re: 3 axis router build
Posted: Mon Feb 18, 2013 1:40 pm
by Eric Baack
I'll definitely keep that in mind. It is likely that it will be operated as a manual 3 axis table for quite a while before I add the steppers. I can use it for joining, cutting pickup pockets, facing boards, etc.
Re: 3 axis router build
Posted: Mon Feb 18, 2013 6:32 pm
by Louie Atienza
That's pretty cool... I believe Alan Carruth made a 3-axis manual router jig for doing binding ledges and other work. There is also a commerically abailable 3-axis manual router guide, though I cannot remember the name of it. Attaching knobs on your machine might be helpful for manual work.
Re: 3 axis router build
Posted: Mon Feb 18, 2013 8:28 pm
by Eric Baack
That's what I was thinking. And you can get digital scales on ebay for very reasonable so you don't have to count turns.
for binding I was thinking that I would center the router bit over a cylinder placed on the board and use that cylinder like the bearing on a rabbetting bit.
without the scale I'm planning to print out graduations for the knobs and stick those onto a machined cylinder for fine measurement.
Re: 3 axis router build
Posted: Mon Feb 18, 2013 10:36 pm
by David King
I do a lot of my guitar work on my hand cranked mill and I have to say that 5 TPI is pretty slow, 10 TPI would be glacial.
Check out these very nice 3 axis DRO kits that use open source software:
http://Shumatech.com I have a 375 and a 550. I also bought 6 glass scales from Ditron in China for about what the cheesy capacitative scales sell for on ebay. Good DRO software is pretty close to what a simple CNC machine can handle for a fraction of the price and resolution to 10 microns if you need that.
Re: 3 axis router build
Posted: Mon Feb 18, 2013 11:29 pm
by Eric Baack
well, it's come a long way since my original plan to use 3/8-16 allthread....
Re: 3 axis router build
Posted: Thu Feb 21, 2013 3:37 pm
by Eric Baack
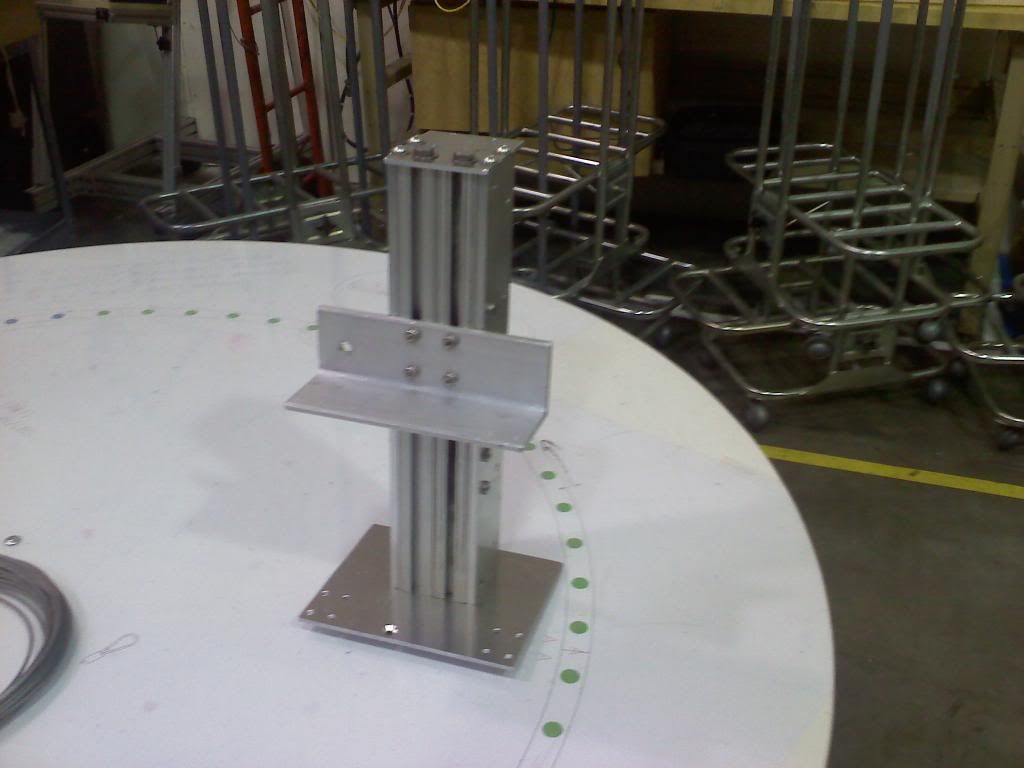
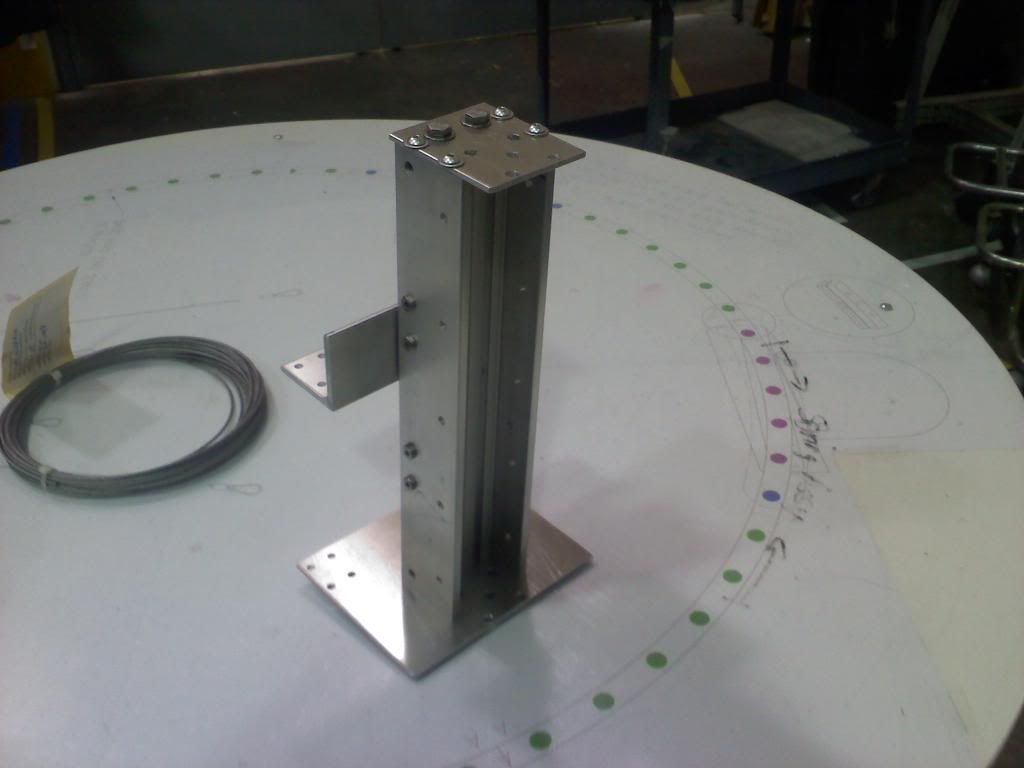
I've been machining parts and did a bit of assembly today on the Z-axis carriage. The extrusion for the bearings came in today so I'll have to chop that up and I can put the bearings on

It is a tad over 12" tall (for scale)
Re: 3 axis router build
Posted: Sat Feb 23, 2013 12:05 am
by Eric Baack
I cut my bearing rails to length today. didn't have time to drill any holes though I blind tapped some holes in 2 of my brace pieces. I'm changing the base assembly from 1 x 3 rectangle tube to 1/2" x 3" flat bar as this will be easier to screw together and I can source it locally. I ran a quick stress analysis on it and it will be about 30% more stiff vertically. This way I can hopefully avoid going to ebay for any more of my raw materials
Re: 3 axis router build
Posted: Wed Feb 27, 2013 6:39 pm
by Eric Baack
I got my bearings all assembled and installed a couple of them on the Y-axis sled. I'd have the other 2 on there too but I'm re-making the bottom plate out of some 1/4" 7075 plate that has come available from the scrap bin!
Re: 3 axis router build
Posted: Wed Feb 27, 2013 9:30 pm
by David King
Hi Eric,
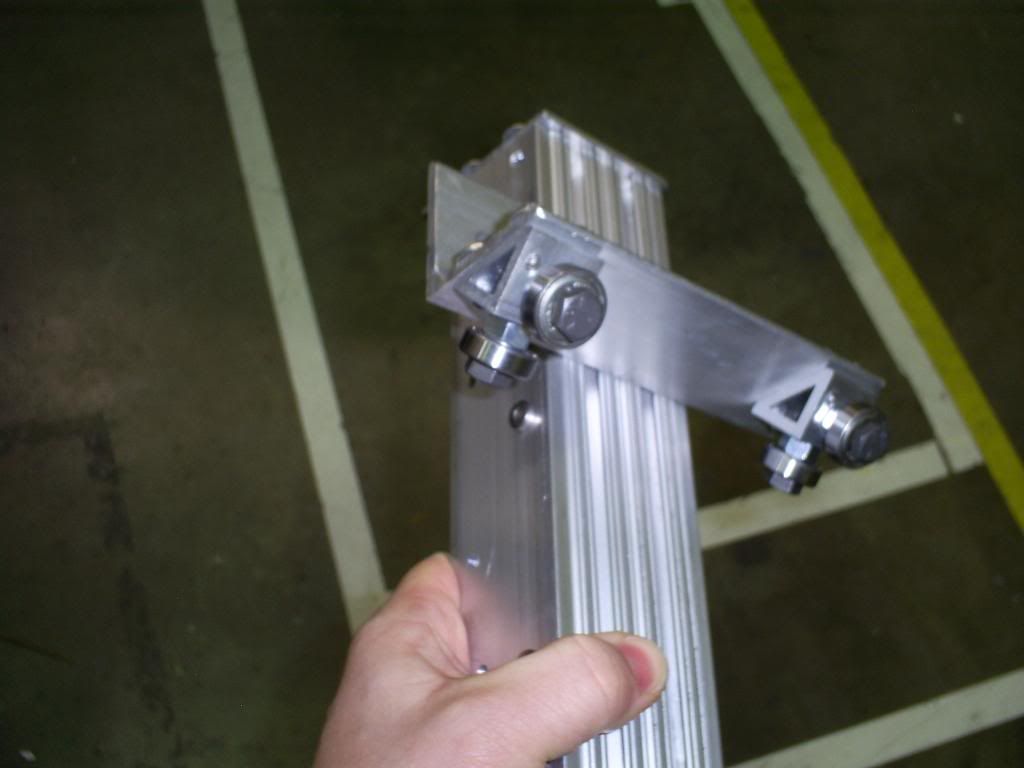
That looks very solid. I've never seen the triangular profile extrusion. Was that something you found on-line? Seems like it would be handy for all kinds of projects.
What equipment are you using to put this together? Do you just work with a chop-saw and a drill press? (And a lot of careful layout.)
Re: 3 axis router build
Posted: Wed Feb 27, 2013 11:38 pm
by Eric Baack
It is an 8020 extrusion. The metric version of the 1" (25mm sides) is about 60% of the cost of the 10 series version. The number for it is 25-8621. It is 25mm x 25mm. The corner to corner distance is 1.375" (almost on the button, the caliper showed 1.3756") The wall thickness is 4mm.
I got mine on ebay. 4' sticks were about $9 per stick. I got 4 sticks and it gave me a few inches of extra material left over. They do combined shipping too.
I've been able to use the shop at work so I'm fortunate to be able to use a mill with a digital readout for drilling my holes and other precision work. I've been able to work to some fairly tight tolerances that way. I plan to use some spring loading in places to ensure good solid engagement of the bearings.
Re: 3 axis router build
Posted: Wed Feb 27, 2013 11:45 pm
by Eric Baack
for reference:
[Auction link removed by staff - sorry, Eric, links to live auctions are not allowed here. Please review our Policy.]
Re: 3 axis router build
Posted: Thu Feb 28, 2013 3:08 am
by Barry Guest
Eric,
I purchased my xyz axis router in Australia. Here is a video of it
https://www.youtube.com/watch?v=z5pw3iBIEXs I don't know if you've considered that you can do pin routing with an overhead XYZ axis as well. You might want to incorporate this function in your design.
Re: 3 axis router build
Posted: Thu Feb 28, 2013 9:42 am
by Eric Baack
oops, sorry, I wasn't trying to advertise, just showing the extrusion I'm talking about.
Re: 3 axis router build
Posted: Wed Mar 06, 2013 11:36 am
by Eric Baack
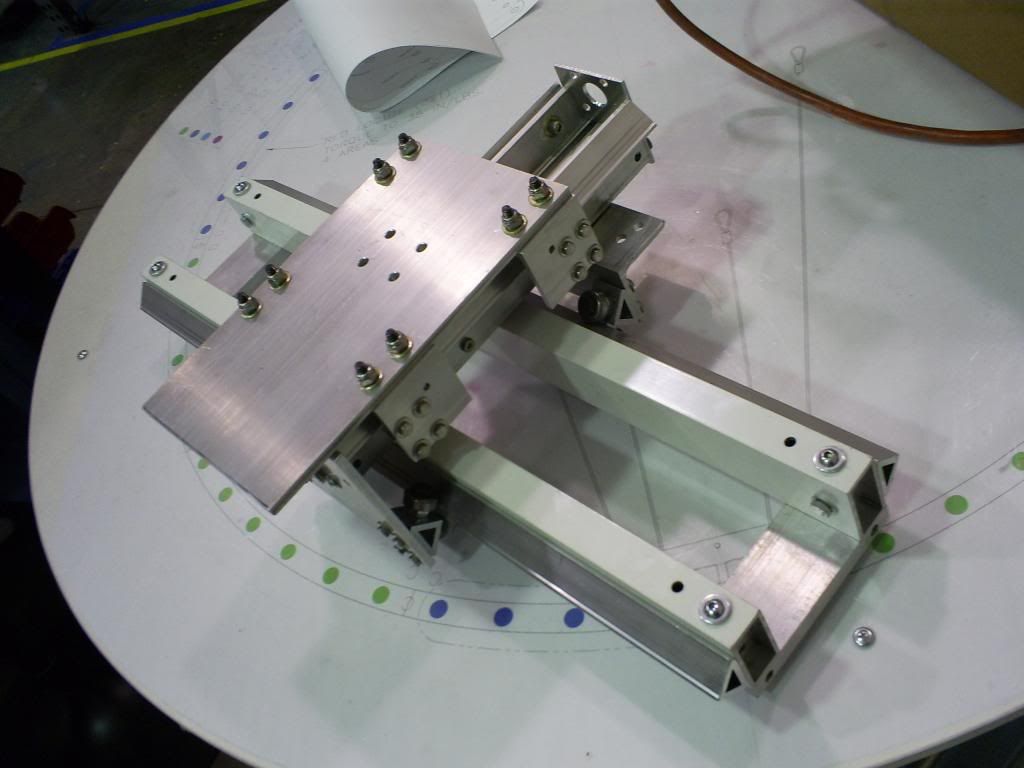
Here's a picture and video of the Y and Z axis bearings. There are more holes to drill and tap but this is a test fit. Things move pretty smoothly and there's no play in it that I can feel!
http://youtu.be/oKnrvckR9zk
Here's a quick picture
Re: 3 axis router build
Posted: Wed Mar 06, 2013 1:18 pm
by David King
That's looking great Eric. So this is the top of the gantry showing Y and Z axis?
My main concern with this design is that ball bearings have a low static load ratings. A roller or needle bearing would be better but the cost would probably skyrocket and the 90º angle rails would undoubtedly need to be hardened steel to handle the higher loading.
Are you planning to have more cross bracing between the top and bottom members of the Y rails. I think I'd want spacers that were centered between the bearing rails or a structural webbing of some kind.
Re: 3 axis router build
Posted: Wed Mar 06, 2013 1:50 pm
by Eric Baack
Yeah, there's going to be some 1/4" plate bolted onto the Y rails to tie them together across the middle.
I don't plan to cut anything too hard with it but we will see how it ends up working. I could probably get some higher end skate bearings in the future as well that might handle a bigger load. It is nice that these do compensate for slight misalignment of the tapped hole for the bearing screw
Re: 3 axis router build
Posted: Wed Mar 06, 2013 7:10 pm
by Louie Atienza
That's great! I ran a machine with skate bearings for a couple years, as long as the pressure's pretty evenly distributed you're fine. Plus they're cheaply replaced.
Then again, you may be surprised how much force a machine can generate. I originally used electrical conduit for my machine, and I actually wore flats on the tubes in about a month! The angle as you have it will distribute the load better, though you may want to add a brush or sweep of sort to keep the rails free of dust.
I actually used ipe decking and framing dropoffs from a big job to build my first machine!
Re: 3 axis router build
Posted: Wed Mar 06, 2013 11:39 pm
by Eric Baack
I can replace the rail with anodized pieces in the future to. this cost about half as much.
Re: 3 axis router build
Posted: Thu Mar 07, 2013 1:07 am
by Louie Atienza
Eric Baack wrote:I can replace the rail with anodized pieces in the future to. this cost about half as much.
I would strongly recommend against using anodized aluminum. The pressure of the hardened steel of the bearing casings against the anodized surface will cause it (the surface coating) to crack, leaving basically what is aluminum oxide powder on your rails, which will cause your bearings to grind, because no matter what seal are on those bearings, that dust seems to get in. Don't ask me how I know this, too... My Y rails used anodized pipe, and I ended up having to file all the anodizing off where the bearings contacted, because the flaking surface was causing skipping and stalling. Not to mention previously inexplicable bearing failure. Thankfully I bought 100 skate bearings for something like $40, so replacement was cheap... Downtime however is not. I ended up replacing most the rails with water-hardening drill rod, even the EMT tubes. While I did not get them hardened, they're sufficiently hard for their purpose. If you do upgrade, cold rolled steel is more consistent and smoother than hot-rolled.
Anodized works good however with plastics like HDPE or Delrin or such, that slide on its surface. I once tried to find suitable bearings with plastic outer rings, like sash bearings for windows, but the plastic is not molded to good tolerances, and the bearings themselves hat a bit of play, and only shielded not sealed.
Re: 3 axis router build
Posted: Thu Mar 07, 2013 9:40 am
by Eric Baack
good to know!!