
I'm hoping against hope that the CA glue will do the trick. Replacing the bridge would significantly increase the complexity and cost of this project.
So, it's reglued with CA glue right now. Is 24 hours enough for CA glue? If it appears the bridge is solid when I remove the clamps, great. If not...
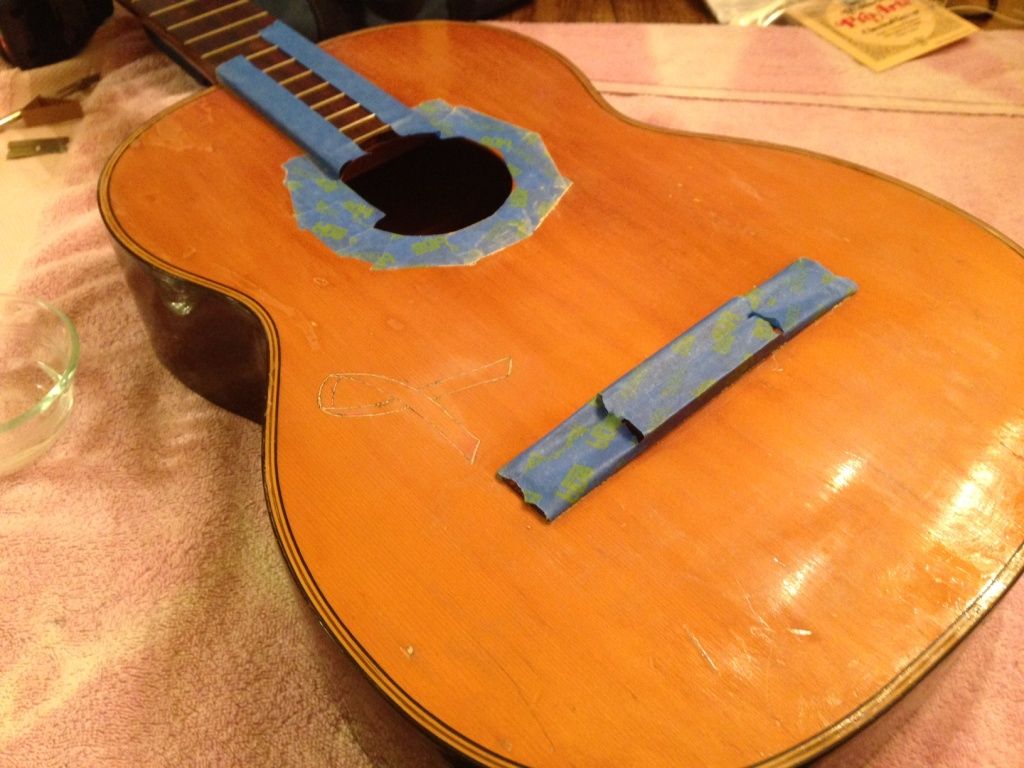
...I think I will try some test sanding around the painted ribbon before removing the bridge, if only to gauge how much more work I really want to put into this. If there's no good way to remove the ribbon, then I think the project is over.
If I'm happy with the ribbon removal, then let's say I remove the bridge with some heat and sharpened putty knife. What's the method for calculating the proper location for a replacement bridge? Presumably, it won't be the same dimensions as the original, and since what I want is for the saddle to remain in the exact same spot, the saddle has to be my reference point, not the outer edges of the bridge itself, right? Maybe drill a couple pilot holes through the saddle slot to fix the location?
If I do remove the bridge, that would have the advantage of simplifying the top repair -- it would (should) be much easier to evenly sand down the top than if I have to work around the bridge. Of course, I'll still have to work around the rosette as I'm about 99% sure it's a thin decal.
If I do have to replace the bridge, do I need clamps like this:
http://www.amazon.com/Shop-Fox-D2804-Al ... 0000DD1TC/
And how few clamps can I get away with?
Saturday morning reclamation project (Nippon Gakki content)
-
Mark Geoffriau
- Posts: 19
- Joined: Sat Aug 23, 2014 11:17 pm
-
Peter Wilcox

- Posts: 1321
- Joined: Sun Jan 08, 2012 1:31 am
- Location: Northeastern California
Re: Saturday morning reclamation project (Nippon Gakki content)
I'm no expert, and I'm sure others will give you better advice.
First, you need to make a caul to fit under the bridge:
http://www.stewmac.com/How-To/Online_Re ... Cauls.html
Then you need to either buy a caul for the top:
http://www.stewmac.com/Luthier_Tools/Ty ... _Caul.html
or make a wooden caul for the top and use 3 clamps on it, which is what I do.
http://www.tomhoelle.com/HGPics/Bridge33.jpg
I got my clamps at Harbor Freight:
http://www.harborfreight.com/catalogsea ... at+C-Clamp
Probably too much of a PITA for this guitar, but a good learning experience for you.
Maybe I can't fix it, but I can fix it so no one can fix it
-
Mark Geoffriau
- Posts: 19
- Joined: Sat Aug 23, 2014 11:17 pm
Re: Saturday morning reclamation project (Nippon Gakki content)
Good news...I think the CA glue did it. When I tested the TiteBond repair, a bit of applied pressure opened it up fairly easily. I applied as much or more pressure after the CA glue repair, but it held strong. I'm hoping that since I intend to lower the saddle quite a bit, there shouldn't be much fore-aft pressure applied to the bridge.tly.
-
Mark Swanson

- Posts: 1991
- Joined: Thu Jan 05, 2012 11:11 am
- Location: Grand Rapids, Michigan USA
- Contact:
Re: Saturday morning reclamation project (Nippon Gakki content)
I bet it will hold!
- Mark Swanson, guitarist, MIMForum Staff
-
Mark Geoffriau
- Posts: 19
- Joined: Sat Aug 23, 2014 11:17 pm
Re: Saturday morning reclamation project (Nippon Gakki content)
Well, good new and bad news.
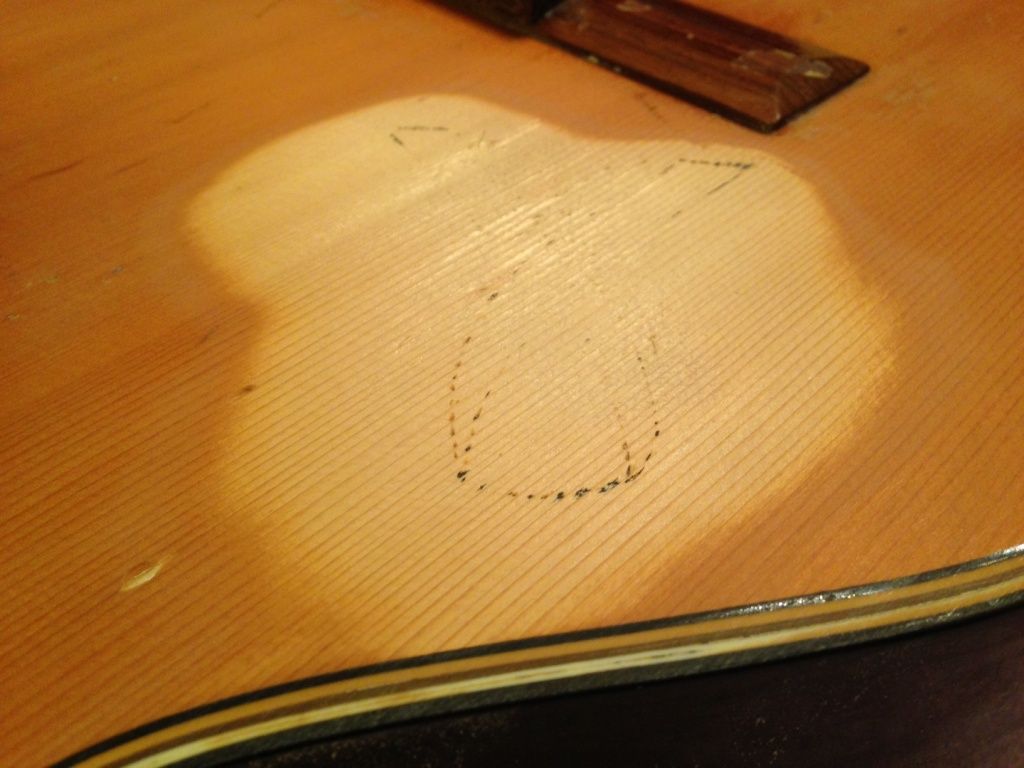
Good news: I have found the depth of the engraving, and it appears to be contained in the first layer of the laminate top, which means I can erase most if not all traces of it.
Bad news: It's pretty deep, which means I'll have to sand down the entire top to raw wood and refinish it.
I'm going to write up my explanation before I post the pics, because I know the pics are going to make some of you shudder. I know I'm doing it "wrong." But here's my thoughts:
If this were a $500 guitar, or a $1500 guitar, or a $15,000 guitar, the right thing to do when faced with a flaw in the top would be to ever-so-carefully and evenly sand or strip down the top until it could be minimized and then refinished. But this is not a $500 guitar. It wasn't even a $50 guitar.
So instead, I decided to hit the engraved spot first to gauge the depth. Basically, I figured, I don't want to invest hours and hours trying to sand down the top evenly, only to discover that it was a lost cause all along. Yes, this means I'll have to go back and try to get the rest of the top down to the same depth. But doing it this way was a proof of concept -- now I know for sure that I can remove the engraving, so I don't mind spending a few more hours sanding down the rest of the top. I might not get it perfectly even, but that's okay for this guitar.
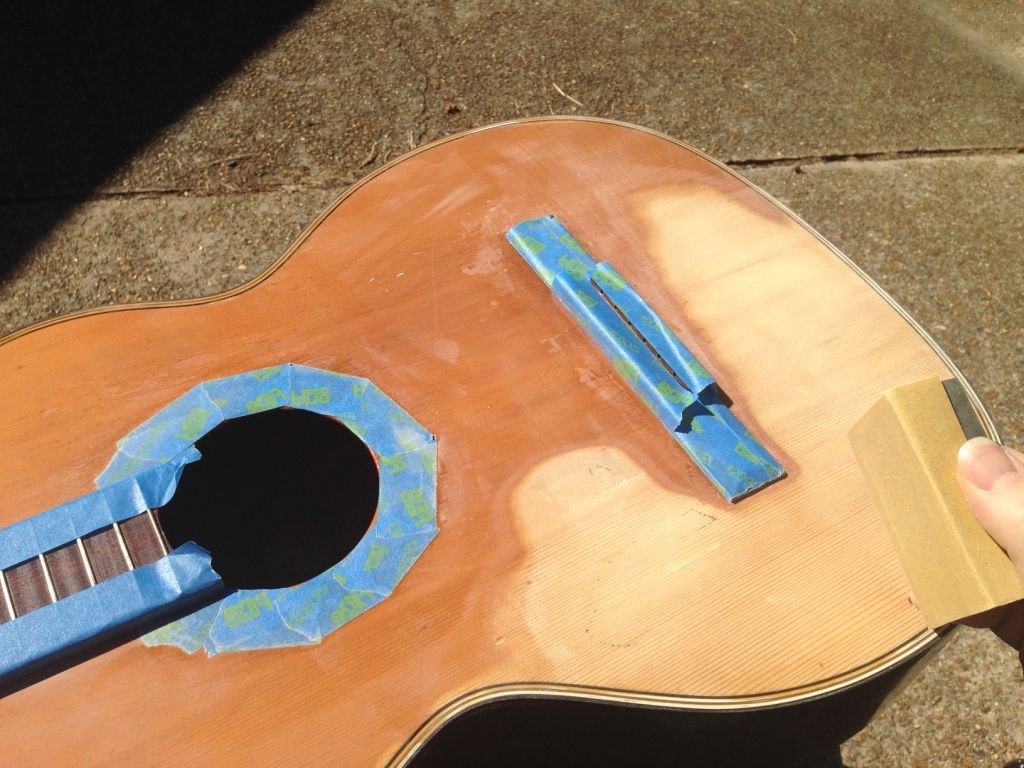
That said, here's a couple pics. 1st pic, I just started. 2nd pic is where I stopped -- the engraving isn't entirely gone, but it's close enough that I decided I should start trying to bring the rest of the top down with it.
Sanding through the finish is a pain -- the finish gums up fast and clogs the sandpaper, requiring frequent cleaning and new sandpaper. But I'll get there eventually.
The remaining question I have yet to answer is how (or whether) to save the rosette. I can keep masking it off to preserve it, but I'm not sure how that will work when I refinish the rest of the top that has been sanded down to raw wood. Or, I guess I could just sand it down and see what happens. My fear would be that I would get stuck in between -- the decal would begin to deteriorate, but not be completely removed.
Any thoughts?
Good news: I have found the depth of the engraving, and it appears to be contained in the first layer of the laminate top, which means I can erase most if not all traces of it.
Bad news: It's pretty deep, which means I'll have to sand down the entire top to raw wood and refinish it.
I'm going to write up my explanation before I post the pics, because I know the pics are going to make some of you shudder. I know I'm doing it "wrong." But here's my thoughts:
If this were a $500 guitar, or a $1500 guitar, or a $15,000 guitar, the right thing to do when faced with a flaw in the top would be to ever-so-carefully and evenly sand or strip down the top until it could be minimized and then refinished. But this is not a $500 guitar. It wasn't even a $50 guitar.
So instead, I decided to hit the engraved spot first to gauge the depth. Basically, I figured, I don't want to invest hours and hours trying to sand down the top evenly, only to discover that it was a lost cause all along. Yes, this means I'll have to go back and try to get the rest of the top down to the same depth. But doing it this way was a proof of concept -- now I know for sure that I can remove the engraving, so I don't mind spending a few more hours sanding down the rest of the top. I might not get it perfectly even, but that's okay for this guitar.
That said, here's a couple pics. 1st pic, I just started. 2nd pic is where I stopped -- the engraving isn't entirely gone, but it's close enough that I decided I should start trying to bring the rest of the top down with it.


Sanding through the finish is a pain -- the finish gums up fast and clogs the sandpaper, requiring frequent cleaning and new sandpaper. But I'll get there eventually.
The remaining question I have yet to answer is how (or whether) to save the rosette. I can keep masking it off to preserve it, but I'm not sure how that will work when I refinish the rest of the top that has been sanded down to raw wood. Or, I guess I could just sand it down and see what happens. My fear would be that I would get stuck in between -- the decal would begin to deteriorate, but not be completely removed.
Any thoughts?
-
Michael Lewis
- Posts: 1475
- Joined: Thu Jan 12, 2012 1:22 am
- Location: Northern California USA
- Contact:
Re: Saturday morning reclamation project (Nippon Gakki content)
You are getting some experience and education with this project, so all is not lost. You could remove the top and put a new solid top on it (more experience and education).
The thing about doing modifications and some repairs is to figure where to draw the line of how far you are willing to go. All too often one thing leads to another, and pretty soon you are up to your eyebrows and still digging. It's not so bad when you own the instrument and it's your own time involved, but when doing such things for a paying customer things can get deep quickly.
The thing about doing modifications and some repairs is to figure where to draw the line of how far you are willing to go. All too often one thing leads to another, and pretty soon you are up to your eyebrows and still digging. It's not so bad when you own the instrument and it's your own time involved, but when doing such things for a paying customer things can get deep quickly.
-
Mark Geoffriau
- Posts: 19
- Joined: Sat Aug 23, 2014 11:17 pm
Re: Saturday morning reclamation project (Nippon Gakki content)
Slowly making progress! The sandpaper I had wasn't cutting it -- clogged way to quickly. I got some 3M Gold sandpaper in 180, 220, 320, and 400 grits. Working with the 180 grit right now as I'm just trying to get down past the finish. It's going much more quickly, but working around the bridge is still difficult.

-
Michael Lewis
- Posts: 1475
- Joined: Thu Jan 12, 2012 1:22 am
- Location: Northern California USA
- Contact:
Re: Saturday morning reclamation project (Nippon Gakki content)
Generally when a top is refinished the bridge is removed first, then the snading and finish take place and finally the bridge is reglued.
It's a tricky proposition to remove a bridge from a laminated top, could shave or rout the bridge off and put a new one on. The sanding and finishing will go much easier with the bridge out of the way, you can get a professional quality finish. Not really possible with the bridge in place.
The top will end up a bit blotchy due to the UV exposed surface wood being sanded away more in some areas than others. If you put some color in your new finish to emulate the old finish it will help camouflage the unevenness of the color in the wood somewhat, assuming it goes on evenly. Wishing you good luck with this.