I started out by absorbing as much technical information as possible from the internet, books and acquaintances through my website. Once I had a handle on the technical aspects, I started building many of the specialized tools and fixtures. Of course that stuff is all available from luthiery suppliers, but I couldn't justify spending all that money on something I could make, when it'll probably only be used a couple times. I built 50 spool clamps from some of the Walnut and Ash left over from the rocking chair project, a number of wooden bar clamps to use when gluing the ribs to the corner blocks, a bending iron to form the ribs, and of course the form or mold itself. The pattern for the mold came from a book by Henry Stroebel, which has full size templates for a 4/4 and 7/8 cello. I wanted to use a poster published by the Strad of a Stradivari 'Davidov' 1720, but it's no longer in print and I was unable to locate one. From what I understand, the Stroebel templates are very similar in shape and size.
I just got started bending the ribs, so before I get too far into the project, I thought I would start a build thread to document my progress. I am definitely a novice in musical instrument construction, but not in craftsmanship itself, so I'm pretty sure some of my methods will vary from those traditionally used, but the result will be the same. I'll start the thread out by posting some pics of the tools and fixturing that I built, and then move on the the instrument itself.
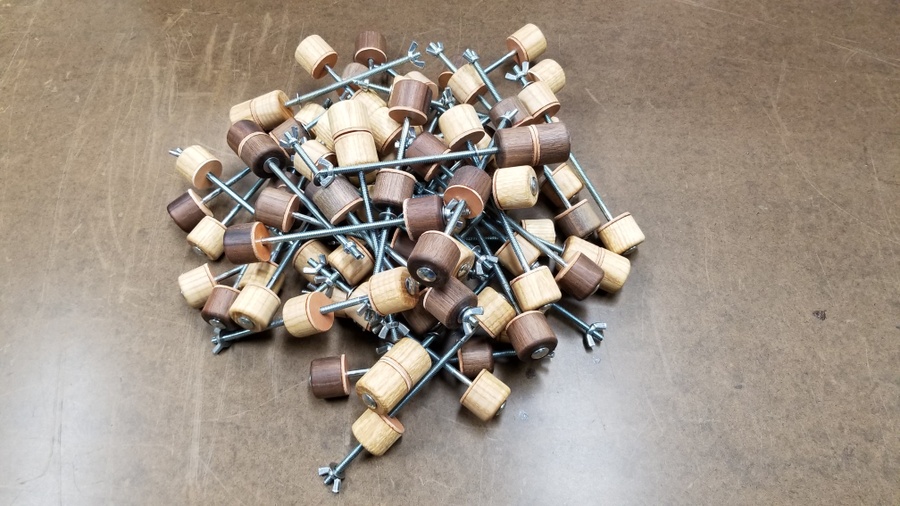
These are the 50 spool clamps that will be used to clamp the front and back of the cello to the rib structure. The going rate for ready made clamps is about $7 a piece or $350 for the lot. All I have invested in mine is $10 for the carriage bolts and wingnuts and a little bit of time.
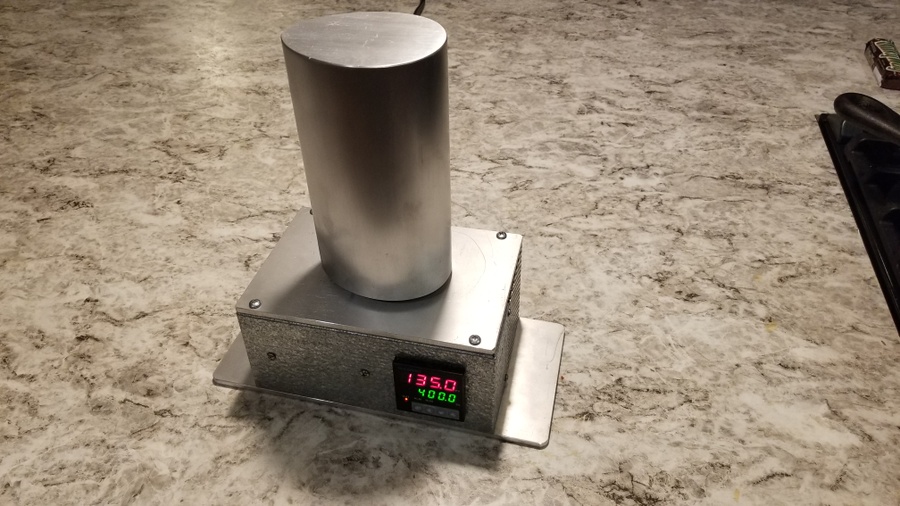
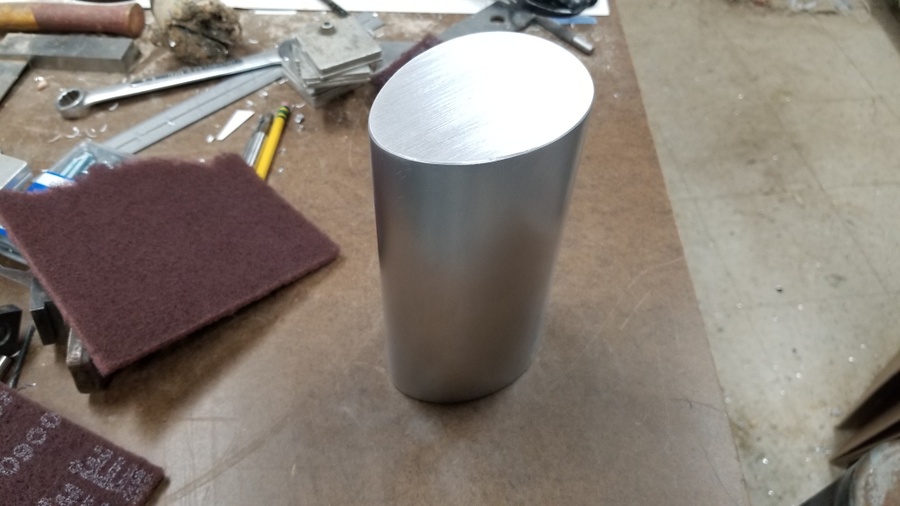
This is the bending iron that I built to form the ribs. It's basically a 3" x 5" x 7" chunk of aluminum made into an airfoil shape, with various radii to suit. It uses a PID temperature controller and solid state relay to power a couple of electric cartridge heaters with a type K thermocouple for feedback on the temperature. I had a vague idea what the temperature needed to be for use, so I designed it for up to 500ºF and hoped for the best. As it turns out, 350ºF was adequate so it's a bit over designed.
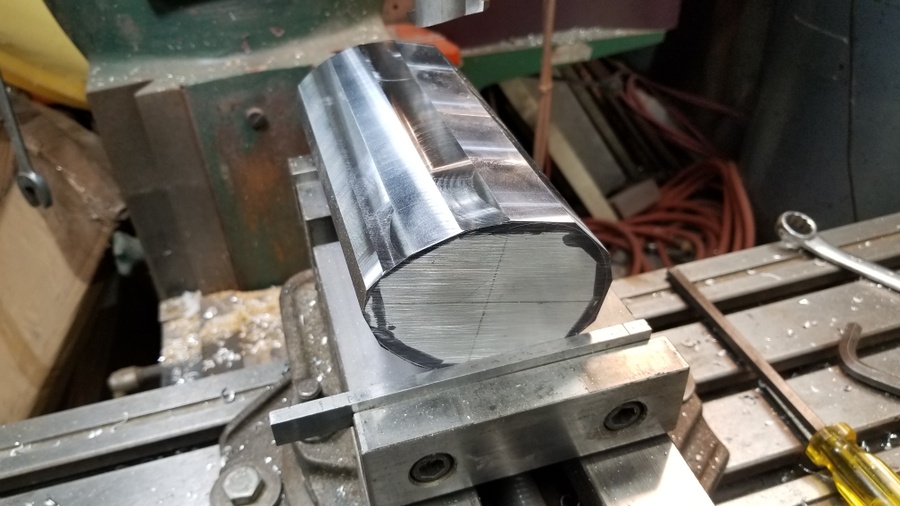
Rough shaping the iron on the mill.
After some time on the belt sander.
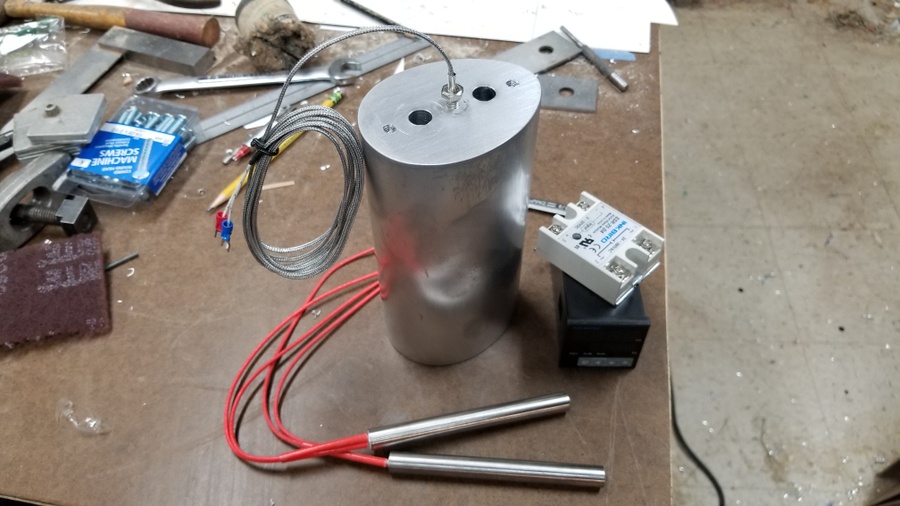
The cartridge heaters, PID controller, solid SSR and thermocouple.
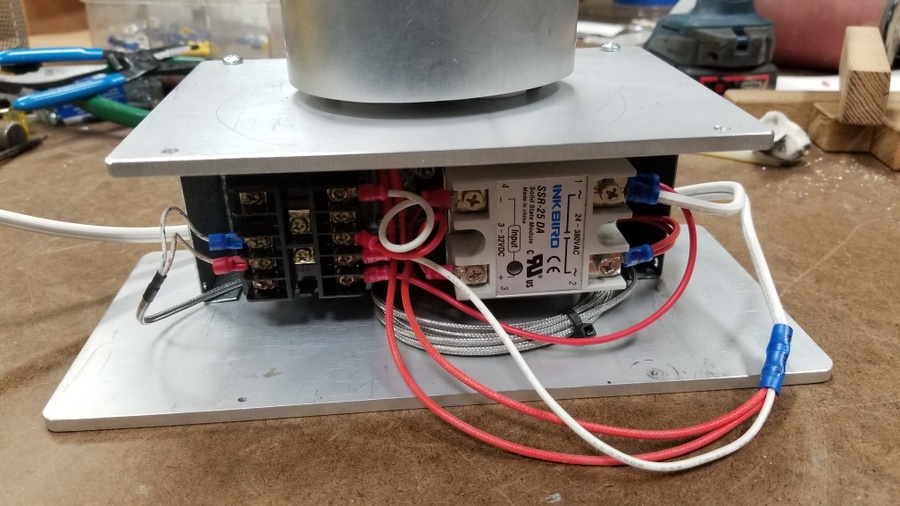
Wiring. (Not one of my strong suits)
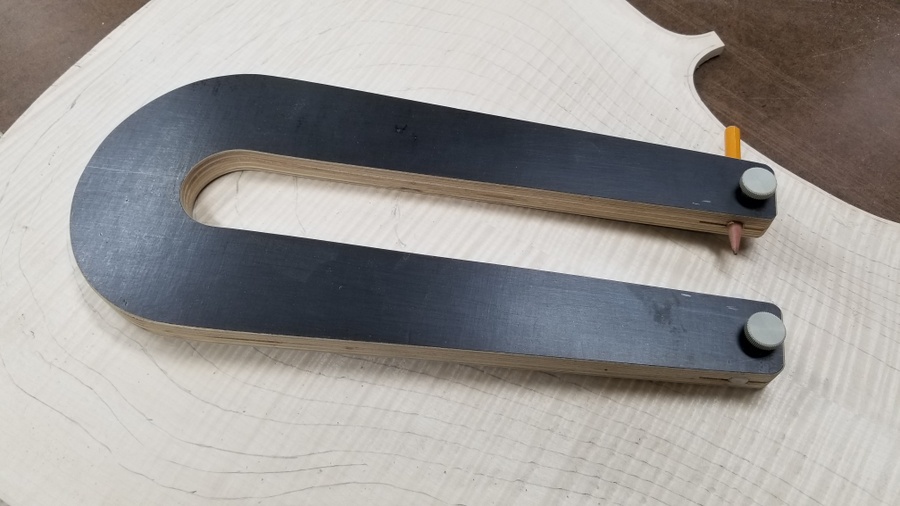
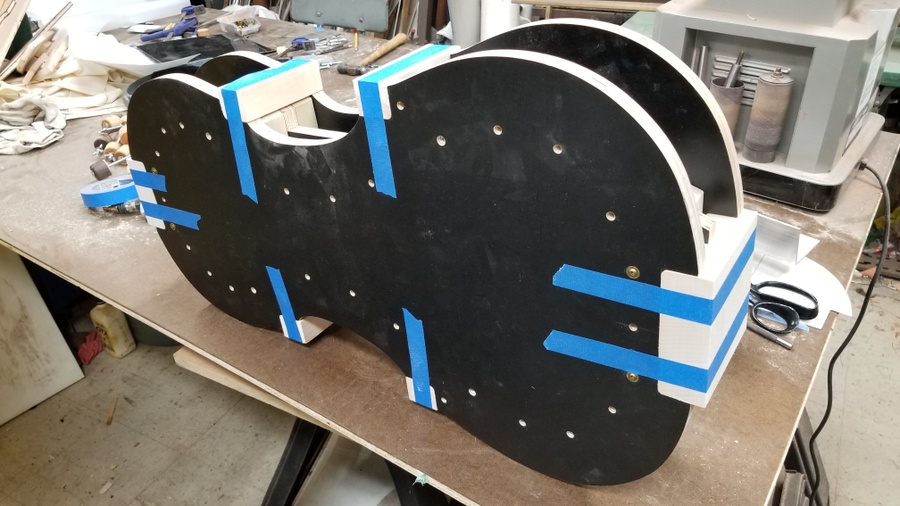
The mold was pretty much Mr. Stroel's design. I used 13 ply concrete form plywood from Menards because it was as flat as Baltic birch plywood, but less expensive. It's a three layer design with a center spine and removable outer plates to allow the addition of the linings around the edges of the ribs (for reinforcement). It's purpose is to provide a template for the form of the body and hold the corner blocks in position for shaping and for gluing the ribs to them. Once the rib/block/lining structure is complete, the mold is disassembled and removed.
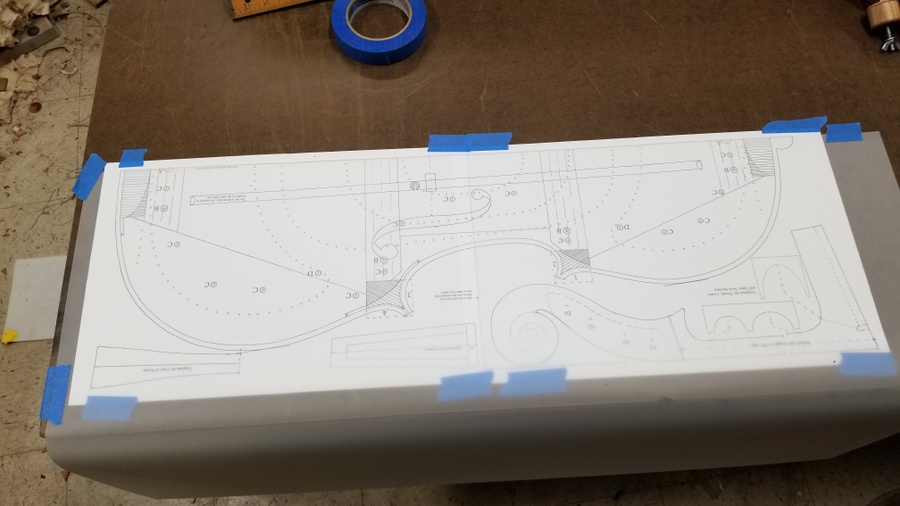
Creating a Mylar template for the mold.
The finished mold.
The cutout for one of the end blocks.
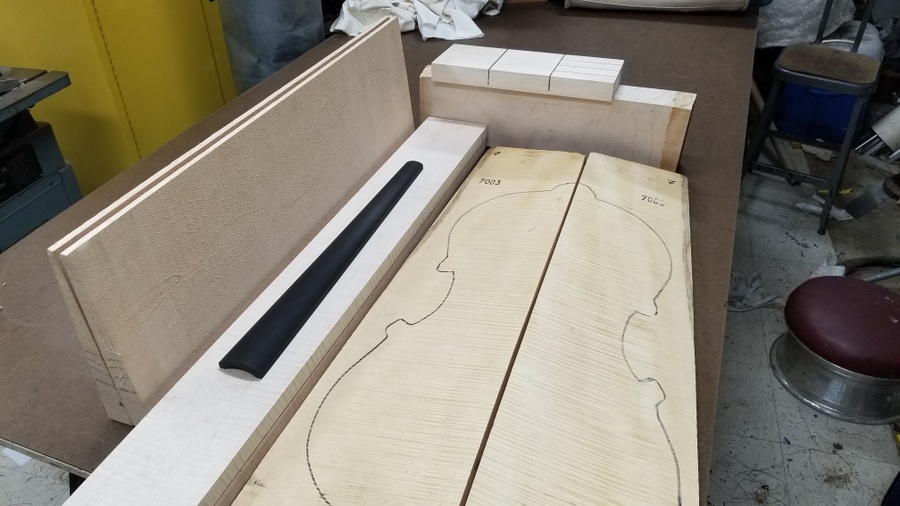
The wood came from a variety of sources. The striped European Maple for the back came from Golden Tonewoods in Romania. The Sitka Spruce front came from Alaska Specialty Woods in yup, Alaska. The rough shaped fingerboard came from India ($30 shipped) because I was unable to find Ebony stock of the necessary size and quality at any price. The neck and blocks came from International Violin. The Tiger Maple boards for the ribs came from a guy in Ohio. I ran them through the planer, resawed them and took them to a friend who had a thickness sander to get them the the finished thickness of 1.7mm. I tried planing them to size, but the figure in the wood made it impossible. Even hand planing it didn't work very well.
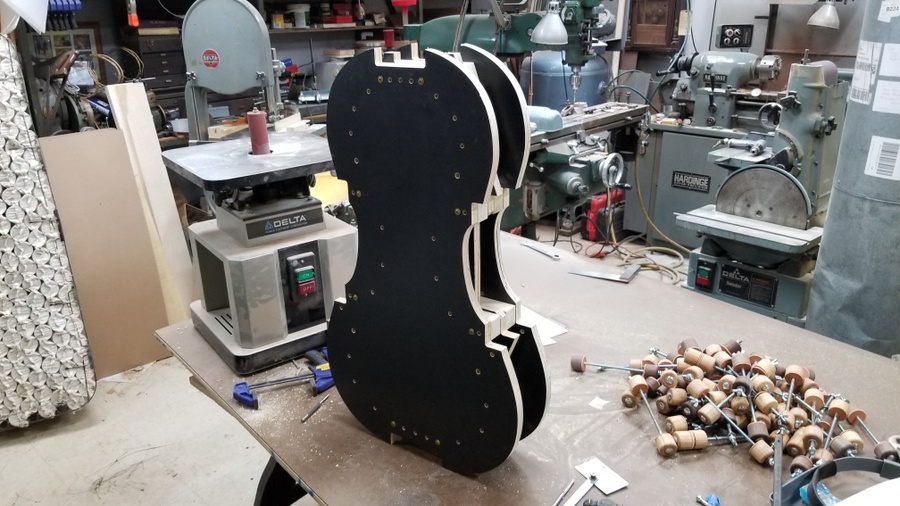
The first step in actually building the cello was to temporarily glue the six corner blocks to the mold. I just used a couple dots of white glue on the center spine. The joint has to be strong enough to hold the blocks for shaping and assembly, but weak enough so they can be broken loose to remove the rib assembly when finished.
The corner blocks glued and taped to the mold. Once dry, I used an oscillating spindle sander to shape the two middle blocks for the "C" shaped ribs.
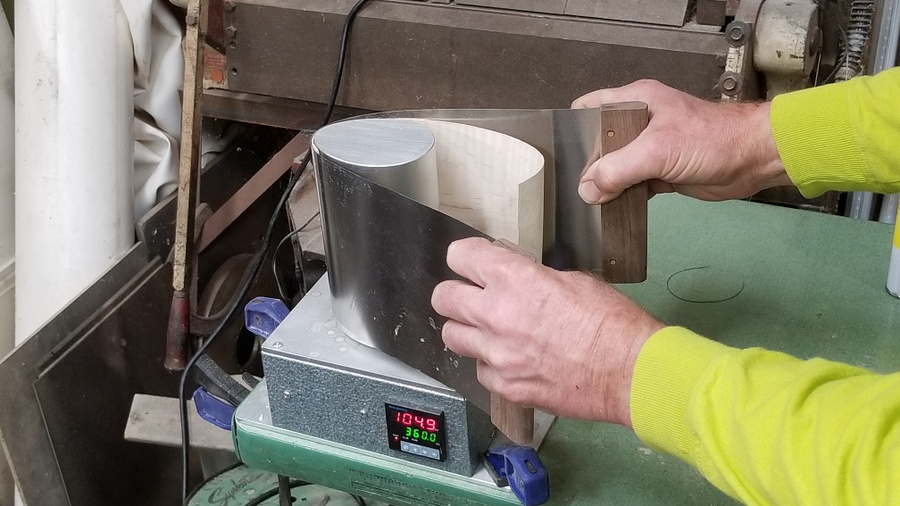
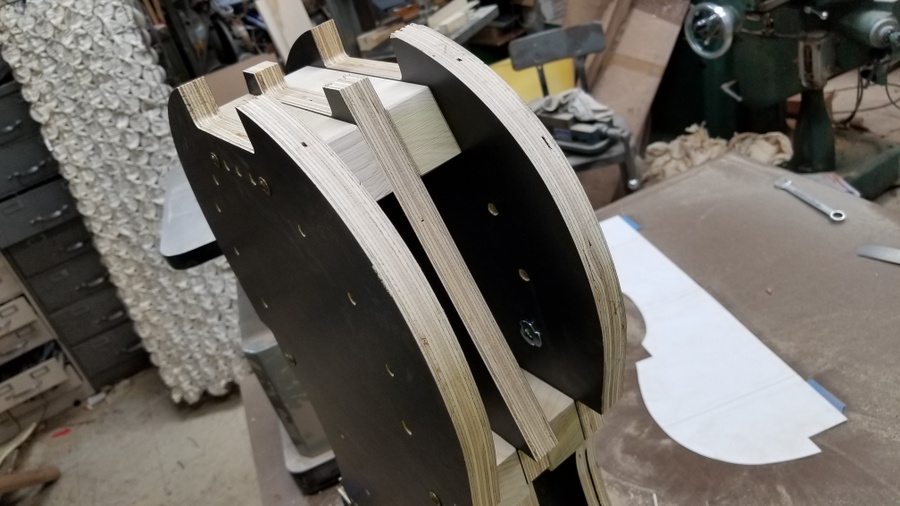
The bending procedure was a learning experience. Basically I both sides of the 1.8mm thick ribs with a wet rag, held one end against the flatter part of the iron to heat it up, and then gradually worked the end of the rib around to the part with a tighter radius and held it there until the water evaporated. I arrived at a best temperature of 350º. That was enough heat to form the wood without scorching it. At the advice of an actual cello maker, I thinned each end of the "C" wood to 1.2mm in the area of the tight radii and it worked very well. You have full control of the shape and can add or subtract curve by applying heat until the fit is perfect. I over bent the "C" ribs slightly so the clamps would force them out against the form and blocks when glued, for zero gaps.
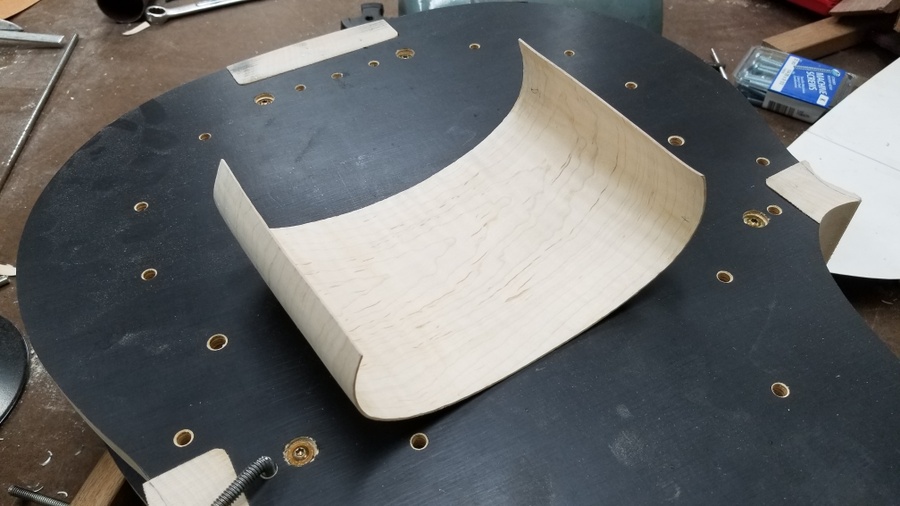
One of the finished "C" ribs. They are left a couple mm wider than the mold for finishing and a bit longer than needed for the clamps to bear.
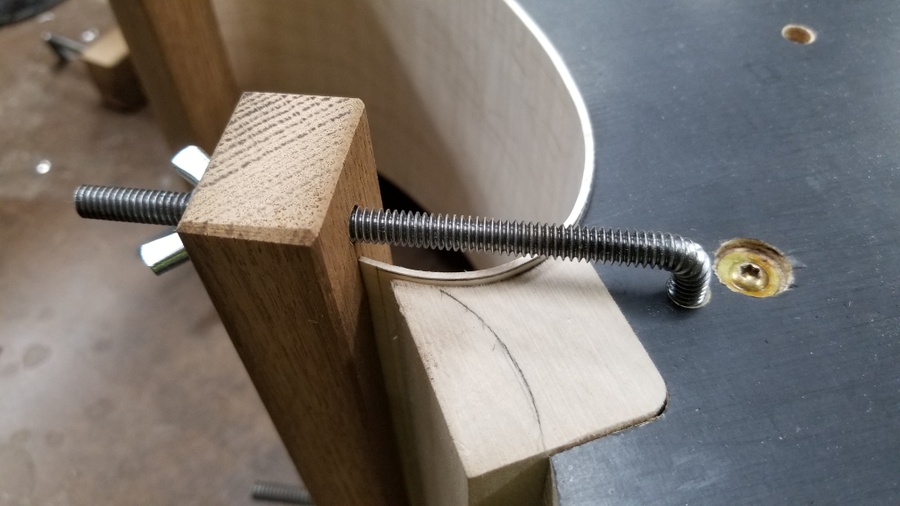
Trial clamping before glue.
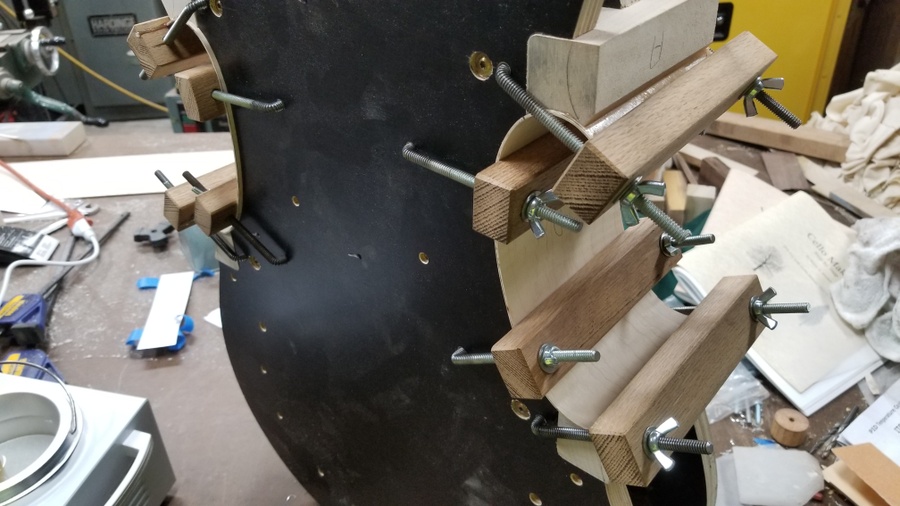
The first ribs glued in place. I have never used hide glue before so that was a leaning experience. I bought a bath heater used for waxing (as in hair removal) and used a beaker to mix the glue in. As it worked out, if the heater is turned all the way up, the glue reaches the necessary temp of 140ºF. I warmed the middle blocks with a heat gun, but still had to really hustle to get everything clamped up before the glue set. The rest of the ribs will be easier because none are curved as tightly as these and they can be glued to the blocks one end at a time.