
The Hossenfeffer Bass
-
Bob Francis
- Posts: 585
- Joined: Wed Jan 11, 2012 6:28 pm
Re: The Hossenfeffer Bass
This is a great thread thanks for the updates.
-
Chris Mudd
- Posts: 21
- Joined: Sun Jul 15, 2012 6:12 pm
Re: The Hossenfeffer Bass
That has always been my favorite bass!!
I can't wait ti see the finished project!
Then you have to build an Ampeg stack!
I can't wait ti see the finished project!
Then you have to build an Ampeg stack!
-
Dan Hehnke

- Posts: 166
- Joined: Wed Feb 15, 2012 12:22 am
- Location: Colorado
- Contact:
Re: The Hossenfeffer Bass
Looks awesome. Probably my favorite bass as well! Looking forward to the rest.
-
Alexander Higgins
- Posts: 145
- Joined: Mon Jan 20, 2014 7:17 pm
Re: The Hossenfeffer Bass
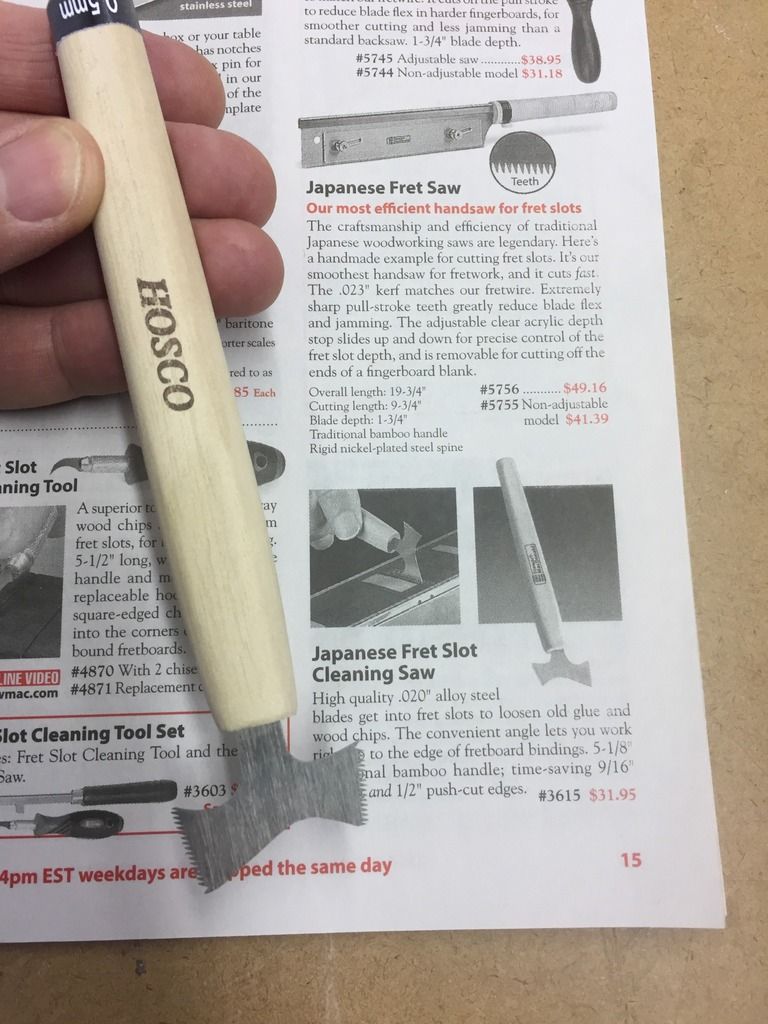
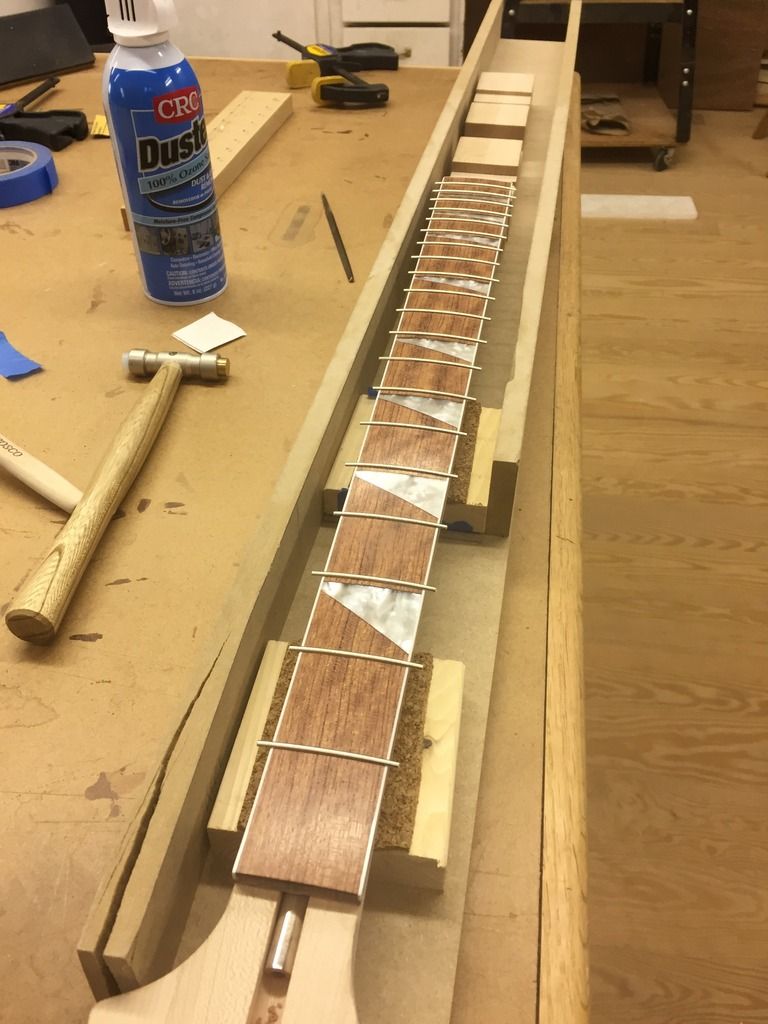
I found that a couple of the fret slots were too shallow after various attempts to flatten the fingerboard, so I had to re-cut them deeper with this tool I got for $20 from Antique Electronics, vs. $31.95 for the IDENTICAL tool from Stewmac. More reasons to love/hate Stewmac.
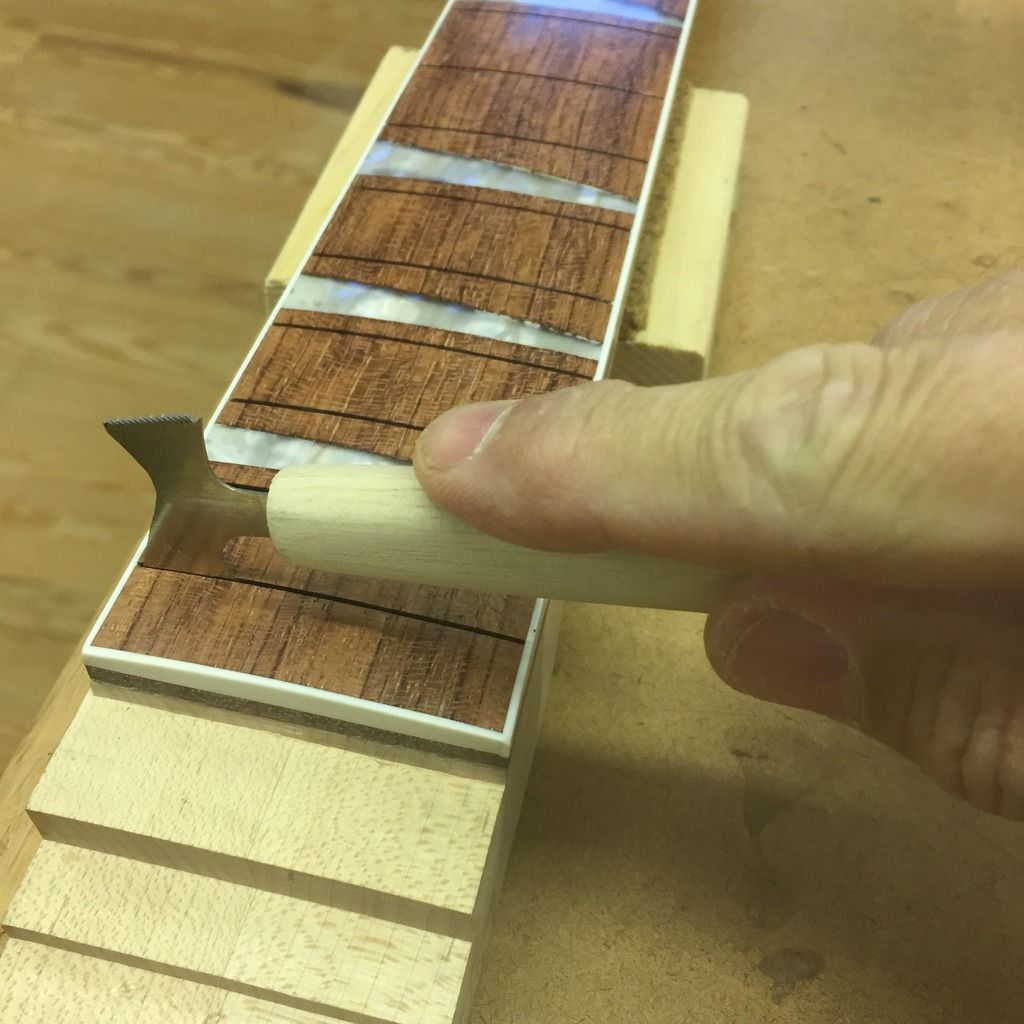
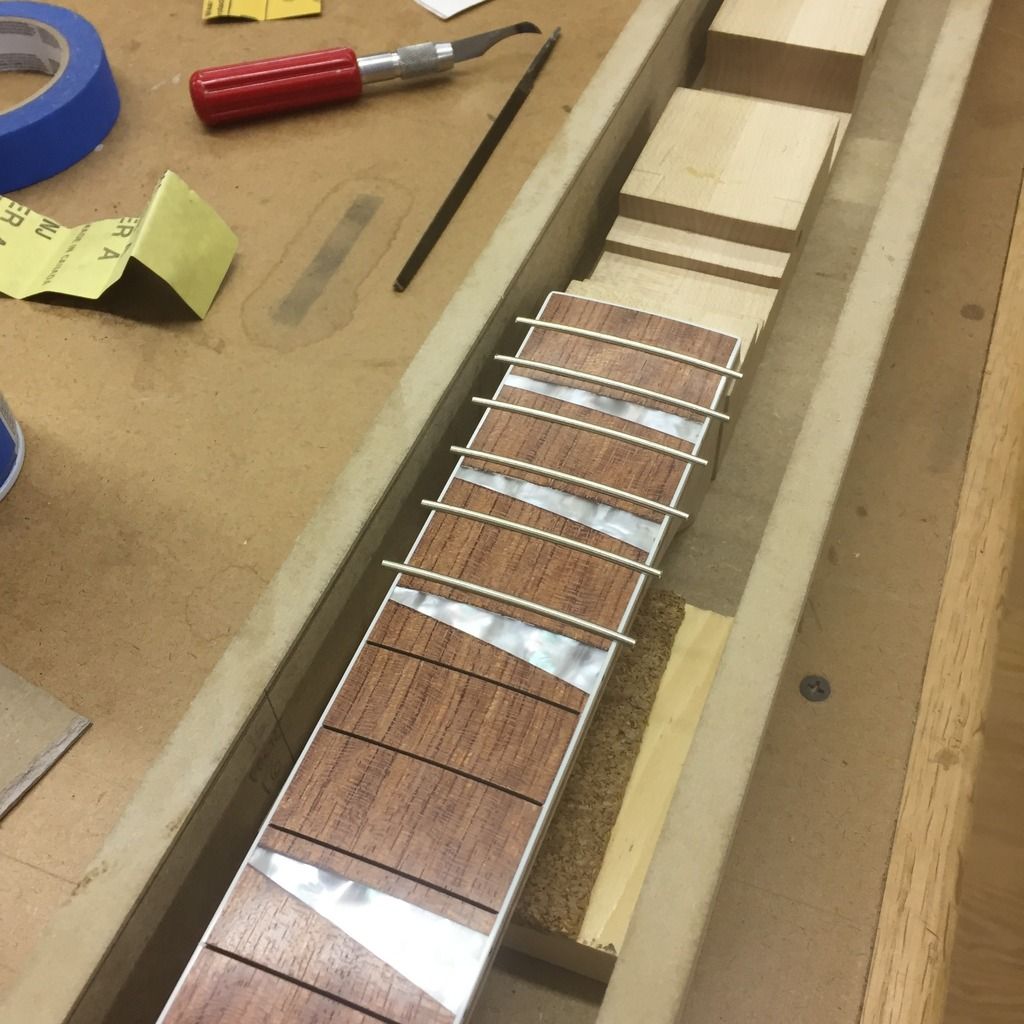
The caul i used has no self-leveling swivel attachment, so it wasn't setting the center of frets flush, cured that with some tape at the middle. It did a decent job, but still required some tapping with a fret hammer to get everything fully seated.
Home-Made 90 and 35 degree fret file:
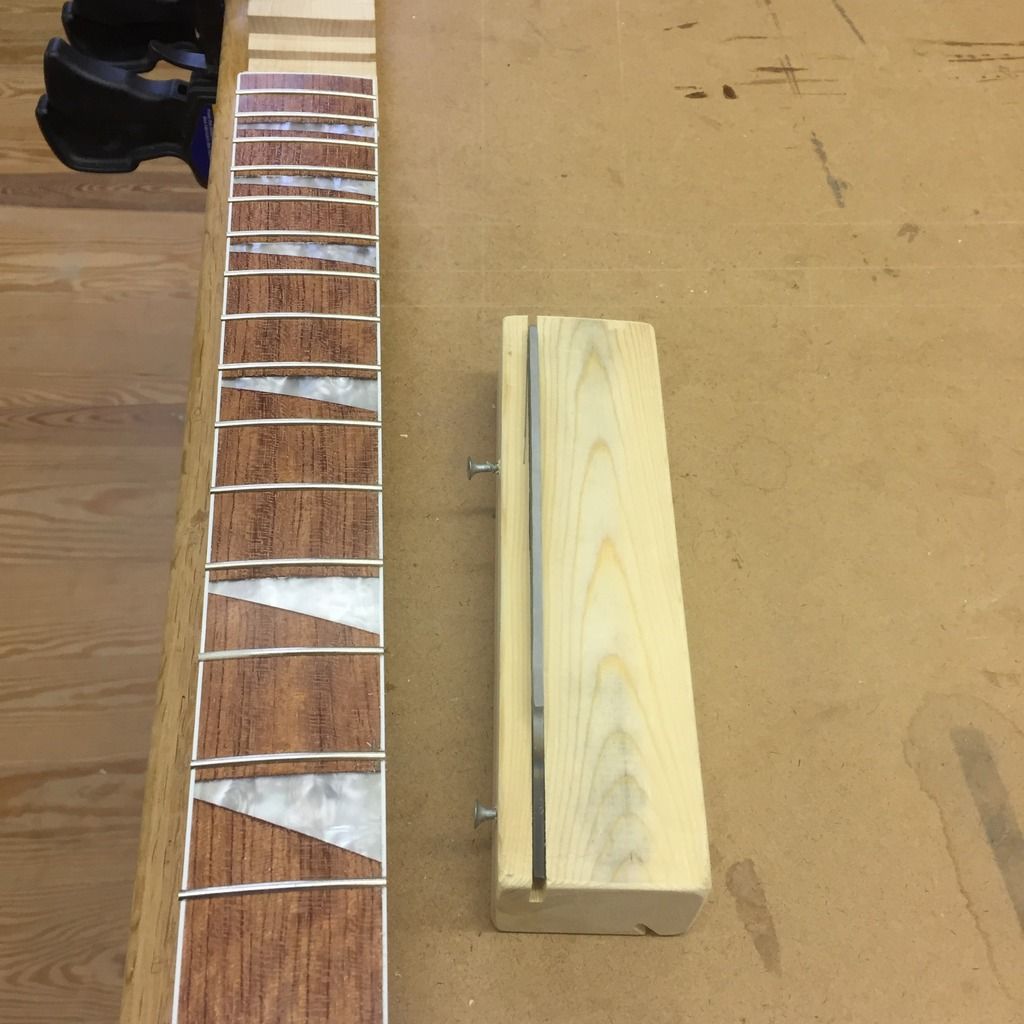
Thanks for looking, next is roundover and belly relief on body wings, then finally glue wings to neck beam. The Glacier continues it's geologic flow!


The caul i used has no self-leveling swivel attachment, so it wasn't setting the center of frets flush, cured that with some tape at the middle. It did a decent job, but still required some tapping with a fret hammer to get everything fully seated.


Home-Made 90 and 35 degree fret file:


Thanks for looking, next is roundover and belly relief on body wings, then finally glue wings to neck beam. The Glacier continues it's geologic flow!
-
Alexander Higgins
- Posts: 145
- Joined: Mon Jan 20, 2014 7:17 pm
Re: The Hossenfeffer Bass
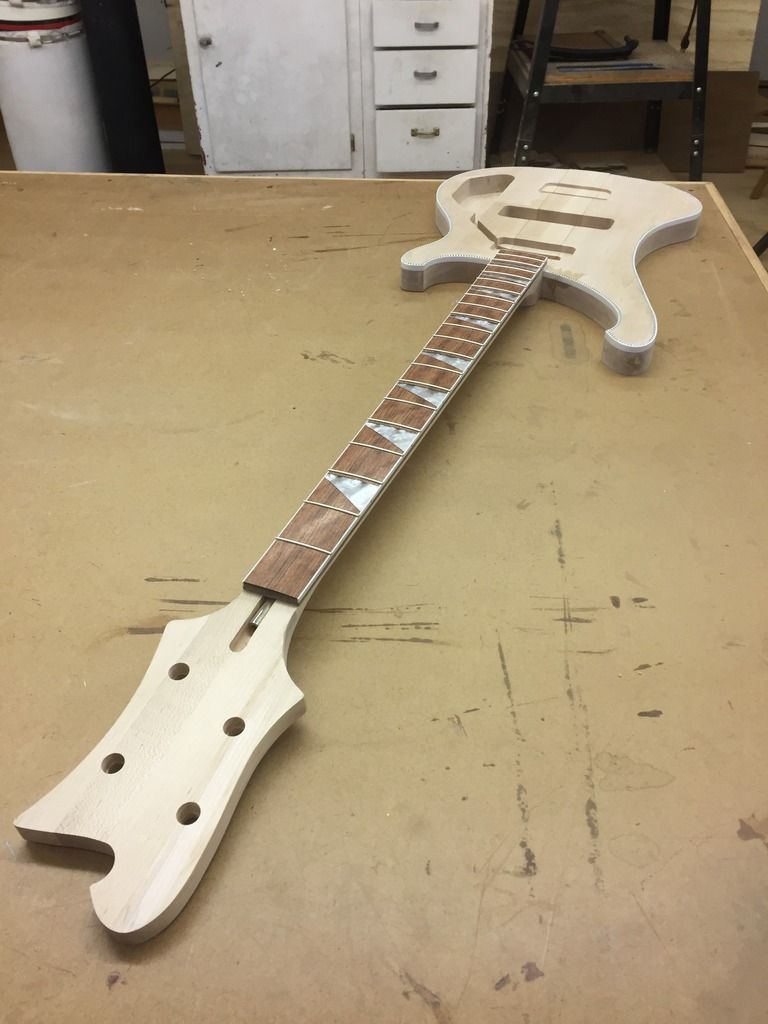
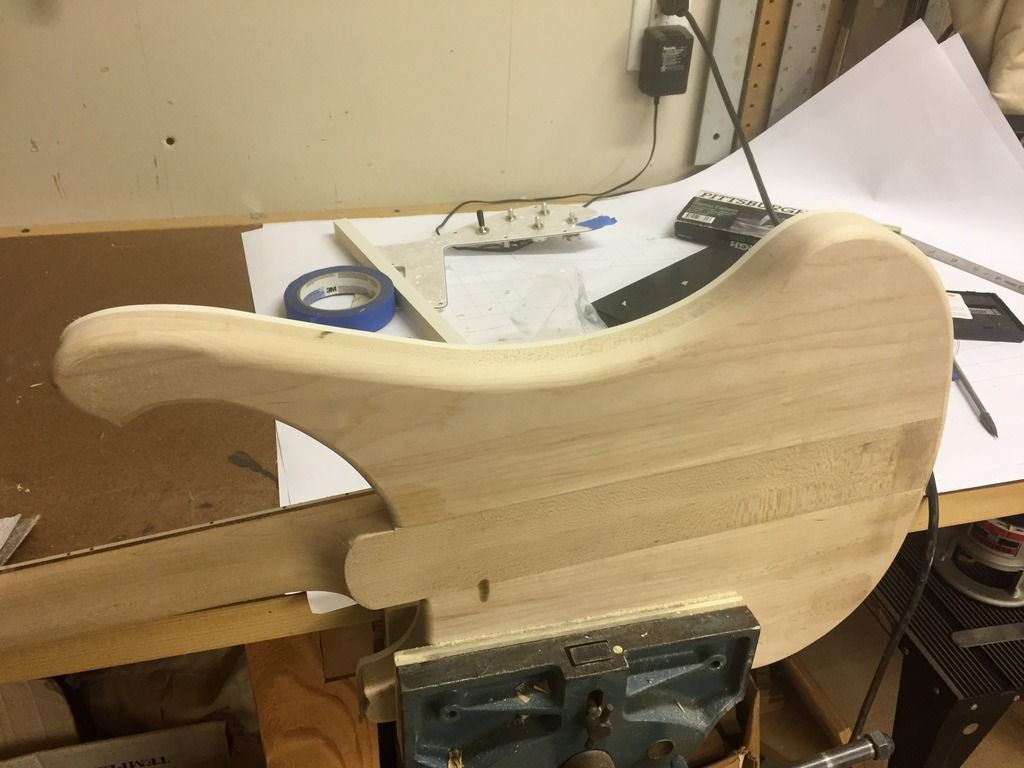
Body roundovers, 1/4" radius all around, then 1/2" belly and top edge radius per the slightly odd Rickenbacker design. Got a little burn on the 1/2" roundovers, still have to fair these into the 1/4" radius cuts.
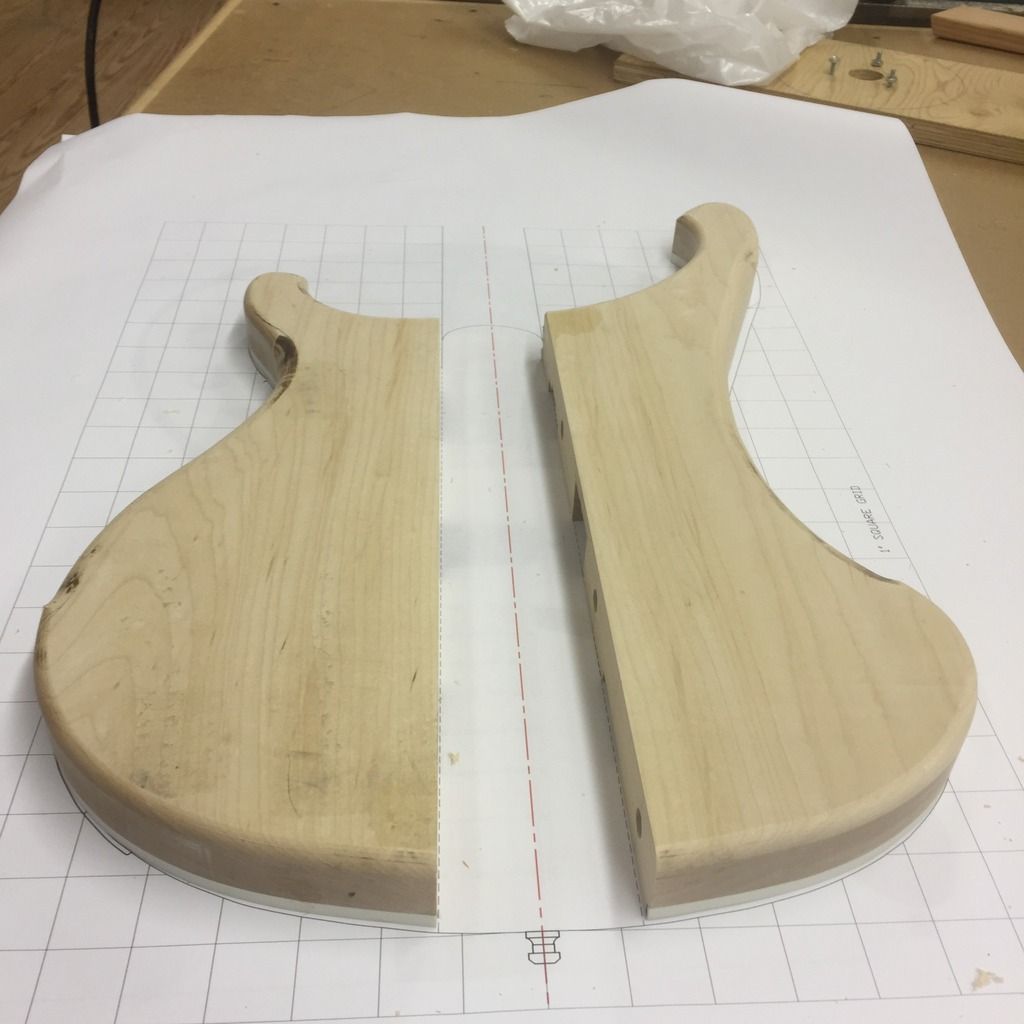
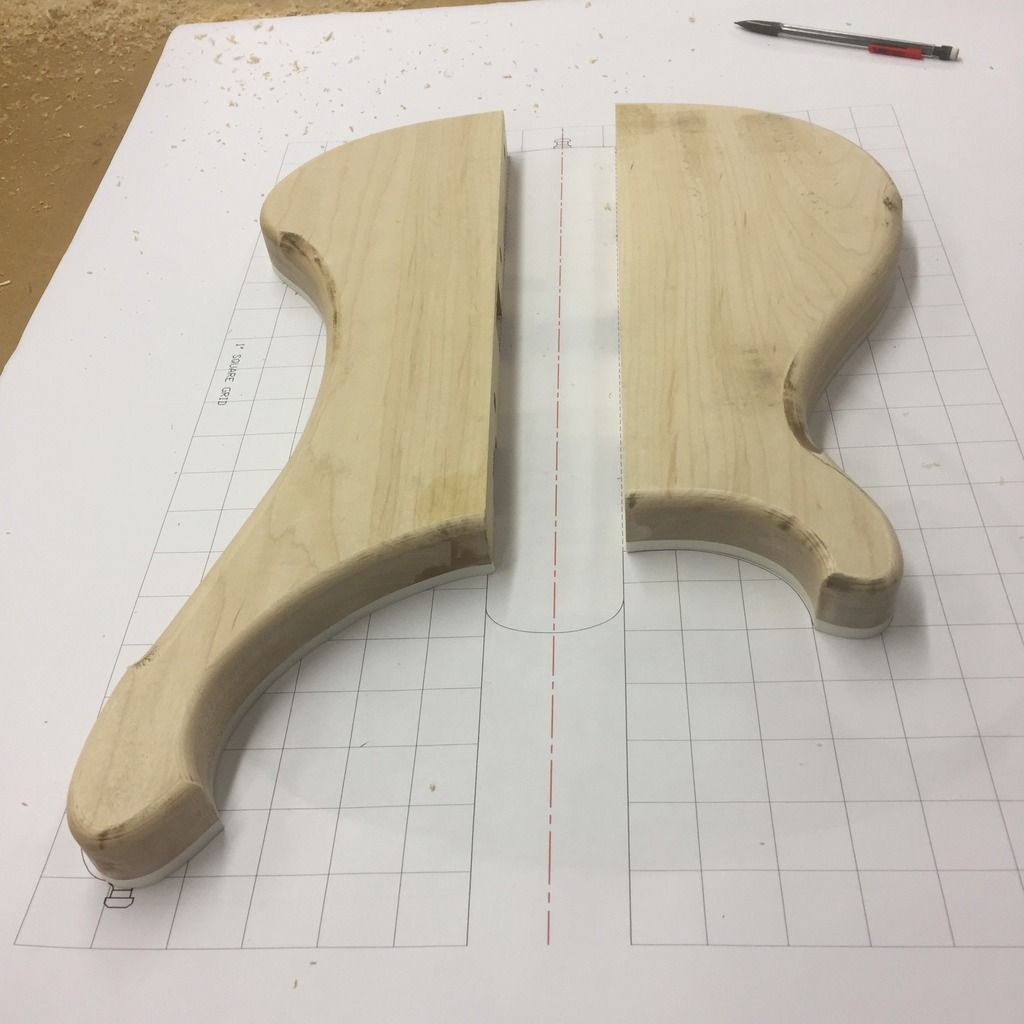
I decided to glue up one body wing at a time to reduce the glue-up stress, using my original body blank cutoff lined with cork as a caul. The dowels kept everything lined up nicely with no slip, I can't imagine doing it any other way from now on.

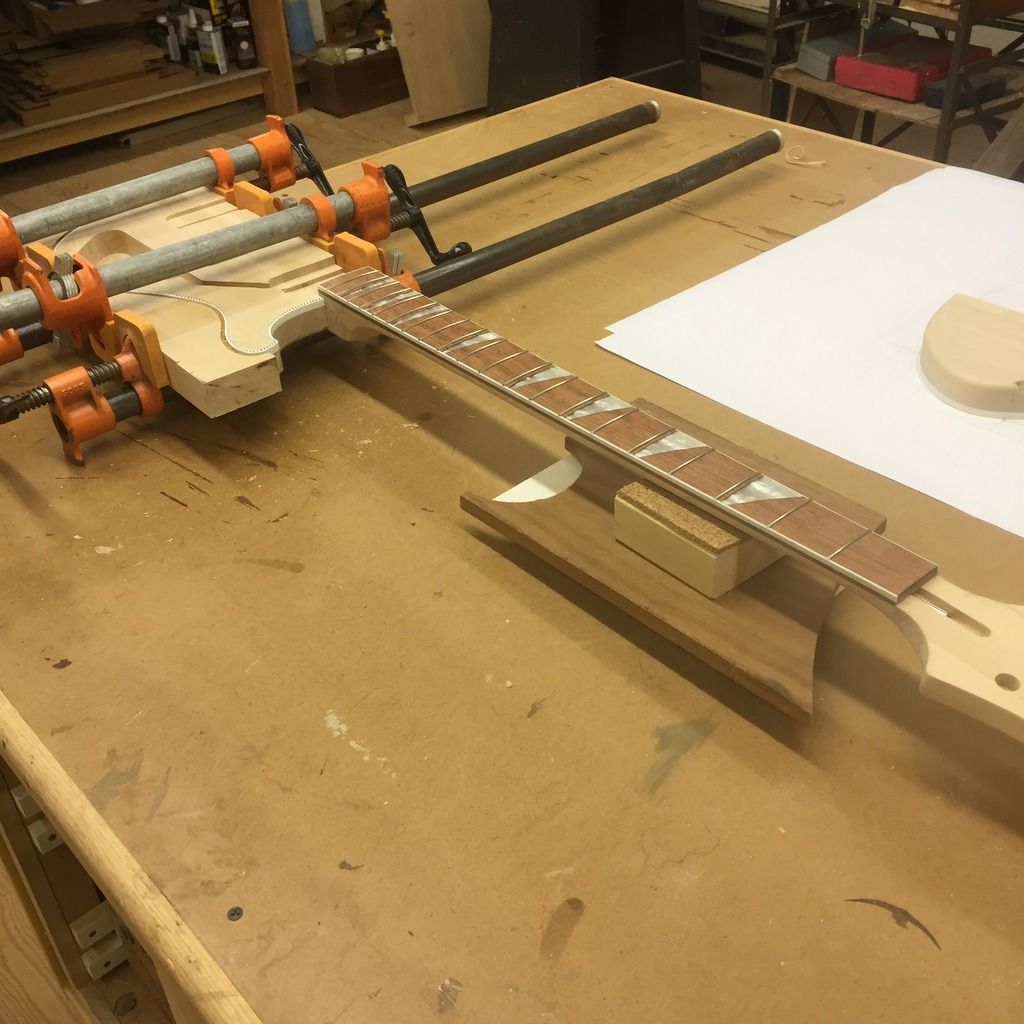


I decided to glue up one body wing at a time to reduce the glue-up stress, using my original body blank cutoff lined with cork as a caul. The dowels kept everything lined up nicely with no slip, I can't imagine doing it any other way from now on.


-
Alexander Higgins
- Posts: 145
- Joined: Mon Jan 20, 2014 7:17 pm
Re: The Hossenfeffer Bass
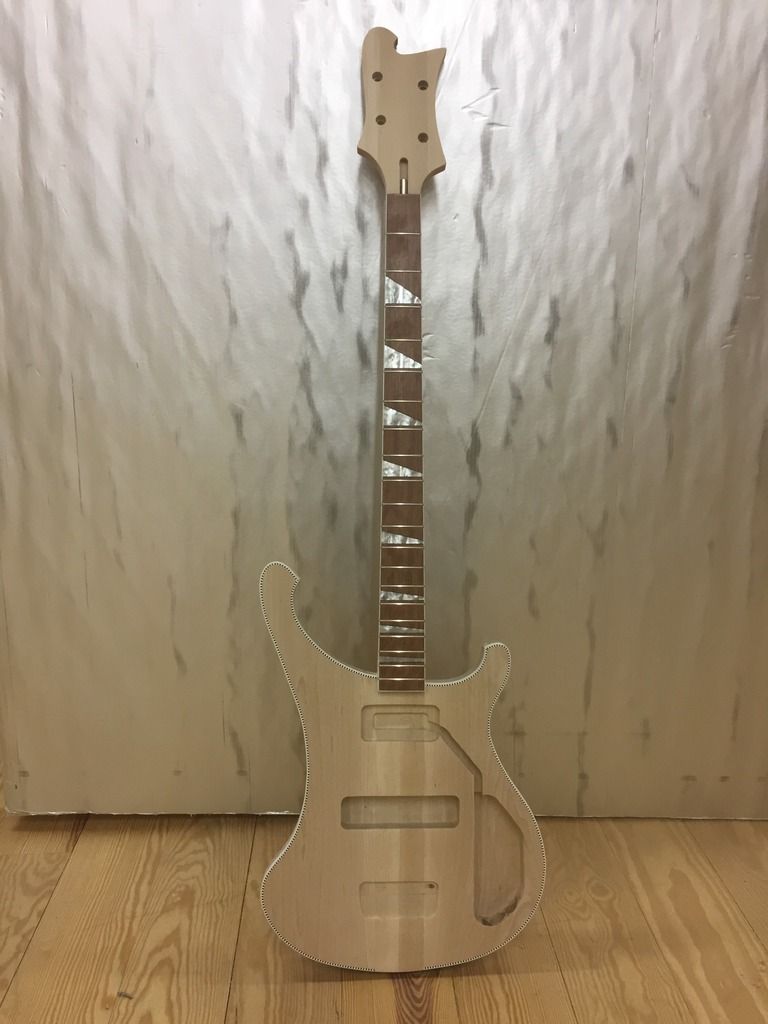
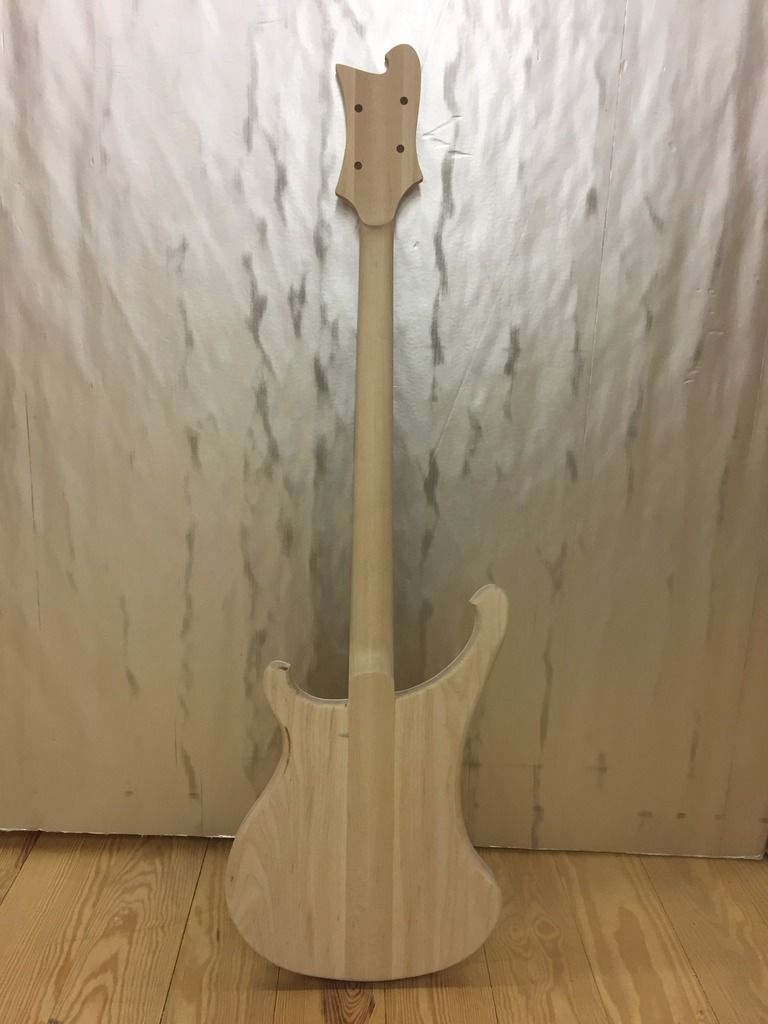
out of the clamps after body wing glue-up. The dowels held everything tight and flush.
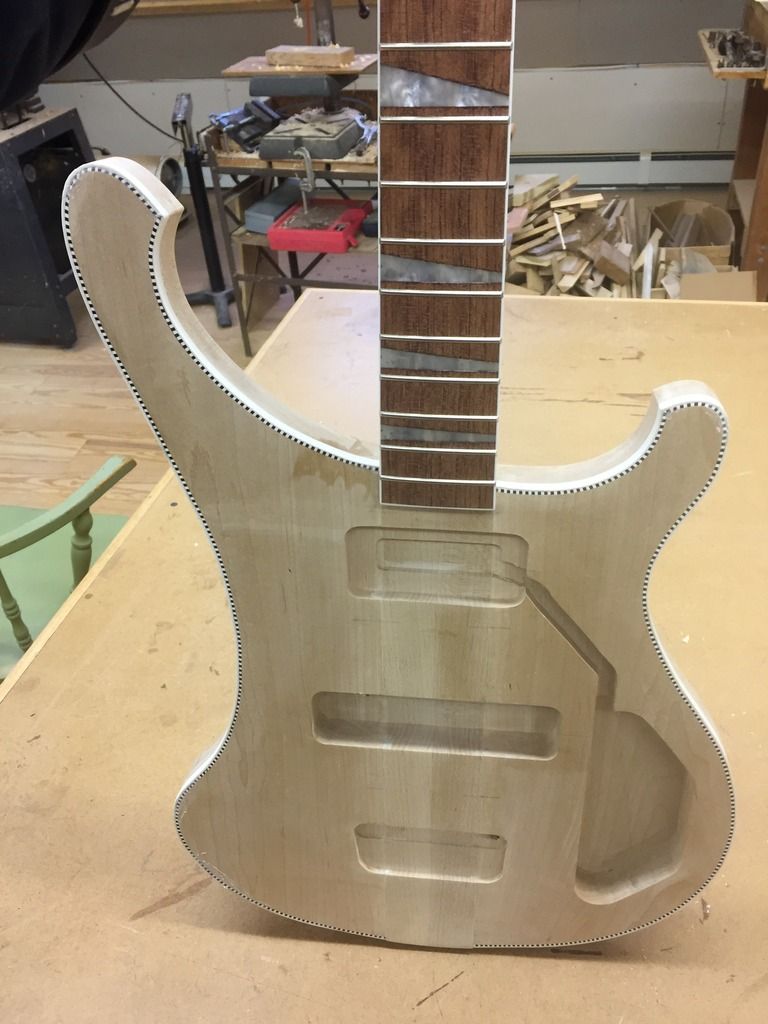
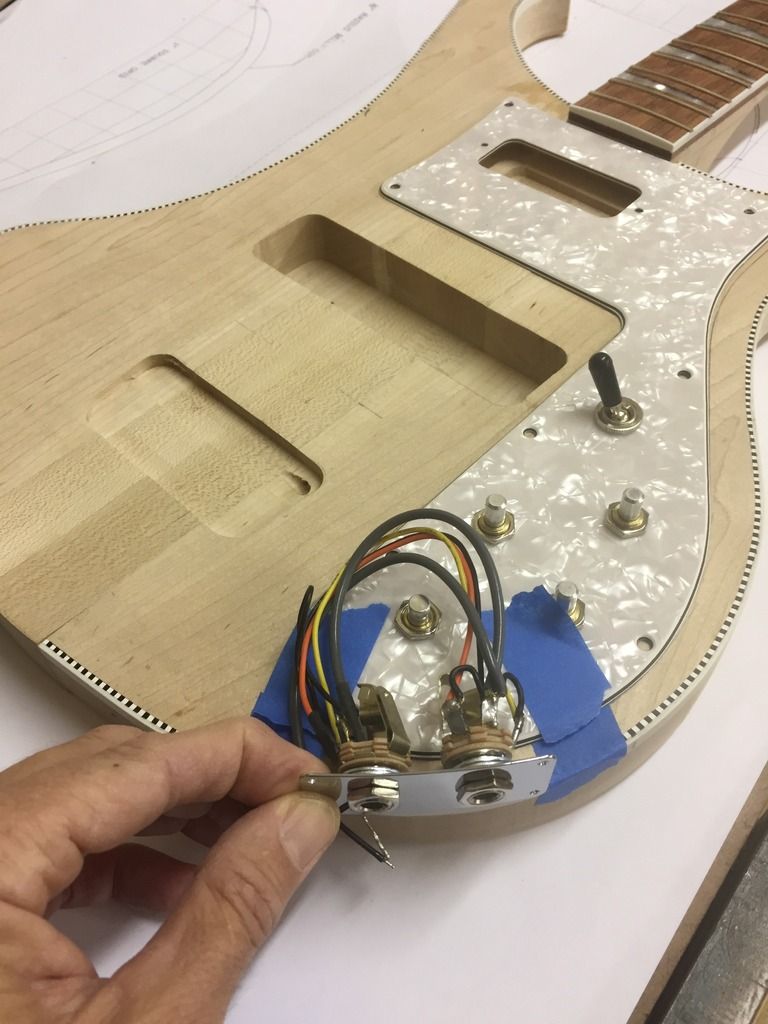
Pickguard and electronics mockup
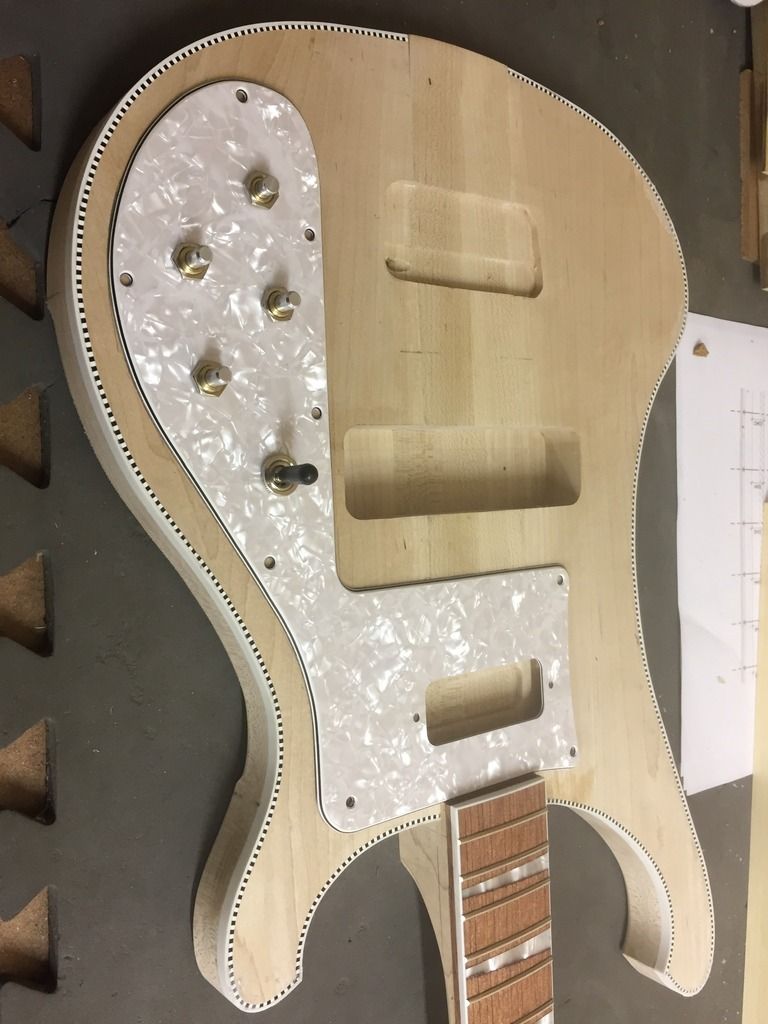
Had to hog out a little more width on the control cavity to clear the pots at the area marked in pencil.
Double jack holes drilled
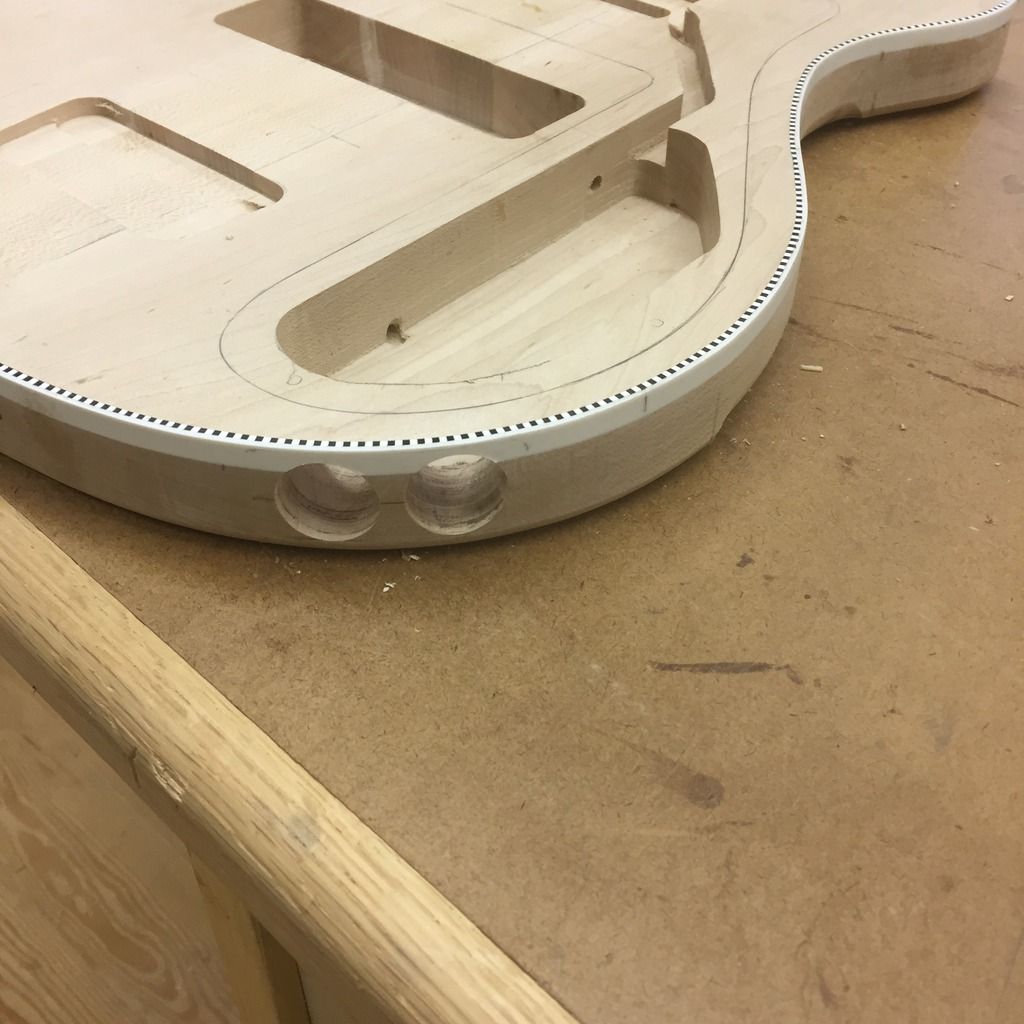
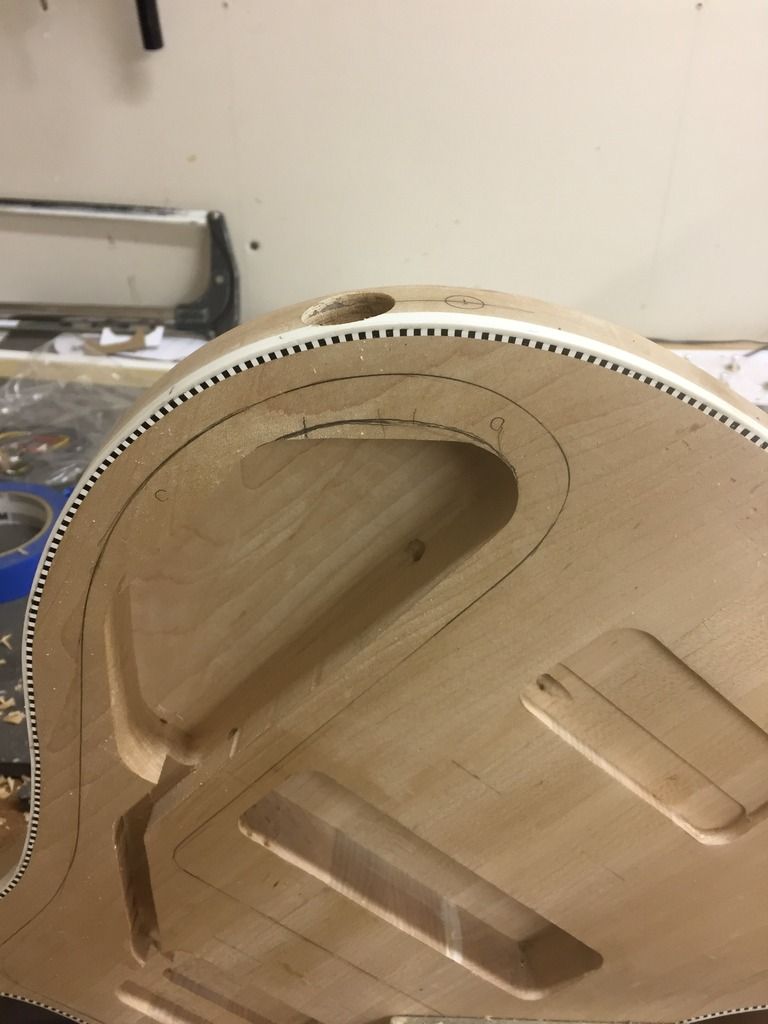
Blending 1/2" and 1/4" body wing relief
Sanded to 220. Got some router burn marks I can't seem to sand out, luckily it will be opaque paint finish!

Pickguard and electronics mockup


Had to hog out a little more width on the control cavity to clear the pots at the area marked in pencil.

Double jack holes drilled

Blending 1/2" and 1/4" body wing relief

Sanded to 220. Got some router burn marks I can't seem to sand out, luckily it will be opaque paint finish!


-
Barry Daniels

- Posts: 3247
- Joined: Thu Jan 05, 2012 10:58 am
- Location: The Woodlands, Texas
-
Gordon Bellerose
- Posts: 1188
- Joined: Wed May 30, 2012 11:47 pm
- Location: Edmonton AB. Canada
Re: The Hossenfeffer Bass
Yep. These projects always take longer and cost more than expected at the start. 
It has come a long way, and is looking pretty good.
It has come a long way, and is looking pretty good.
I need your help. I can't possibly make all the mistakes myself!
-
Greg Martin
- Posts: 308
- Joined: Thu Feb 23, 2012 7:18 pm
Re: The Hossenfeffer Bass
I just saw this build thread.wonderful,dont think ive seen a more complete pictorial on a difficult bass to get good info for.
Ive had most of the parts needed to do a build like this,but many things blocked me because of lack of build info. Now i may put it back on the to do list.
Ive had most of the parts needed to do a build like this,but many things blocked me because of lack of build info. Now i may put it back on the to do list.
-
Brian Evans
- Posts: 922
- Joined: Sat Aug 30, 2014 8:26 am
- Location: Tatamagouche, Nova Scotia
Re: The Hossenfeffer Bass
I noticed that you are planning a rattle-can lacquer finish. I did three projects with rattle-can acrylic lacquer, and after a few years the finish has started to pick up stuff. It mars where it sits on a guitar stand, the strap sticks to it, a fabric rag burns into it and fibers embed into it. Not what I was hoping for at all. Your project is just lovely, I am going to steal some of your techniques! 
-
Alexander Higgins
- Posts: 145
- Joined: Mon Jan 20, 2014 7:17 pm
Re: The Hossenfeffer Bass
I don't want to use Nitro, too toxic and too fragile. Been looking at Varathane Heavy Use formula gloss water bease laquer for the clearcoat. I called Rustoleum, they said it can be used over their color paints if you allow it to dry thoroughly. The Varathane has the advantage of drying really quick, days instead of weeks before wetsanding. We'll see! I cant justify buying a spray gun and compressor for one or two painted builds.Brian Evans wrote:I noticed that you are planning a rattle-can lacquer finish. I did three projects with rattle-can acrylic lacquer, and after a few years the finish has started to pick up stuff. It mars where it sits on a guitar stand, the strap sticks to it, a fabric rag burns into it and fibers embed into it. Not what I was hoping for at all. Your project is just lovely, I am going to steal some of your techniques!
-
Alexander Higgins
- Posts: 145
- Joined: Mon Jan 20, 2014 7:17 pm
Re: The Hossenfeffer Bass
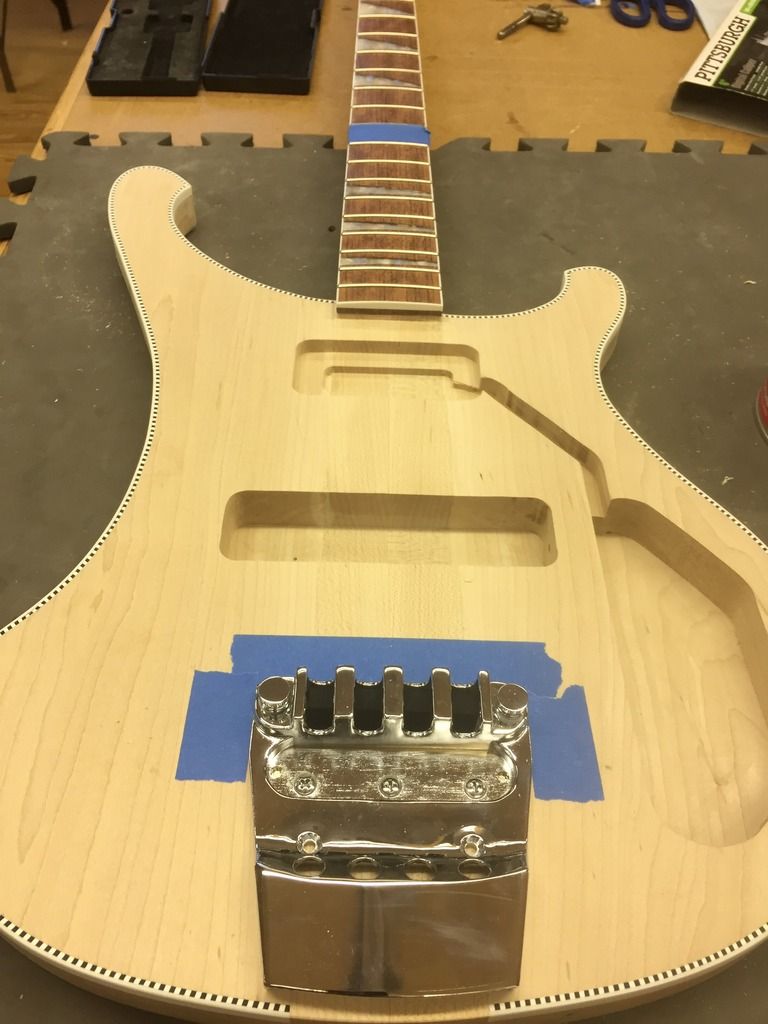
Bridge set with 3 out of five screws. Hope I did this right:
33.25" scale, so 16-5/8" from nut to 12th, 16-5/8" from 12th to knife edge on G string saddle. I set the G saddle as far forward as it would go, then backed it off 4 turns to leave about 3/32" of travel towards nut.
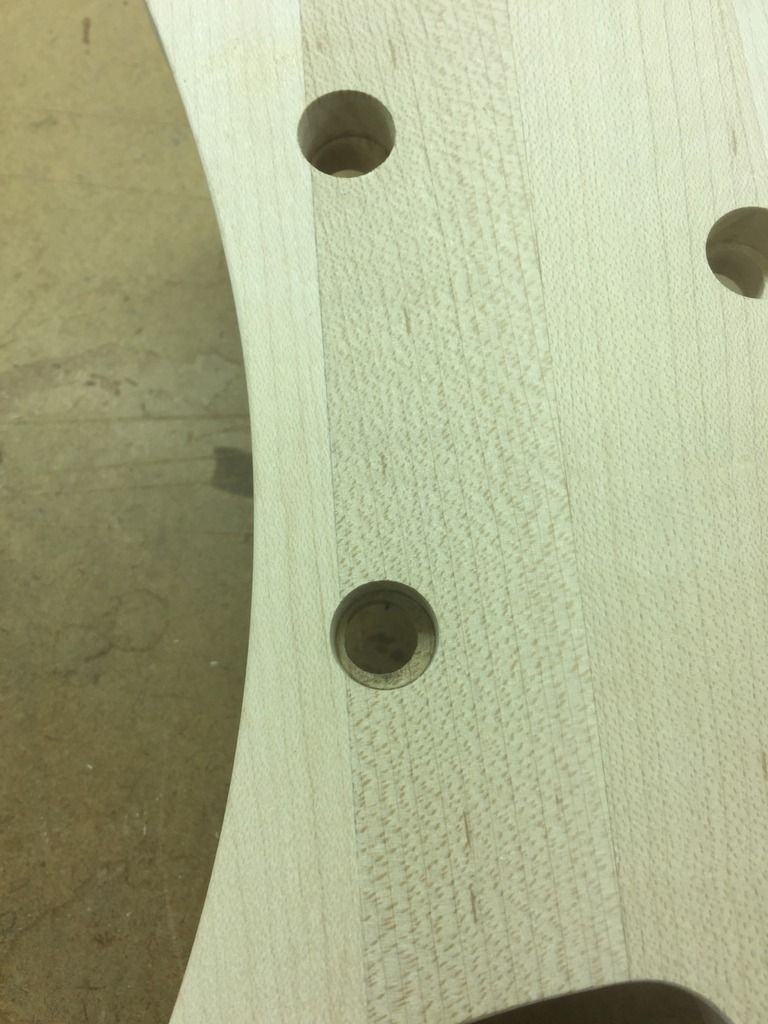
I drilled (badly) 1/2" diameter tuner holes on the front side, and 3/8" diameter on the back, not perfectly centered on each other, I can fix that with a rasp. The holes measure .505", my Rickenbacker Schaller tuner bushings are .518", too tight to push in by hand, worried I'll split the headstock. .518" works out to 13.1mm, is that a standard Schaller bushing hole size? I can probably ream it out a little with a sandpaper wrapped dowel, any suggestions?
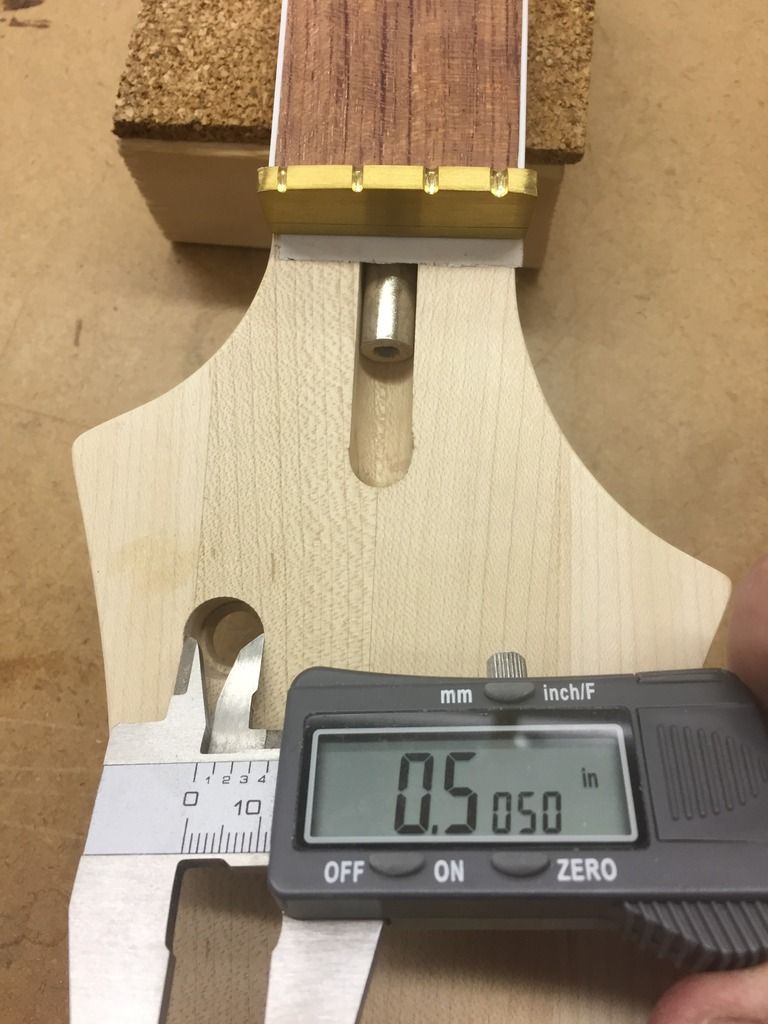
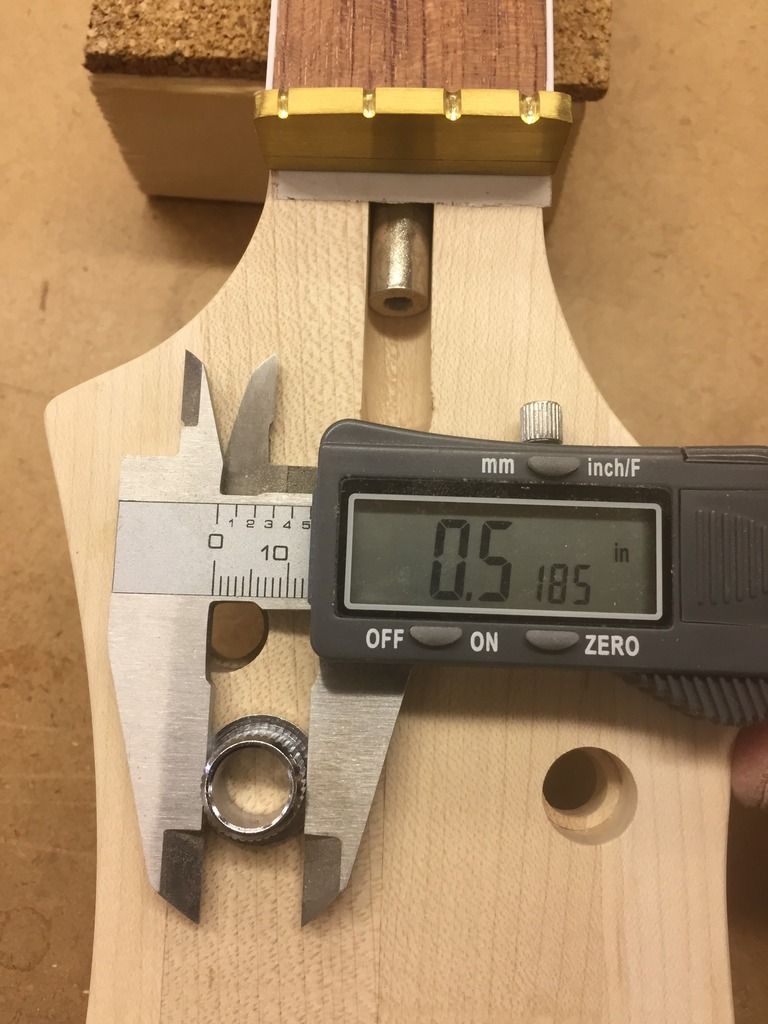
Axemasters pre-slotted brass nut. I don't think it improves open note sustain, but they look purty. This is just taped in place to check string paths.

-
Peter Wilcox

- Posts: 1323
- Joined: Sun Jan 08, 2012 1:31 am
- Location: Northeastern California
Re: The Hossenfeffer Bass
Regarding the tuner holes - I used to drill two step holes, then decided there was no reason to have to do this. The post is supported by the gears inside the tuner, and by the bushing in the peg head. Unless the smaller hole is absolutely concentric and of perfect diameter, it offers no additional support and may even cause some binding. And if for any reason you have to remove the bushing, it can be a bitch to get out. So now I just drill the bushing hole diameter all the way through (from each side to avoid tear out.) As far as the correct diameter, I make it so I can just press it in about half way with heavy thumb pressure. If it's too loose I slop a little extra finish in the hole. 
Beautiful job on the bass!
Beautiful job on the bass!
Maybe I can't fix it, but I can fix it so no one can fix it
-
Alexander Higgins
- Posts: 145
- Joined: Mon Jan 20, 2014 7:17 pm
Re: The Hossenfeffer Bass
Thanks! I came to the same conclusion, the smaller diameter hole on the back doesn't really serve any purpose, so I'm going to drill it out. I can't find a 13mm drill bit locally, and at this point I'd probably chip the holes using one to enlarge them, so I'll just use a 1/2" dowel with some sandpaper and sneak up on it until I get a finger press fit. For future reference, how do you get holes drilled from two sides of a headstock to line up perfectly? My method of using a small diameter drill bit to drill all the way through, and then using that small hole as a pilot of a forstner from each side was a dismal failure. Either the small drill wandered in the wood, or the forstner did. Would it be simpler to just use a piece of tightly clamped scrap maple as a backup, and just drill right through with a forstner in one shot? I'm thinking that's how I'll extend the top face 1/2" dia. hole through now.Peter Wilcox wrote:Regarding the tuner holes - I used to drill two step holes, then decided there was no reason to have to do this. The post is supported by the gears inside the tuner, and by the bushing in the peg head. Unless the smaller hole is absolutely concentric and of perfect diameter, it offers no additional support and may even cause some binding. And if for any reason you have to remove the bushing, it can be a bitch to get out. So now I just drill the bushing hole diameter all the way through (from each side to avoid tear out.) As far as the correct diameter, I make it so I can just press it in about half way with heavy thumb pressure. If it's too loose I slop a little extra finish in the hole.
Beautiful job on the bass!
-
Peter Wilcox
- Posts: 1323
- Joined: Sun Jan 08, 2012 1:31 am
- Location: Northeastern California
Re: The Hossenfeffer Bass
I use a spade bit, and set the depth so that just the tip of the point comes through, drilling from the front side. Then turn it over and drill the rest from the back, setting the point in the small hole left by the point from the front.
To complete the holes you've already drilled, I think clamping a piece to the back and drilling from the front should be OK. And even if there's a little tear out (which I know we all hate to happen) it would be covered by the tuner body, or you could countersink a bevel to remove it.
To complete the holes you've already drilled, I think clamping a piece to the back and drilling from the front should be OK. And even if there's a little tear out (which I know we all hate to happen) it would be covered by the tuner body, or you could countersink a bevel to remove it.
Maybe I can't fix it, but I can fix it so no one can fix it
-
Edgar Jessop
- Posts: 37
- Joined: Sat Jun 02, 2012 7:23 pm
Re: The Hossenfeffer Bass
Adapt one of these methods for drilling string ferrule holes using an alignment pin in the table to your tuning machine hole project.
https://www.youtube.com/results?search_ ... rule+holes
.
https://www.youtube.com/results?search_ ... rule+holes
.
-
Dan Hehnke
- Posts: 166
- Joined: Wed Feb 15, 2012 12:22 am
- Location: Colorado
- Contact:
Re: The Hossenfeffer Bass
Looking great, can't wait to see this one done!
-
Alexander Higgins
- Posts: 145
- Joined: Mon Jan 20, 2014 7:17 pm
Re: The Hossenfeffer Bass
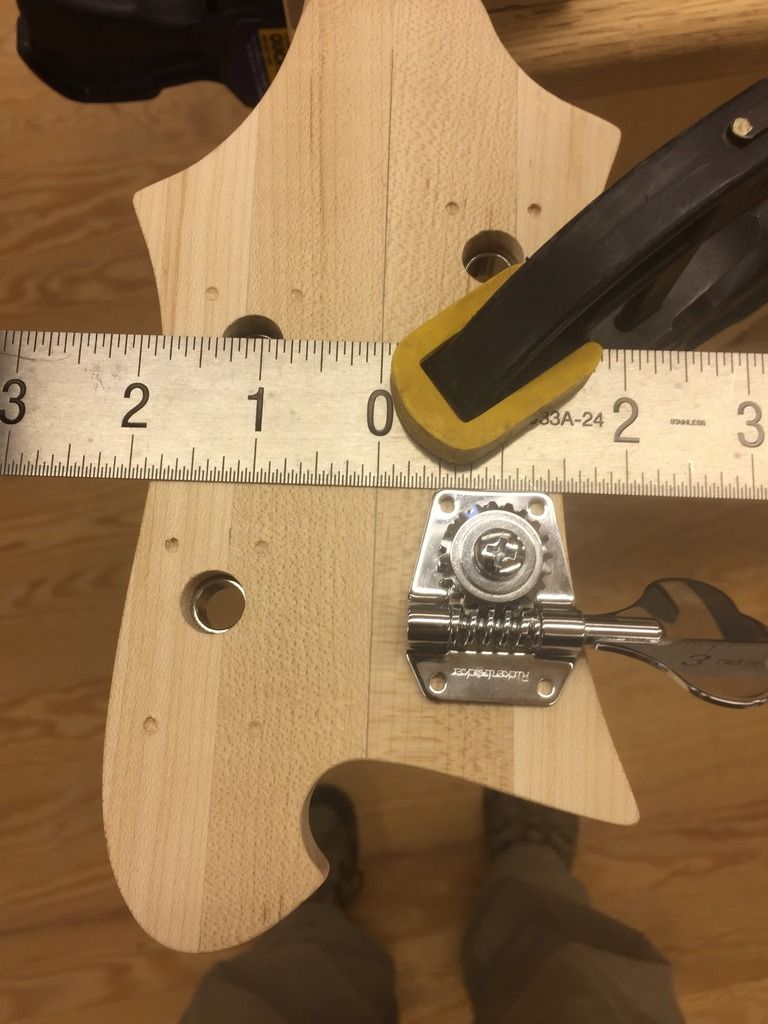
Couldn't find a reamer anywhere local, so I just dew a 17/32" circle around my 1/2" holes as a guide to keep things circular, and went at it with a tapered round rasp a tiny bit a t a time until I got a firm thumb-press fit on the bushings.

I used a centering ruler aligned with neck centerline to get tuner plates square to centerline.
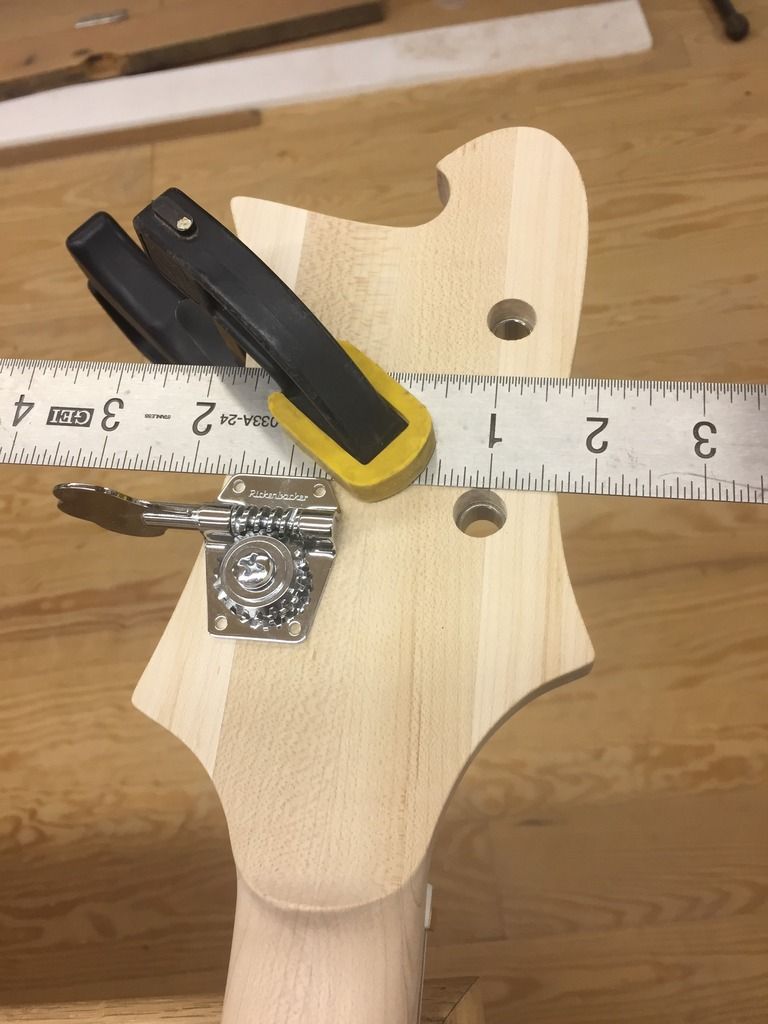
Pre-drilled very shallow holes with a bit matching the tuner plate screw holes to locate centers.
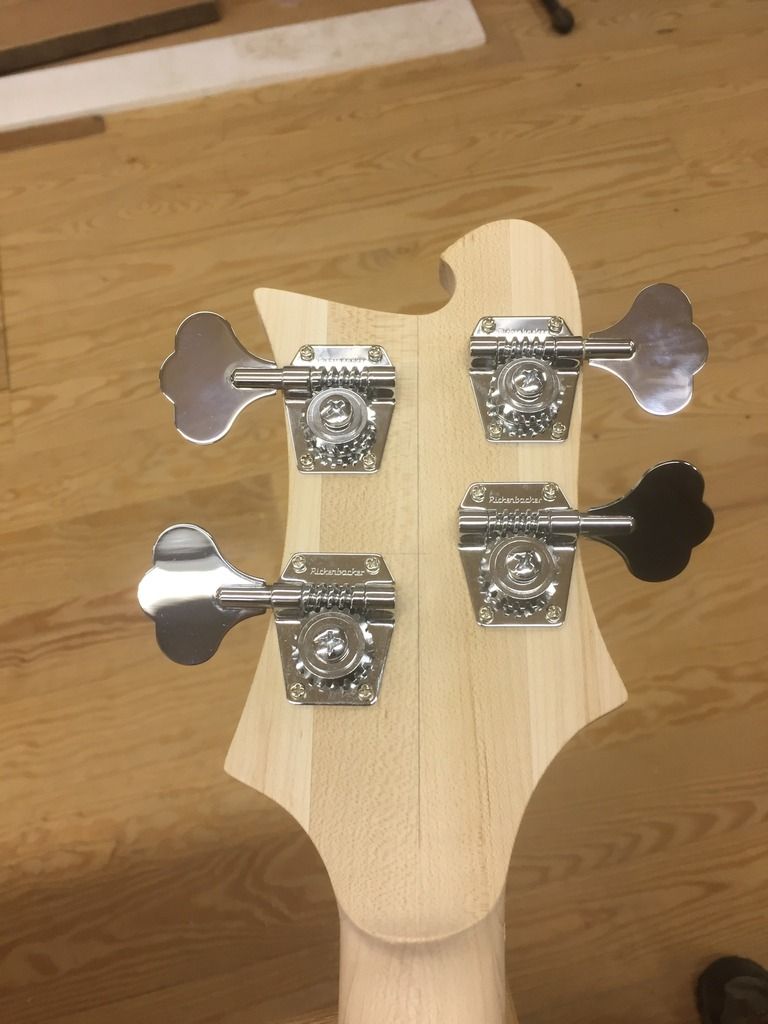
Strung E and G strings to see where I'm at, no nasty surprises like strings falling off the board, I'll call that a win!
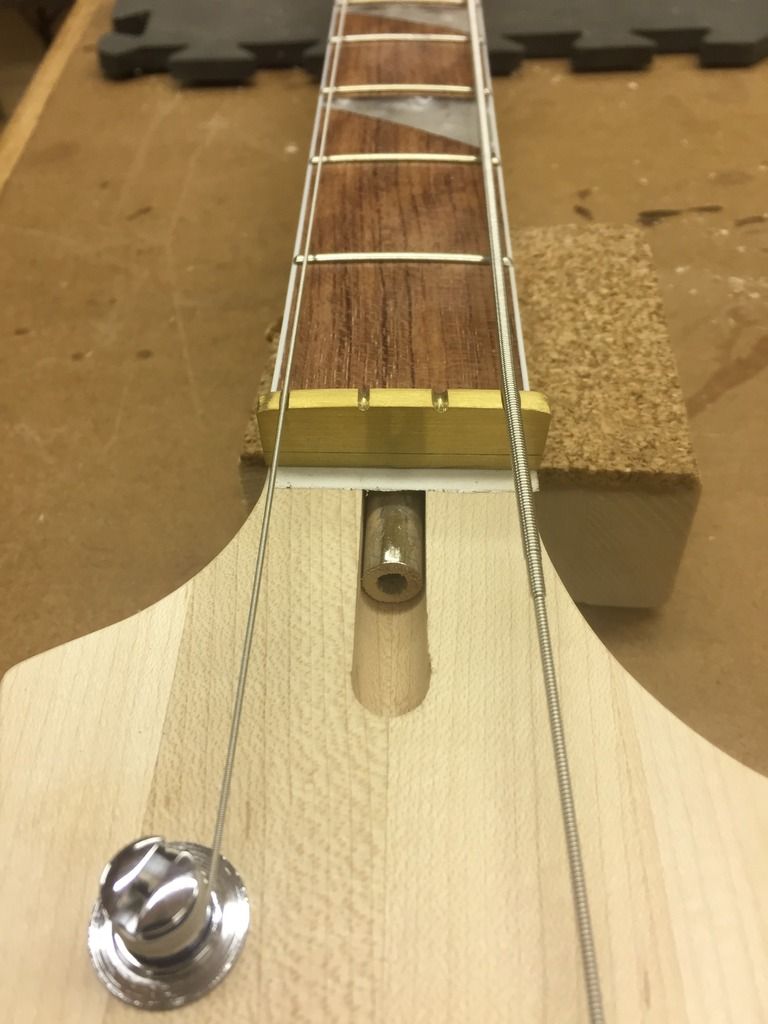
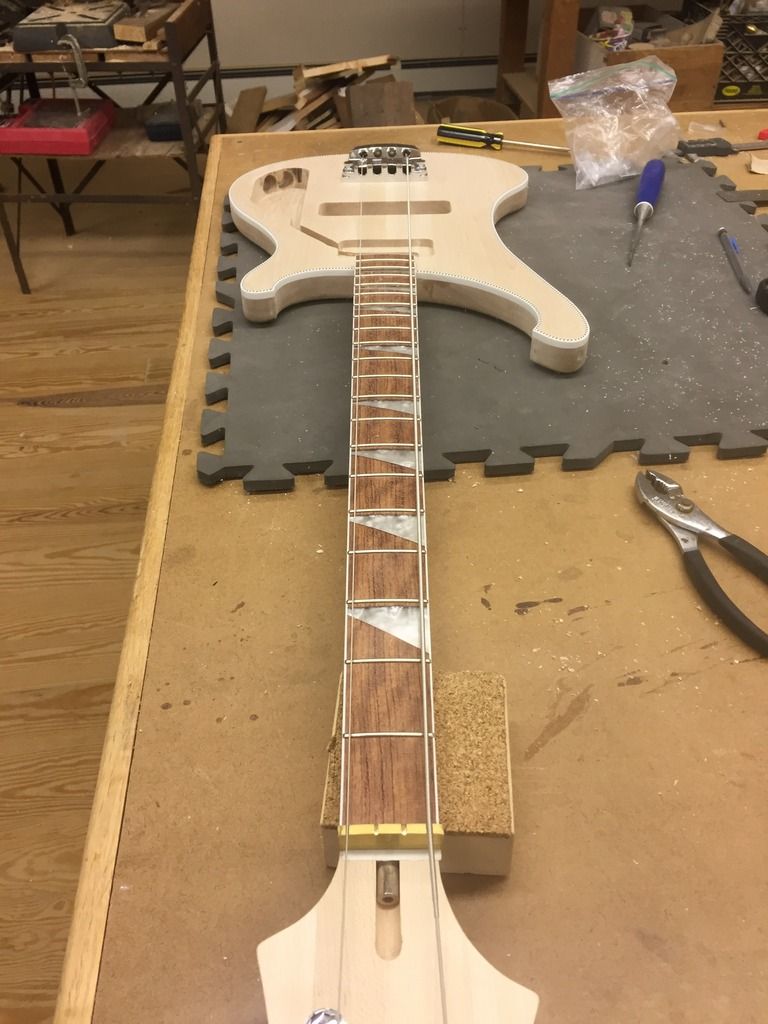
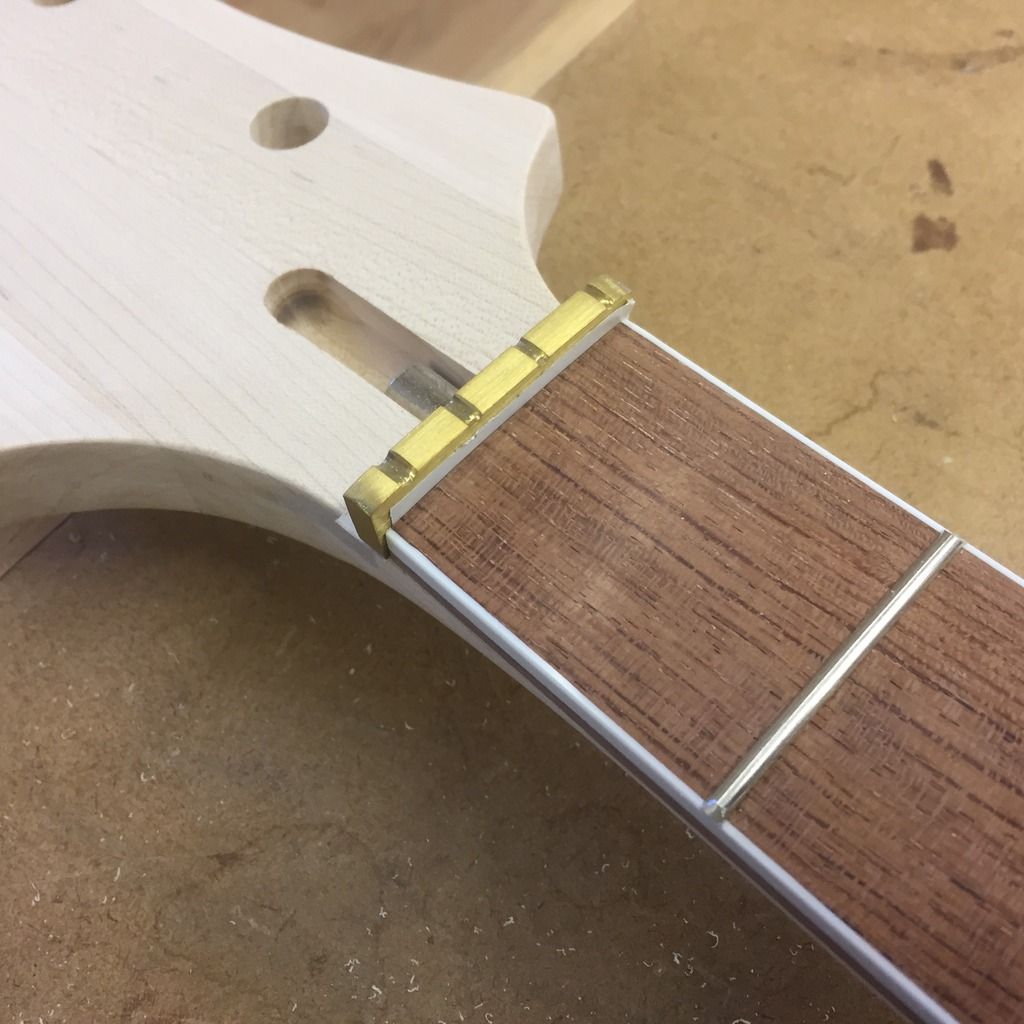
I got the pre-cut brass nut on Ebay from a vendoe called Axemasters. Oddly, made from two pieces of brass glued together with waht looks like pre-school paste, immediately came apart when I tried grinding it down a little. Its WAY high!
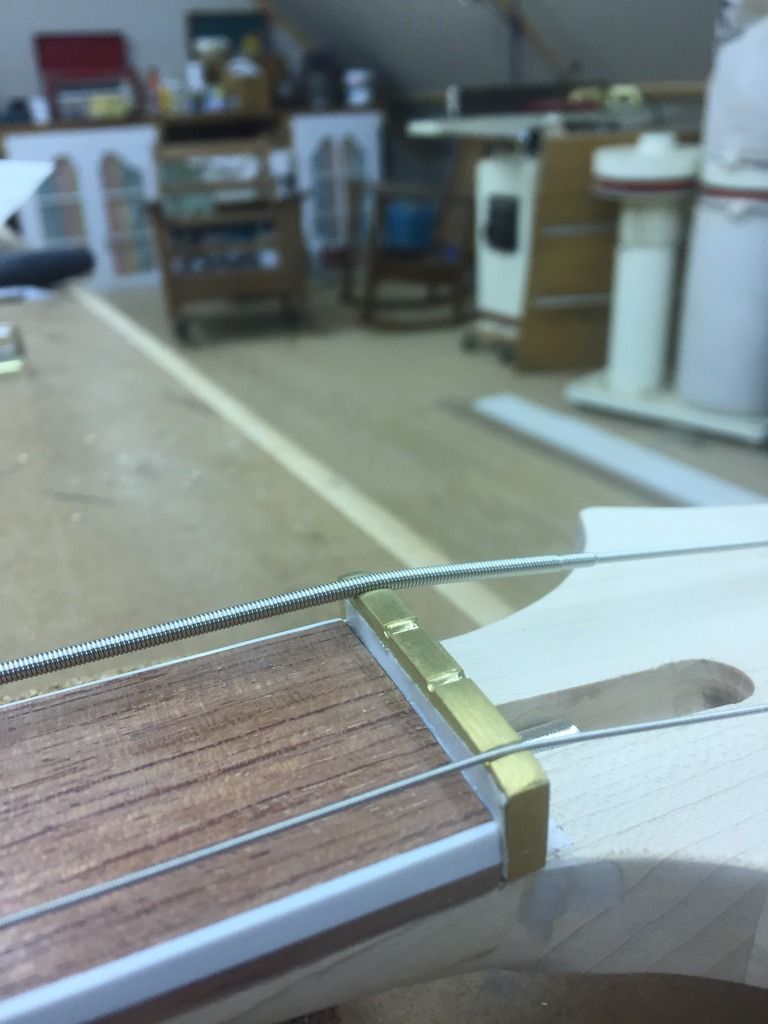
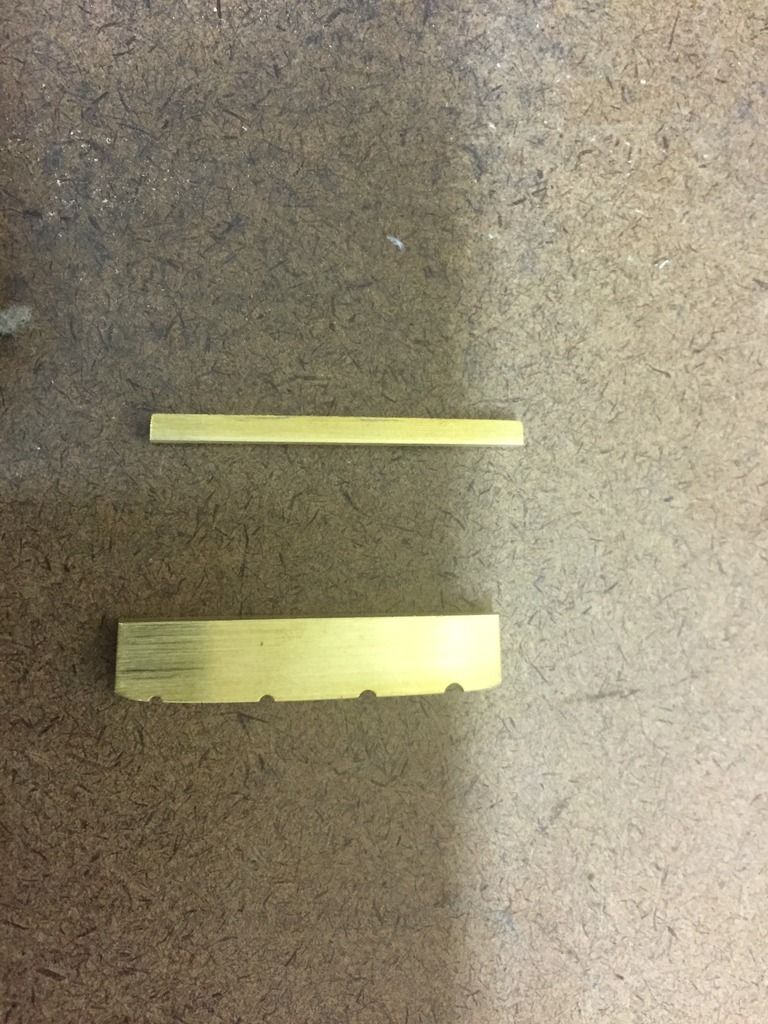
Whittling it down slowly with a file clamped in my low-budget fret-end beveler to keep edges at 90 degrees. I tried just the top piece of brass minus the second strip, too low.
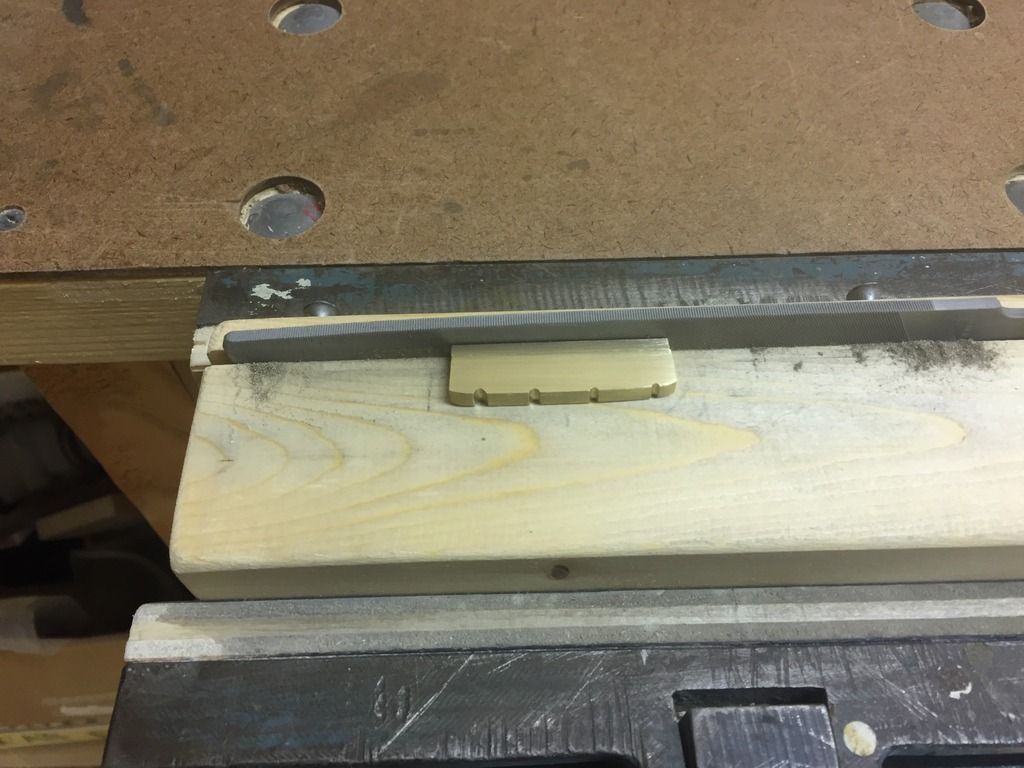
Any advice or links to good tutorials on shaping a brass nut, setting height correctly, etc. appreciated.

I used a centering ruler aligned with neck centerline to get tuner plates square to centerline.

Pre-drilled very shallow holes with a bit matching the tuner plate screw holes to locate centers.


Strung E and G strings to see where I'm at, no nasty surprises like strings falling off the board, I'll call that a win!


I got the pre-cut brass nut on Ebay from a vendoe called Axemasters. Oddly, made from two pieces of brass glued together with waht looks like pre-school paste, immediately came apart when I tried grinding it down a little. Its WAY high!


Whittling it down slowly with a file clamped in my low-budget fret-end beveler to keep edges at 90 degrees. I tried just the top piece of brass minus the second strip, too low.

Any advice or links to good tutorials on shaping a brass nut, setting height correctly, etc. appreciated.
-
Peter Wilcox
- Posts: 1323
- Joined: Sun Jan 08, 2012 1:31 am
- Location: Northeastern California
Re: The Hossenfeffer Bass
I know nothing about store-bought nuts - I make my own out of the dog's old bones - but I'm surprised at that two-piece one. It's too bad the single piece is too low - I don't know how the two pieces will affect the strength or sustain.
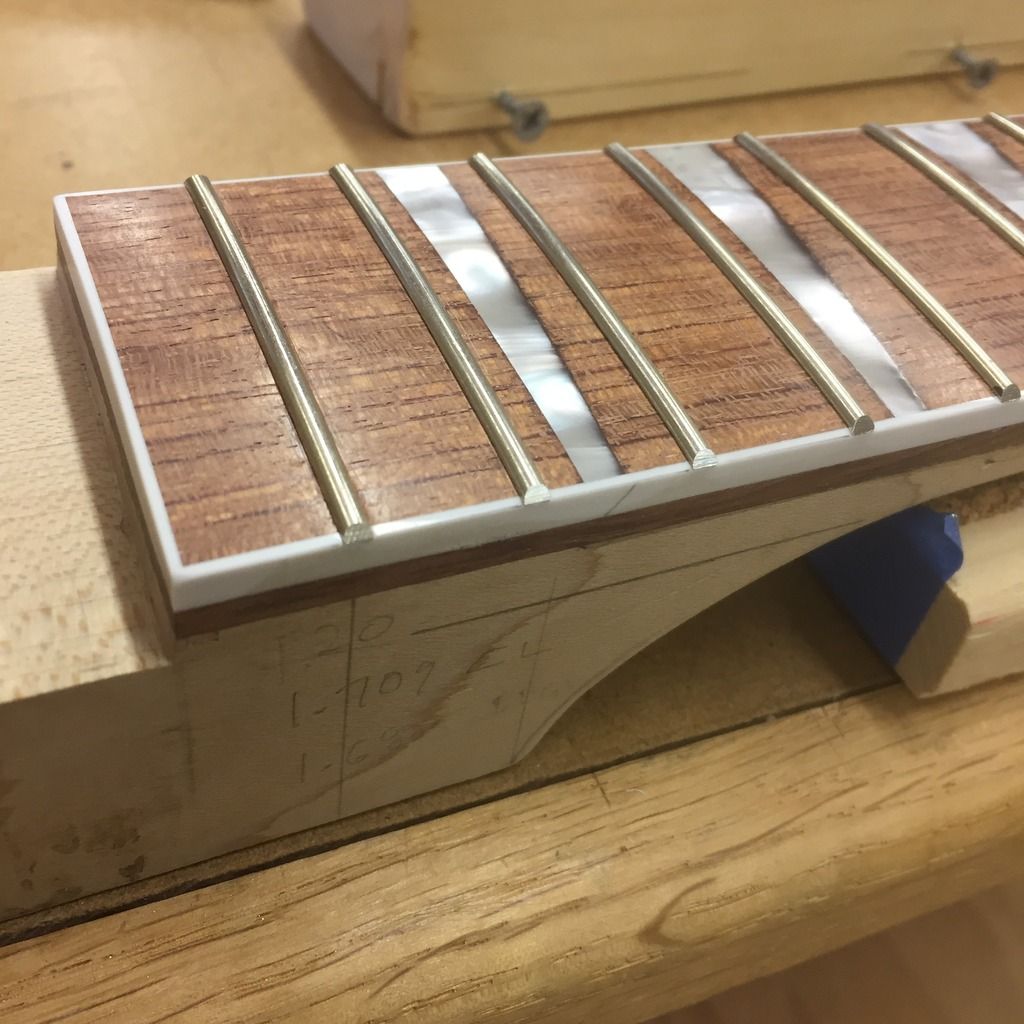
It looks from your pics that the slots are too wide for your gauge of strings, so those should be filed down narrower to the same width as the strings. The strings should seat in the slots so that about half the string width sits above the top of the nut, so you'll probably have to take some off the top of the nut after you file the slots. The slots should also be angled or curved back a little from the fretboard face toward the tuners. The strings should leave the nut at approximately a distance above the fretboard equal to the crown height of your frets or a hair more - probably about 0.050" to 0.060". The bass strings may need to be a little higher than the treble ones to keep from buzzing. I have trouble getting the slot depth right - usually overdo it - so now I use zero frets.
Here's a tutorial from Stewmac - I can't say how good it is, but it's a start. http://www.stewmac.com/How-To/Online_Re ... -Step.html
Maybe I can't fix it, but I can fix it so no one can fix it
-
David King
- Posts: 2690
- Joined: Sat Jan 07, 2012 10:01 pm
- Location: Portland, OR
- Contact:
Re: The Hossenfeffer Bass
I'd say start with a fresh piece of brass. I score the edges and the string height with the nut placed in the slot and a piece of something that's the same height as the frets laid on the fingerboard right up against the nut. I use a caliper to locate the midpoint of the nut and then lay out the outer strings leaving enough space to the edge of the fingerboard (usually about 1/8" or 5/32"). I divide the distance between the outer strings by three and mark off where the inner strings will go. If it's 1.2" / 3 = .4". I'll use a fine-tooth saw to cut a notch straight down to my fret height line at the center of each string and then use a round needle file to make the string slot of the proper width. A good needle file will have a long continuous taper from the mid-point out to the tip. I'll measure the string diameter with my caliper and then find that diameter on the file and mark it with a sharpie. That way I'll know how much of the file I can use to achieve that width of string slot. The notch I sawed beforehand will keep the needle file more or less centered on the desired string location. I'll file to within approximately .005" of the fret height line and then test the strings.
Bring the instrument up to pitch, adjust the truss rod until there is just a slim detectable amount of relief under the strings (say .010"). Fret each string at the 2nd fret and tap the string at the first fret. You want just the slightest distance between the string and the top of first fret. About .001" is fine and you can hear and feel that when you tap on the string. If there's too much relief file the slot a little deeper and try again. A sheet of plain paper is approximately .0025" thick.
As Peter noted above you want each slot to angle back from the leading edge of the nut towards the plane of the headstock. The witness point of the string needs to be the front of the nut. Later on you can test the intonation of the first fret and move the witness point of the string back into the nut towards the headstock as necessary.
Lastly you'll trim the top of the nut so that the top half of each string is exposed above the top of the nut.